There’s something magical about the aroma of baking apples and cinnamon wafting through the kitchen. It instantly creates a sense of warmth and comfort that few other desserts can match. As someone who has been perfecting my apple crisp recipe for over a decade, I’m thrilled to share my ultimate version with you today.
Apple crisp holds a special place in my heart. It was the first dessert I learned to make from my grandmother, and over the years, I’ve tweaked and refined the recipe to achieve what I believe is the perfect balance of tender, spiced apples and that irresistibly crunchy, buttery topping. Unlike apple pie with its sometimes finicky crust, apple crisp forgives even novice bakers while delivering equally impressive results.
In this comprehensive guide, I’ll walk you through everything you need to know about creating a spectacular apple crisp—from selecting the right apples to achieving that perfect crumble texture. I’ll share my tried-and-true recipe, plus variations to suit different dietary needs and flavor preferences. Whether you’re a seasoned baker or trying this classic dessert for the first time, I promise you’ll find valuable insights to make your apple crisp absolutely unforgettable.
What Makes a Perfect Apple Crisp?
Before diving into the recipe, let’s understand what makes an exceptional apple crisp stand out:
- Perfectly cooked apples: Tender without being mushy, with distinct pieces that hold their shape
- Balanced sweetness: Sweet enough to satisfy but not so sweet that it overwhelms the natural apple flavor
- Textural contrast: A crispy, crunchy topping against the soft, yielding fruit beneath
- Warm spices: A harmonious blend that enhances rather than overpowers the apples
- The right thickness: Not too dry, not too soupy—just enough juice to create a luscious sauce
When these elements come together, magic happens. Now, let’s explore the key ingredients that will help us achieve apple crisp perfection.
Selecting the Perfect Apples
The foundation of any great apple crisp begins with choosing the right apples. While you might be tempted to grab whatever’s in your fridge, taking a moment to select specific varieties will dramatically improve your dessert.
Best Apple Varieties for Baking
| Variety | Flavor Profile | Texture When Baked | Sweetness Level | Best Uses |
|---|---|---|---|---|
| Granny Smith | Tart, bright | Holds shape excellently | Low | Provides backbone and tang |
| Honeycrisp | Sweet-tart balance | Maintains structure | Medium-high | Adds juiciness and flavor complexity |
| Braeburn | Rich, spicy-sweet | Holds shape well | Medium | Great all-purpose baking apple |
| Pink Lady | Sweet-tart, aromatic | Retains texture nicely | Medium | Adds sophisticated flavor notes |
| Golden Delicious | Mellow, honey-like | Softens but doesn’t dissolve | Medium-high | Creates smooth texture |
| Jonagold | Honey-tart balance | Semi-firm when baked | Medium | Excellent flavor development |
| Cortland | Sweet with slight tartness | Resists browning | Medium | Maintains white flesh when cut |
| Northern Spy | Complex, sweet-tart | Holds shape beautifully | Medium | Traditional heirloom choice |
I personally prefer using a mixture of apple varieties for the most complex flavor. My go-to combination is:
- 60% Granny Smith for structure and tartness
- 30% Honeycrisp for juiciness and balanced sweetness
- 10% Golden Delicious for creating a tender texture
This combination ensures you get firm pieces of apple suspended in a luscious sauce with the perfect sweet-tart balance.
Apple Preparation Tips
- Peeling: While optional, peeling creates a more uniform texture. Leave small patches of skin for rustic appeal and added nutrition.
- Cutting size: Aim for ¼-inch thick slices or ½-inch chunks for ideal texture.
- Uniformity: Cut pieces to similar sizes to ensure even cooking.
- Pre-treatment: Toss cut apples with a splash of lemon juice to prevent browning if not using immediately.
My Ultimate Apple Crisp Recipe
Now that we understand the foundations, let’s dive into my perfected recipe. This makes an 8×8 inch pan that serves 6-8 people.
Ingredients
For the Apple Filling:
- 6-7 medium apples (about 2.5 pounds or 1.1 kg), preferably a mix of varieties
- 3 tablespoons granulated sugar
- 2 tablespoons brown sugar
- 1 tablespoon all-purpose flour
- 1 tablespoon fresh lemon juice
- 1 teaspoon ground cinnamon
- ¼ teaspoon ground nutmeg
- ¼ teaspoon ground ginger
- ⅛ teaspoon ground cardamom (optional but recommended)
- Pinch of salt
For the Crisp Topping:
- 1 cup old-fashioned rolled oats
- ¾ cup all-purpose flour
- ⅔ cup packed brown sugar
- ½ teaspoon ground cinnamon
- ¼ teaspoon salt
- ½ cup (1 stick/113g) cold unsalted butter, cubed
- ½ cup chopped nuts (walnuts, pecans, or almonds)
Instructions
- Preheat your oven to 350°F (175°C). Lightly grease an 8×8-inch baking dish.
- Prepare the apples: Peel (if desired), core, and slice the apples into ¼-inch thick slices or ½-inch chunks. Place in a large bowl.
- Make the filling: In a small bowl, whisk together the granulated sugar, brown sugar, flour, cinnamon, nutmeg, ginger, cardamom, and salt. Sprinkle this mixture over the apples along with the lemon juice. Toss gently until all apple pieces are evenly coated. Transfer this mixture to your prepared baking dish, spreading it out evenly.
- Prepare the topping: In a medium bowl, combine the oats, flour, brown sugar, cinnamon, and salt. Add the cold cubed butter and use a pastry cutter, two forks, or your fingertips to work the butter into the dry ingredients until the mixture resembles coarse crumbs with some pea-sized pieces of butter remaining. Stir in the chopped nuts.
- Assemble: Sprinkle the topping evenly over the apple mixture, covering the fruit completely.
- Bake: Place the baking dish on a rimmed baking sheet (to catch any potential overflow) and bake for 45-55 minutes, until the topping is golden brown and the apple filling is bubbling around the edges.
- Cool slightly: Allow the crisp to cool for at least 15 minutes before serving. This helps the filling set up and prevents burnt mouths!
Mastering the Techniques
While the recipe seems straightforward, a few technical tips can elevate your apple crisp from good to exceptional:
For Perfect Apples:
- Layer strategically: Place firmer apple varieties on the bottom where they’ll receive more heat.
- Create height: Don’t flatten your apples too much; a slight mound will account for shrinkage during baking.
- Check doneness: Apples should be easily pierced with a knife but still hold their shape.
For the Perfect Crisp Topping:
- Keep butter cold: This creates pockets of steam during baking, resulting in a lighter, crispier texture.
- Don’t overmix: Stop when you have a pebbly texture; overmixing creates a paste-like consistency.
- Press lightly: Gently press some of the topping together to create various-sized crumbles for textural interest.
- Even distribution: Ensure the topping reaches the edges to prevent filling from bubbling over.
Baking Success:
- Use a clear dish: This allows you to see when the filling is bubbling properly.
- Position in oven: Place in the middle rack for even heat distribution.
- Look for visual cues: Golden brown topping and bubbling juices around the edges indicate doneness.
- Rest properly: Allowing the crisp to cool slightly helps the juices thicken to the perfect consistency.
Variations to Try
One of the joys of apple crisp is its versatility. Here are some delicious ways to customize the basic recipe:
Dietary Adaptations
Gluten-Free Apple Crisp:
- Replace all-purpose flour with a gluten-free blend or almond flour
- Use certified gluten-free oats
- Add 2 tablespoons of cornstarch to the filling for proper thickening
Vegan Apple Crisp:
- Substitute cold coconut oil or vegan butter for regular butter
- Consider adding 2 tablespoons of almond butter to the topping for richness
- Increase cinnamon by ¼ teaspoon for enhanced flavor
Reduced-Sugar Version:
- Cut sugars by ⅓ and add ¼ teaspoon of cinnamon to compensate
- Use naturally sweeter apple varieties like Fuji or Gala
- Add 2 tablespoons of unsweetened applesauce to the filling for moisture
Flavor Twists
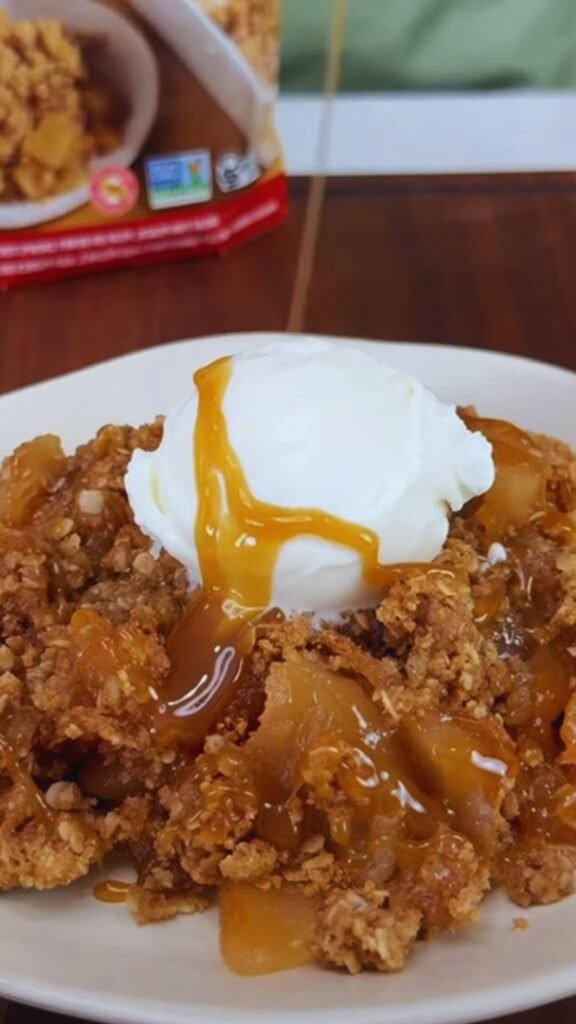
Caramel Apple Crisp:
- Add 3 tablespoons of caramel sauce to the apple mixture
- Drizzle additional caramel over the top after baking
- Add a pinch of flaky sea salt to the topping
Apple-Cranberry Crisp:
- Replace 1 cup of apples with 1 cup of fresh or frozen cranberries
- Increase sugar by 2 tablespoons to balance cranberry tartness
- Add orange zest to the filling for complementary citrus notes
Chai-Spiced Apple Crisp:
- Add ¼ teaspoon each of ground cardamom, cloves, and allspice
- Include 1 tablespoon of finely minced crystallized ginger in the topping
- Finish with a vanilla-infused whipped cream
Apple-Pear Crisp:
- Use 50% apples and 50% firm pears (Bosc or D’Anjou)
- Add ¼ teaspoon almond extract to the filling
- Include sliced almonds in the topping
Serving Suggestions
The way you serve apple crisp can transform it from a simple dessert to a memorable finale. Here are my favorite serving ideas:
Classic Pairings
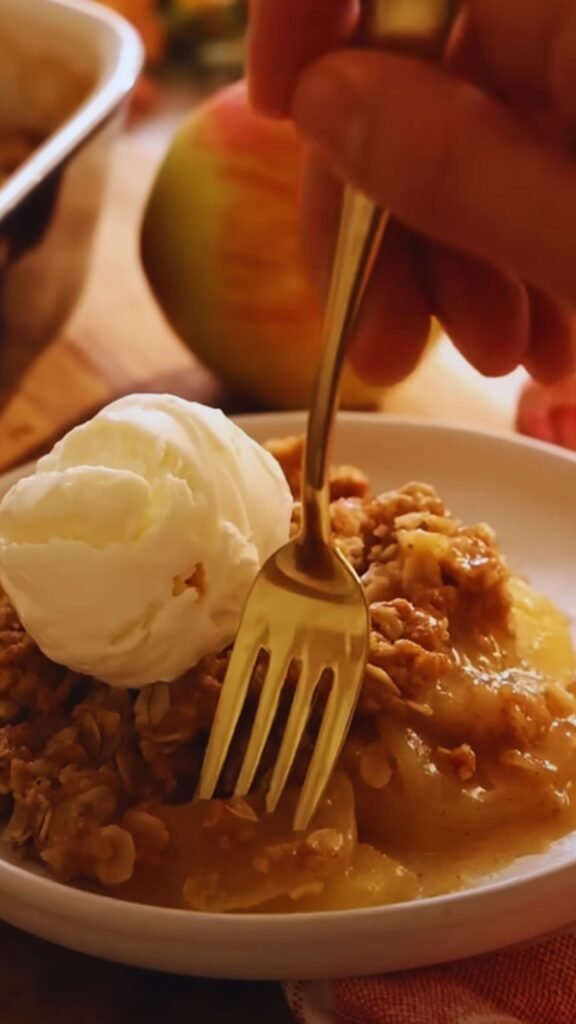
- Vanilla ice cream: The ultimate partner—cool, creamy contrast to warm, spiced fruit
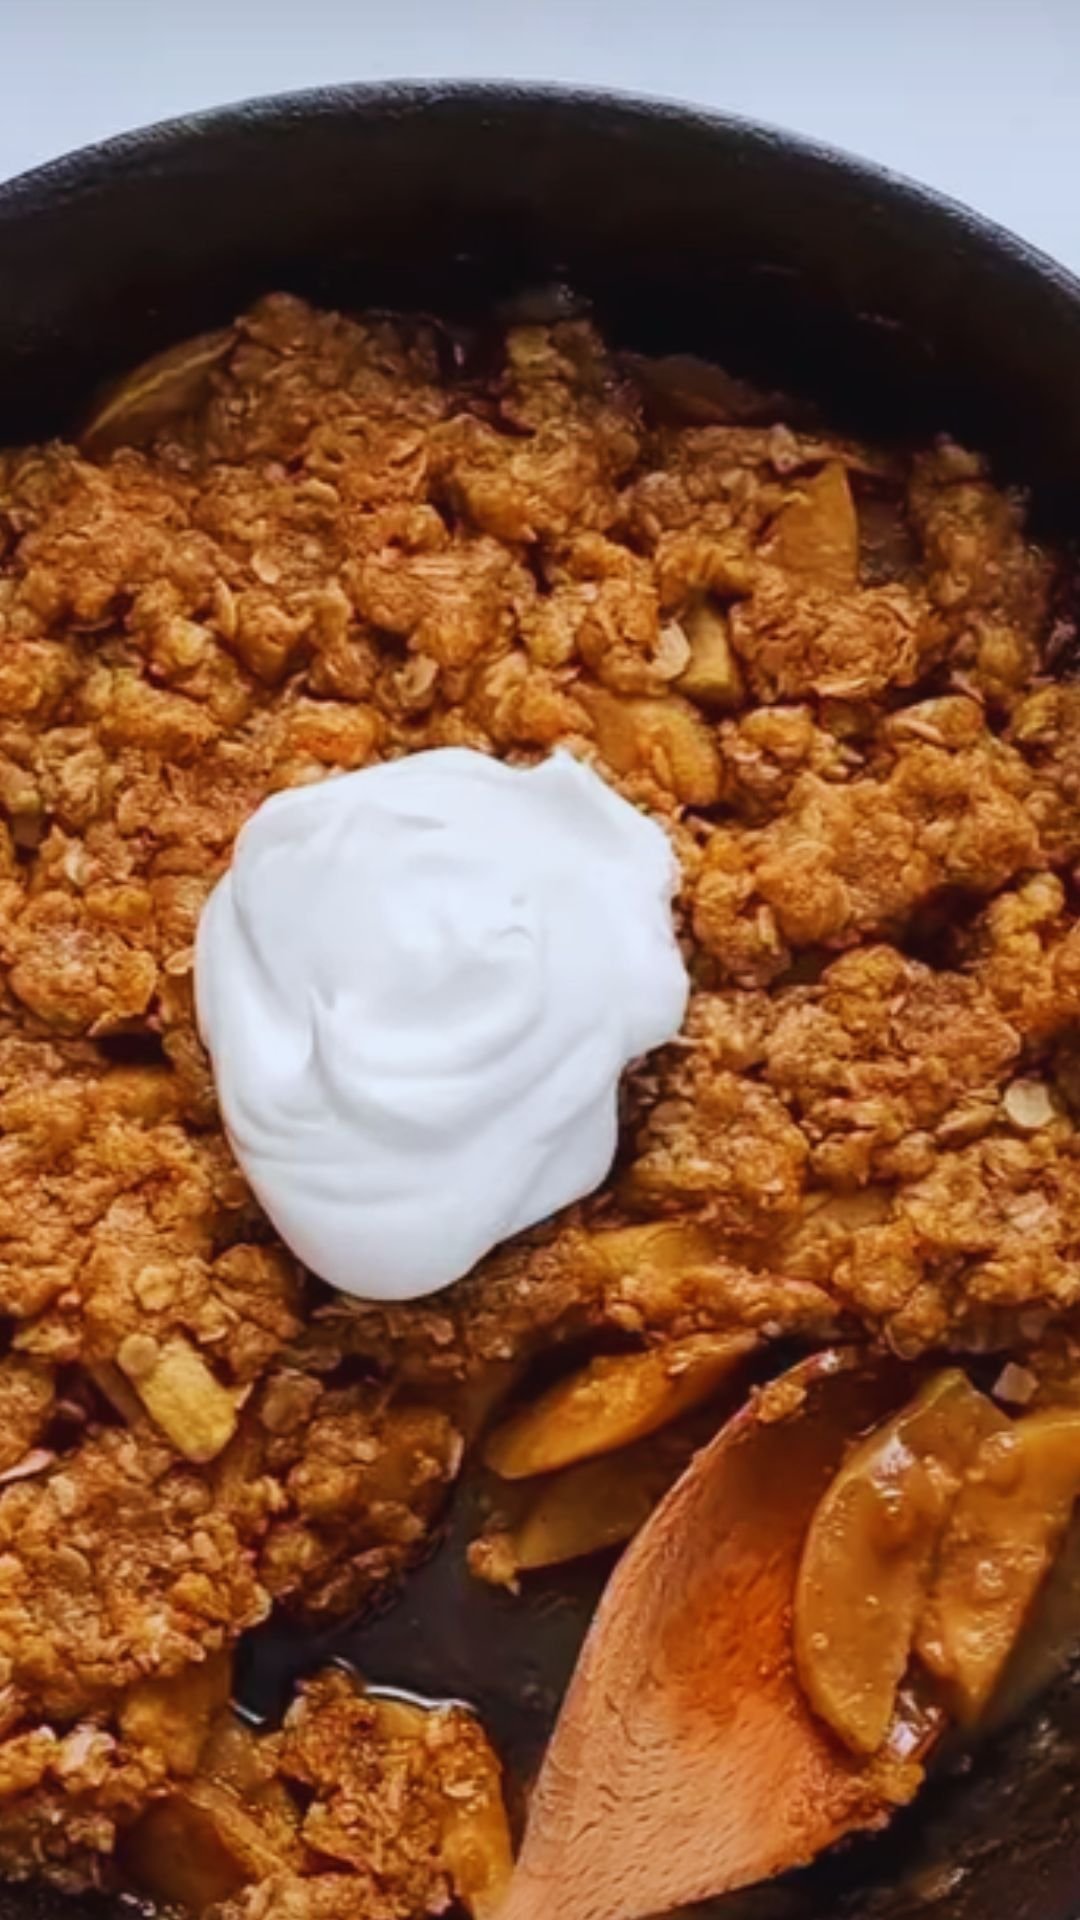
- Freshly whipped cream: Lighter than ice cream but equally delicious
- Crème fraîche: For a tangy, sophisticated twist
- Warm custard sauce: Creates a luxurious, comforting experience
Creative Presentations
- Individual ramekins: Pre-portion for elegant serving and quicker baking
- Cast iron presentation: Bake and serve in cast iron skillets for rustic charm
- Dessert parfaits: Layer cooled crisp with yogurt and granola for breakfast-inspired dessert
- Baked apple vessels: Hollow out apples and fill with crisp mixture for impressive presentation
Seasonal Serving Ideas
- Summer: Pair with lavender or honey ice cream and fresh berries
- Fall: Serve with cider reduction sauce and toasted pepitas
- Winter: Add a drizzle of spiced maple syrup and a side of eggnog whipped cream
- Spring: Lighten with a scoop of lemon sorbet and edible flowers
Storage and Make-Ahead Tips
Apple crisp is wonderfully adaptable to busy schedules. Here’s how to make it work for your timing needs:
Storage Guidelines
| Storage Method | Timeframe | Best Practices | Quality Notes |
|---|---|---|---|
| Room Temperature | Up to 2 days | Cover loosely with foil | Topping stays crispest |
| Refrigerated | Up to 5 days | Cover tightly | Reheat to restore texture |
| Frozen (baked) | Up to 3 months | Double-wrap, airtight container | Texture slightly compromised |
| Frozen (unbaked) | Up to 4 months | Assemble without baking, wrap well | Bake from frozen, add 15-20 minutes |
Reheating Methods
- Oven (best method): 350°F for 15-20 minutes, covered with foil
- Microwave: 30-second intervals until warm (topping will soften)
- Toaster oven: 325°F for 10 minutes, great for individual portions
Make-Ahead Strategies
- Night before: Assemble completely, refrigerate unbaked, bring to room temperature before baking
- Partial prep: Make topping up to 3 days ahead, store separately in refrigerator
- Freezer approach: Freeze filling and topping separately, assemble before baking
Troubleshooting Common Issues
Even experienced bakers occasionally run into challenges. Here’s how to solve the most common apple crisp problems:
Problem: Soggy Topping
Causes:
- Overlapping top and filling during storage
- Covering while still warm
Solutions:
- Store topping and filling separately if making ahead
- Ensure crisp cools completely before covering
- Add 2 tablespoons of cornstarch to the filling for thicker juices
- Increase baking time by 5-10 minutes for deeper browning
Problem: Dry Filling
Causes:
- Insufficient juicy apples in the mix
- Overbaking
- Too much thickener
Solutions:
- Include at least 30% juicy apple varieties
- Add 2-3 tablespoons of apple cider or juice to the filling
- Reduce flour in filling to 2 teaspoons
- Check doneness earlier using a knife to test apple softness
Problem: Undercooked Apples
Causes:
- Apple pieces cut too large
- Insufficient baking time
- Oven temperature too high (browns topping before apples cook)
Solutions:
- Cut apples into smaller, uniform pieces
- Cover with foil if topping browns too quickly
- Pre-cook apples for 5 minutes in microwave before assembling
Frequently Asked Questions
Q: Do I really need to peel the apples?
A: It’s entirely personal preference. Peeling creates a more uniform texture, but unpeeled apples provide more nutrition and a rustic appearance. If leaving peels on, wash apples thoroughly and cut into smaller pieces for better texture.
Q: Can I make apple crisp without oats?
A: Absolutely! For an oat-free topping, replace the oats with an equal amount of flour and add an extra 2 tablespoons of chopped nuts for texture. You can also make a streusel-style topping with just flour, sugar, and butter for a more cake-like consistency.
Q: Why is my apple crisp watery?
A: Several factors can cause excess liquid: juicy apple varieties, underbaking, or insufficient thickener. Add an extra tablespoon of flour or cornstarch to the filling, ensure adequate baking time (look for thick bubbles around the edges), and let it cool at least 30 minutes before serving.
Q: Can I use frozen apples?
A: Yes, but with adjustments. Thaw frozen apples completely and drain excess liquid before using. Add an extra tablespoon of thickener to compensate for the additional moisture. Frozen apples work best in recipes where a softer texture is desirable.
Q: What’s the difference between apple crisp, apple crumble, and apple cobbler?
A: Apple crisp typically contains oats in the topping for a crispy texture. Apple crumble has a streusel-like topping without oats. Apple cobbler features a biscuit or cake-like topping that’s dropped or poured over the fruit, creating a “cobbled” appearance when baked.
Q: How can I make my apple crisp extra special for guests?
A: Try these elevated touches: add a tablespoon of bourbon to the filling, infuse your cream or ice cream with vanilla beans, sprinkle the finished crisp with decorative sugar or finely chopped nuts, or serve in individual ramekins with a cinnamon stick garnish.
Final Thoughts
Apple crisp represents the perfect intersection of simplicity and satisfaction. It’s a dessert that welcomes personalization while honoring tradition—the kind of recipe that can become your signature dish with just a few tweaks to make it your own.
What I love most about apple crisp is how it connects us to seasonal rhythms and shared memories. Whether enjoyed at a fall harvest gathering, as a cozy winter comfort, or as a surprise summer treat with a scoop of ice cream, it never fails to bring smiles and second helpings.
I encourage you to use this guide as a starting point, but don’t be afraid to experiment and develop your own perfect version. The best apple crisp is ultimately the one that brings you and your loved ones the most joy. Happy baking!