There’s something magical about freshly made naan bread. That first tear into the warm, pillowy softness. The slight chew. The charred bubbles that add a hint of smoky flavor. I’ve spent years perfecting my homemade naan recipe, and I’m excited to share it with you today.
When I first tried making naan at home, I was intimidated. Wasn’t this something only professional tandoor ovens could produce? Turns out, that’s completely false. With the right technique and a few simple ingredients, you can create restaurant-quality naan right in your kitchen.
In this guide, I’ll walk you through everything you need to know about making exceptional naan bread at home. We’ll cover the ingredients, techniques, and all those little secrets that transform good naan into great naan. Plus, I’ll share my favorite variations and serving suggestions to help you make the most of your freshly baked bread.
What Makes Naan Special?
Naan is a leavened flatbread that originated in South Asia and has become beloved worldwide. Unlike many other flatbreads, naan is traditionally baked in a tandoor (a clay oven), giving it its distinctive charred spots and fluffy interior.
What sets naan apart from other flatbreads is its pillowy texture and slight tanginess. This comes from the yogurt in the dough, which tenderizes the bread while adding subtle flavor. The yogurt also helps create that signature chew that makes naan so satisfying.
Essential Ingredients
Let’s start with what you’ll need to make exceptional naan at home:
- All-purpose flour: Forms the base of our dough
- Plain yogurt: Adds tenderness and a slight tang
- Warm water: Activates the yeast
- Active dry yeast: Creates those beautiful air pockets
- Sugar: Feeds the yeast and adds subtle sweetness
- Salt: Enhances all flavors
- Baking powder: Gives additional lift for that fluffy texture
- Ghee or butter: For brushing the finished naan
- Garlic: Optional, but adds wonderful flavor
- Fresh herbs: Cilantro, mint, or both
Each ingredient plays a crucial role in creating perfect naan bread. The combination of yeast and baking powder might seem unusual, but this dual-leavening approach is what gives naan its distinctive texture—fluffy yet chewy, with the perfect amount of rise.
Equipment You’ll Need
You don’t need specialty equipment, but these basics will help:
- Large mixing bowl
- Cast iron skillet, heavy-bottomed pan, or pizza stone
- Rolling pin
- Clean kitchen towel
- Measuring cups and spoons
Don’t worry if you don’t have a tandoor oven (most home cooks don’t!). A well-heated cast iron skillet works remarkably well for recreating those distinctive charred spots.
The Best Homemade Naan Bread Recipe
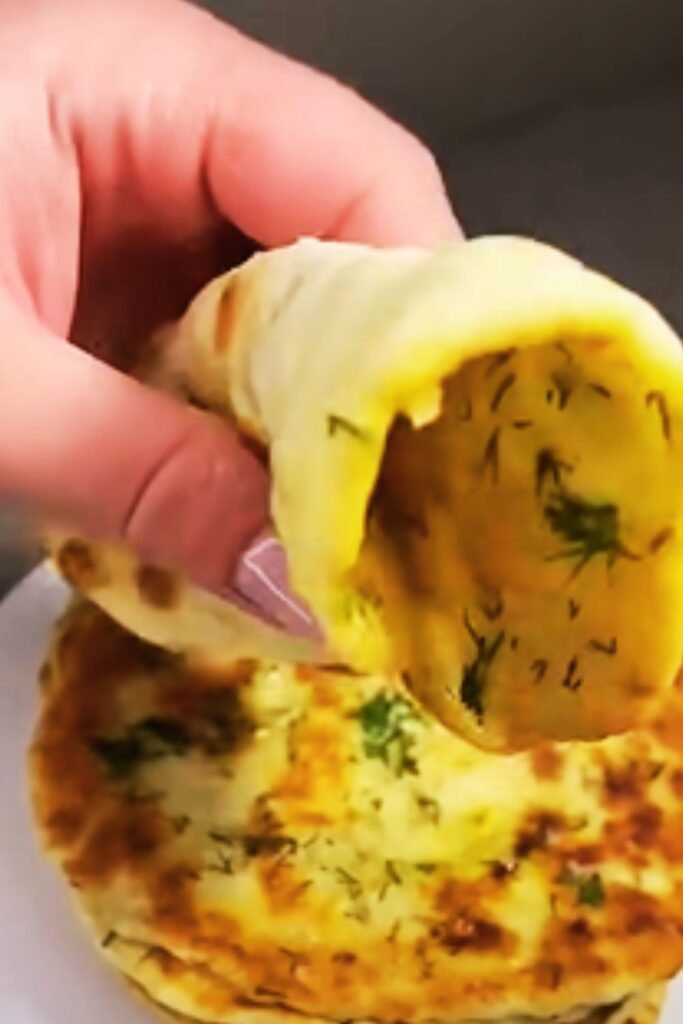
Ingredients
- 4 cups all-purpose flour, plus more for dusting
- 1 cup plain yogurt (full-fat works best)
- 3/4 cup warm water (around 110°F/45°C)
- 2 1/4 teaspoons active dry yeast (one standard packet)
- 2 teaspoons sugar
- 2 teaspoons salt
- 1 teaspoon baking powder
- 4 tablespoons melted ghee or butter, divided (2 for dough, 2 for brushing)
- 4 cloves garlic, finely minced (optional)
- 1/4 cup chopped fresh cilantro or mint (optional)
Step-by-Step Instructions
- Activate the yeast: In a small bowl, combine the warm water, sugar, and yeast. Stir gently and let sit for 5-10 minutes until foamy. If it doesn’t foam, your yeast might be old—start over with fresh yeast.
- Make the dough: In a large bowl, combine the flour, salt, and baking powder. Mix well. Make a well in the center and add the yogurt, 2 tablespoons of melted ghee, and the activated yeast mixture.
- Knead until smooth: Mix with a wooden spoon until the dough starts to come together, then turn out onto a floured surface. Knead for 8-10 minutes until the dough becomes smooth and elastic. If it’s too sticky, add a little more flour, one tablespoon at a time.
- First rise: Place the dough in a lightly oiled bowl, cover with a damp cloth, and let rise in a warm place for 1-2 hours, until doubled in size.
- Divide the dough: After rising, punch down the dough gently and divide it into 8 equal portions. Roll each portion into a ball.
- Shape the naan: Working with one ball at a time (keep the others covered to prevent drying), roll it into an oval or teardrop shape, about 1/4 inch thick. Don’t worry about perfect shapes—rustic looks more authentic!
- Rest briefly: Let the shaped naan rest for 5 minutes before cooking. This relaxes the gluten and helps create a better texture.
- Cook the naan: Heat a cast iron skillet or heavy-bottomed pan over high heat until very hot. Place one naan in the dry skillet and cook until bubbles form on the surface and the bottom develops brown spots, about 1-2 minutes.
- Finish cooking: Flip the naan and cook the other side for another minute. If using a gas stove, you can carefully use tongs to hold the first-cooked side directly over the flame for a few seconds to get those characteristic charred spots.
- Final touch: Brush the hot naan with the remaining melted ghee or butter. If making garlic naan, mix the minced garlic with the melted ghee before brushing. Sprinkle with herbs if desired.
- Keep warm: Place the cooked naan in a clean kitchen towel while you prepare the rest.
Storing and Reheating
Fresh naan is best enjoyed immediately, but if you have leftovers:
- Short-term storage: Keep in an airtight container at room temperature for up to 2 days.
- Freezing: Place cooled naan in freezer bags with parchment paper between each piece. Freeze for up to 3 months.
- Reheating: Sprinkle with a few drops of water and heat in a 350°F oven for 3-4 minutes, or briefly warm in a dry skillet.
Troubleshooting Common Issues
| Problem | Possible Cause | Solution |
|---|---|---|
| Tough or chewy naan | Overworked dough | Knead just until smooth, don’t overdo it |
| Naan too thick | Rolled too thick or didn’t stretch enough | Roll thinner, about 1/4 inch |
| No bubbles forming | Pan not hot enough | Preheat pan thoroughly until very hot |
| Dough too sticky | Too much moisture | Add flour gradually while kneading |
| Dough too dry | Not enough moisture | Add 1 tablespoon of water at a time |
| Burnt spots (not just charred) | Pan too hot or cooked too long | Lower heat slightly or reduce cooking time |
| Naan doesn’t puff | Old yeast or insufficient rising | Ensure yeast is fresh and dough doubles in size |
| Bland flavor | Insufficient salt | Don’t reduce the salt in the recipe |
Delicious Variations
Once you’ve mastered the basic recipe, try these tasty variations:
Garlic Naan
Mix 4 minced garlic cloves with your melted ghee before brushing on the hot naan. For extra garlic flavor, add 2 teaspoons of garlic powder to the dough.
Herb Naan
Add 1/4 cup of finely chopped herbs to the dough. Cilantro, mint, or a combination works beautifully.
Cheese Naan
Stuff the naan with 1-2 tablespoons of grated cheese (like mozzarella or paneer) before rolling. Seal the edges well to prevent cheese from leaking.
Onion Naan
Add 1/4 cup of finely chopped green onions to the dough during mixing.
Whole Wheat Naan
Replace half the all-purpose flour with whole wheat flour for a nuttier, more nutritious bread.
Sweet Naan
Add 2 tablespoons of honey to the dough and sprinkle with a cinnamon-sugar mixture after cooking.

Pro Tips For Perfect Naan Every Time
After years of making naan at home, I’ve discovered some tricks that make a huge difference:
- Don’t rush the rise: The longer, slower rise develops better flavor and texture. If you have time, let the dough rise in the refrigerator overnight.
- Use room temperature yogurt: Cold yogurt can slow down yeast activity.
- The hotter the pan, the better: A screaming hot pan creates those beautiful bubbles and char marks.
- Work quickly: Once the pan is hot, the cooking process goes fast. Have everything ready before you start cooking.
- Don’t crowd the cooked naan: Stack them with a kitchen towel between each piece to prevent sogginess.
- Adjust thickness to preference: Roll thinner (1/8 inch) for crispier naan or thicker (1/4 inch) for chewier naan.
- Keep dough covered: Always keep unused dough covered to prevent it from drying out.
- Add fat to the dough: The 2 tablespoons of ghee in the dough makes a significant difference in texture.
Serving Suggestions
Naan is incredibly versatile. Here are some of my favorite ways to enjoy it:
- As a scoop for Indian curries, dal, or tikka masala
- Wrapped around kebabs or grilled vegetables
- As a base for quick pizzas (naan pizza)
- Cut into triangles and served with hummus or baba ganoush
- Stuffed with spiced potatoes for a quick aloo paratha-inspired meal
- Topped with avocado and eggs for a breakfast twist
- Used as a wrap for sandwich fillings
- Served alongside soups as an alternative to dinner rolls
- Cut into chips, lightly oiled and baked for dipping
For a complete meal, I love serving fresh naan with butter chicken or chana masala, a side of cucumber raita, and a simple salad.

Nutritional Information
For those keeping track of nutritional content, here’s an approximate breakdown per naan (recipe makes 8):
| Nutrient | Amount per Naan |
|---|---|
| Calories | 275 |
| Total Fat | 8g |
| Saturated Fat | 4.5g |
| Cholesterol | 20mg |
| Sodium | 590mg |
| Total Carbohydrates | 45g |
| Dietary Fiber | 1.5g |
| Sugars | 2g |
| Protein | 7g |
| Calcium | 4% DV |
| Iron | 15% DV |
Note: Values will vary based on exact ingredients used and portion sizes.
Why This Recipe Works
Understanding the science behind good naan helps you appreciate the process:
- Yogurt’s role: The acidity in yogurt helps tenderize the gluten in the flour, resulting in a softer texture. It also adds subtle tanginess that makes naan distinctive.
- Dual leavening: Using both yeast and baking powder creates the perfect balance of rise and texture. The yeast develops flavor during fermentation, while baking powder ensures even bubbling during the quick cooking process.
- High heat cooking: The intense heat mimics a tandoor oven, creating rapid steam expansion within the dough. This is what creates those beautiful bubbles and blistered spots.
- Fat enrichment: Adding ghee to both the dough and as a finishing touch adds richness and prevents drying out.
Historical Context
Naan has a rich history dating back to the 1300s in the royal courts of the Delhi Sultanate. Originally, it was reserved for royalty and the elite because it required a tandoor oven, which wasn’t common in ordinary households.
The word “naan” comes from Persian, simply meaning “bread.” While now associated primarily with Indian cuisine, variations of naan appear throughout South, Central, and Western Asia, each region adding its own twist.
Traditional tandoor-baked naan achieves temperatures of 900°F (480°C), which is why we need to adapt techniques for home cooking. Despite these adaptations, we can still achieve incredible results that honor this bread’s noble heritage.
Frequently Asked Questions
Can I make naan without yogurt? Yes, you can substitute sour cream or buttermilk. In a pinch, you can use milk with a tablespoon of lemon juice, though the texture will be slightly different.
Why is my naan not soft? The most common reasons are overworking the dough, insufficient fat, or cooking too long. Remember that naan continues to firm up as it cools, so it’s better to slightly undercook than overcook.
Can I make this with gluten-free flour? Yes, though the texture will be different. Use a good quality gluten-free all-purpose flour blend with xanthan gum. You may need to adjust the liquid slightly.
How can I get more bubbles in my naan? Make sure your pan is extremely hot, don’t roll the dough too thin, and ensure your dough has properly risen. The steam from the moisture in the dough creates those bubbles.
Can I make the dough ahead of time? Absolutely! The dough can be refrigerated overnight for the first rise, which actually improves flavor. Let it come to room temperature for about 30 minutes before shaping.
Why add baking powder if there’s already yeast? The baking powder provides an extra lift during the quick cooking process, helping create those signature bubbles even if the yeast hasn’t fully activated in the high heat.
My naan sticks to the pan. What am I doing wrong? Your pan might not be hot enough. A properly heated pan will sear the dough quickly, preventing sticking. Also, make sure your dough isn’t too wet and has enough flour dusting.
How do I know when to flip the naan? Flip when you see bubbles forming on the surface and the bottom has golden-brown spots (lift a corner to check). This usually takes 1-2 minutes on high heat.
Can I use Greek yogurt instead of regular yogurt? Yes, but you may need to add a little more water as Greek yogurt is thicker. Start with an extra tablespoon and adjust as needed.
Is naan vegan? Traditional naan contains yogurt and is often brushed with ghee, making it not vegan. However, you can substitute plant-based yogurt and oil for a vegan version.
Making naan at home connects you to centuries of culinary tradition while filling your kitchen with incredible aromas. There’s something deeply satisfying about creating this staple bread from scratch, watching it puff and blister in the pan, and then enjoying it fresh and warm with your favorite dishes.
Once you master this recipe, I guarantee store-bought naan will never taste the same again. The freshness, texture, and flavor of homemade simply can’t be matched. Plus, the satisfaction of creating something so delicious from such simple ingredients is its own reward.
I hope this recipe brings as much joy to your kitchen as it has to mine. Happy baking!
