
There’s something magical about celebrating the special women in our lives with homemade treats. As Mother’s Day (or Moederdag, as it’s known in Dutch) approaches, I find myself drawn to my kitchen, ready to create something that expresses love and gratitude in the sweetest way possible. Cupcakes have always been my go-to for special occasions – they’re personal, portable, and provide the perfect canvas for creativity.
When I first started making these Moederdag cupcakes, I had no idea they would become such a cherished tradition in my family. Now, every year when May rolls around, my kitchen transforms into a bakery filled with the aroma of vanilla, butter, and love. These aren’t just any cupcakes; they’re a celebration of motherhood, crafted with care and decorated with touches that say “I appreciate you” in every bite.
In this article, I’ll guide you through creating these special Mother’s Day treats from scratch. We’ll explore everything from the basic cupcake recipe to elegant decorating techniques that will make your cupcakes look professionally made. Whether you’re a seasoned baker or trying your hand at cupcakes for the first time, this guide will help you create something truly special for the maternal figures in your life.
The Perfect Cupcake Base
Before we dive into decorations and themes, let’s start with the foundation: a perfectly moist and flavorful cupcake base. I’ve tested countless recipes over the years, and this vanilla cupcake recipe has proven to be foolproof and universally loved.
Classic Vanilla Cupcake Recipe
Ingredients:
- 170g all-purpose flour
- 200g granulated sugar
- 1½ teaspoons baking powder
- ¼ teaspoon salt
- 115g unsalted butter, at room temperature
- 2 large eggs, at room temperature
- 120ml whole milk, at room temperature
- 2 teaspoons pure vanilla extract
Instructions:
- Preheat your oven to 180°C (350°F) and line a 12-cup muffin tin with cupcake liners.
- In a medium bowl, whisk together the flour, baking powder, and salt.
- In a large bowl, beat the butter and sugar with an electric mixer until light and fluffy, about 3-4 minutes.
- Add the eggs one at a time, beating well after each addition. Mix in the vanilla extract.
- Gradually add the flour mixture to the butter mixture, alternating with the milk, beginning and ending with the flour mixture. Mix until just combined.
- Divide the batter evenly among the cupcake liners, filling each about two-thirds full.
- Bake for 18-20 minutes, or until a toothpick inserted into the center comes out clean.
- Allow the cupcakes to cool in the pan for 5 minutes, then transfer to a wire rack to cool completely before frosting.
Notes:
- Room temperature ingredients are crucial for a smooth batter.
- Don’t overmix the batter once you add the flour, as this can result in tough cupcakes.
- For a stronger vanilla flavor, use vanilla bean paste instead of extract.
Buttercream Frosting: The Essential Topping
A great cupcake deserves a stellar frosting. This classic buttercream is versatile, pipes beautifully, and serves as the perfect base for our Mother’s Day decorations.
Classic Buttercream Frosting
Ingredients:
- 230g unsalted butter, at room temperature
- 480g powdered sugar, sifted
- 2-3 tablespoons heavy cream or milk
- 2 teaspoons pure vanilla extract
- Pinch of salt
- Food coloring (optional)
Instructions:
- In a large bowl, beat the butter with an electric mixer until creamy and pale, about 3-4 minutes.
- Gradually add the powdered sugar, mixing on low speed until incorporated.
- Add the vanilla extract, salt, and 2 tablespoons of cream. Beat on medium-high speed until light and fluffy, about 5 minutes.
- If needed, add more cream, one teaspoon at a time, until you reach your desired consistency.
- If using food coloring, divide the frosting into separate bowls and tint as desired.
Coloring Tips:
- For a Mother’s Day palette, I like to use soft pinks, lavenders, and pastel yellows.
- Gel food coloring gives more vibrant results than liquid coloring.
- Start with a small amount and add more as needed – you can always darken the color, but you can’t lighten it once it’s too dark.
Decorating Techniques for Moederdag
Now comes the fun part – transforming your basic cupcakes into stunning Mother’s Day creations! I’ll share some of my favorite techniques that have wowed the mothers in my life over the years.
Piping Techniques
Piping creates professional-looking results, even for beginners. Here are some simple techniques to try:
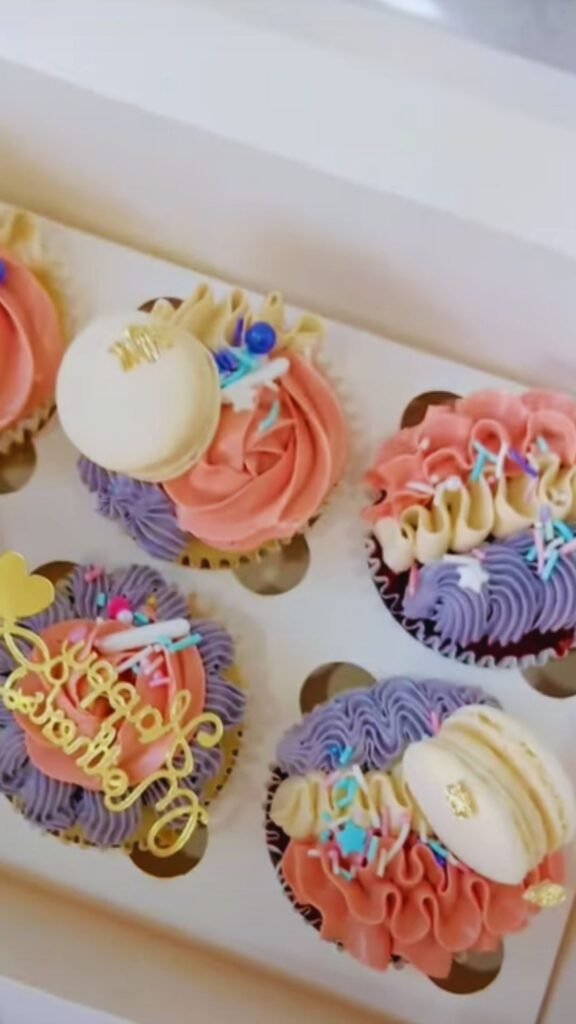
- Rosettes: Use a 1M or 2D piping tip. Start at the center of the cupcake and pipe in a spiral outward.
- Ruffles: Use a petal tip (like #104). Hold the tip so the narrow end is pointing up and pipe back and forth while moving around the cupcake.
- Simple Swirl: Use a round tip (like #12). Start at the outer edge and spiral inward, ending with a slight pressure release.
Decoration Ideas
- Edible Flower Cupcakes: Press edible flowers (like pansies, violets, or rose petals) into the frosting for an elegant touch.
- Chocolate Medallions: Melt chocolate, pipe small circles or heart shapes onto parchment paper, let set, and place on top of the frosted cupcakes.
- Fondant Toppers: Roll out colored fondant and cut shapes with small cookie cutters. Leave them to dry slightly before placing on cupcakes.
| Decoration Type | Materials Needed | Difficulty Level | Best For |
|---|---|---|---|
| Buttercream Flowers | Piping bags, flower tips, colored buttercream | Medium | Elegant, garden-themed cupcakes |
| Fondant Toppers | Fondant, food coloring, small cookie cutters | Easy | Neat, uniform decorations |
| Fresh Fruit | Berries, citrus slices, edible flowers | Very Easy | Natural, refreshing look |
| Chocolate Work | Melting chocolate, parchment paper, piping bags | Medium | Sophisticated, gourmet appearance |
| Sprinkles | Assorted sprinkles, edible pearls, sugar crystals | Very Easy | Fun, colorful, whimsical look |
Mother’s Day Themed Cupcake Designs
Creating themed cupcakes makes your gift even more special. Here are some Moederdag-inspired ideas:
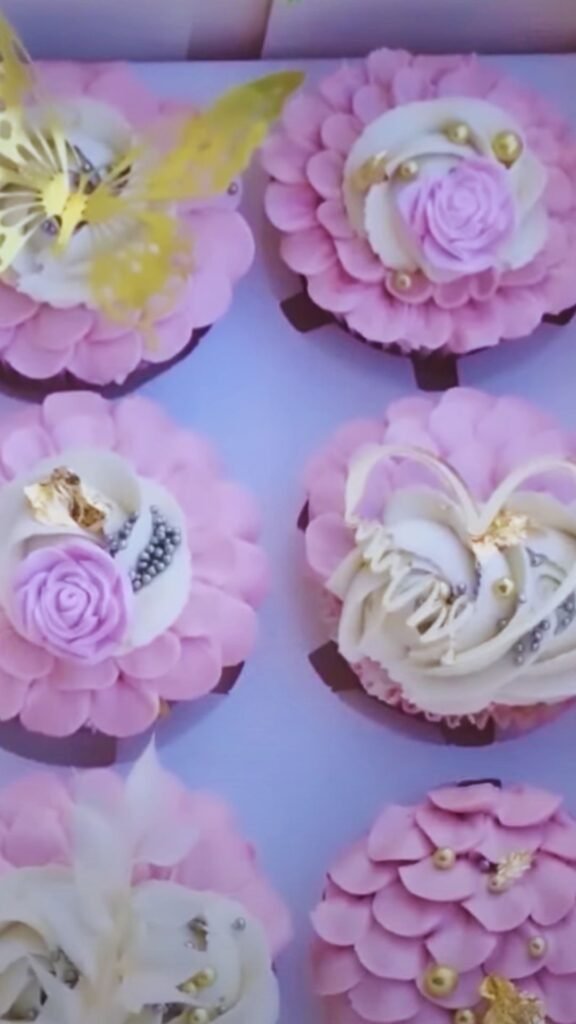
Flower Garden Cupcakes
Nothing says “Mother’s Day” quite like flowers. Create a beautiful edible garden with these techniques:
- Tint your buttercream in various flower colors (pink, yellow, purple, etc.)
- Use flower piping tips (#104, #127, #129) to create roses, daisies, and tulips.
- Add green buttercream with a leaf tip (#352) for leaves and stems.
- Finish with a sprinkle of edible glitter for morning dew.
These cupcakes look complex but are actually quite manageable with practice. I recommend watching a few video tutorials before attempting them.
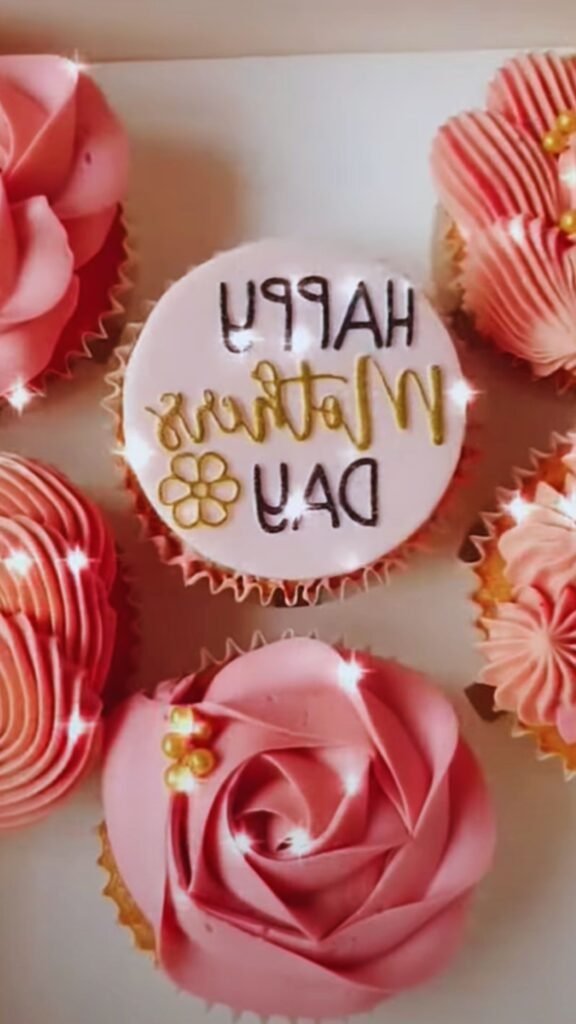
“Mom” Letter Cupcakes
For a straightforward but impactful design:
- Frost your cupcakes with a smooth layer of buttercream.
- Use alphabet cookie cutters to cut out “M-O-M” or “M-A-M-A” from fondant or modeling chocolate.
- Place the letters on the cupcakes and arrange them in a row.
- Add small fondant hearts or flowers around the letters.
Teacup Cupcakes
Perfect for a Mother’s Day tea party:
- Bake your cupcakes in silicone teacup molds, or use regular cupcakes as a base.
- Frost with buttercream in a teacup shape.
- Add a fondant handle to the side.
- Place a small fondant or chocolate disc on top to represent the tea.
- Garnish with sprinkles or edible pearls.
Special Dietary Considerations
Many families have dietary restrictions to consider. Here are some adaptations for common dietary needs:
Gluten-Free Cupcakes
Replace the all-purpose flour with a gluten-free flour blend (I recommend one with xanthan gum included). Add an extra egg to help with binding and structure.
Dairy-Free Options
- Replace butter with dairy-free margarine or coconut oil
- Use almond milk, oat milk, or coconut milk instead of whole milk
- For frosting, try a dairy-free buttercream using vegetable shortening or vegan butter
Reduced Sugar Variations
- Reduce sugar in the cake recipe by up to 25% without affecting texture significantly
- Use a cream cheese frosting with less sugar for a tangy alternative
- Consider using natural sweeteners like stevia or monk fruit in combination with sugar
| Dietary Need | Ingredient Substitutions | Notes |
|---|---|---|
| Gluten-Free | Gluten-free flour blend, extra egg | Add ¼ tsp xanthan gum if not in the blend |
| Dairy-Free | Plant-based butter, non-dairy milk | Coconut oil works well in the cake batter |
| Egg-Free | Flax eggs (1 tbsp ground flax + 3 tbsp water) | Can also use applesauce (60g per egg) |
| Nut-Free | Avoid almond extract, use nut-free milk | Check sprinkles and decorations for nut traces |
| Low Sugar | Reduce sugar by 25%, use stevia | Texture may be slightly less tender |
Packaging and Presentation
The presentation of your cupcakes can be just as important as their taste. Here are some creative ways to package your Moederdag cupcakes:
Individual Packaging
- Place each cupcake in a clear plastic or paper cupcake container
- Tie with ribbon in Mother’s Day colors
- Attach a small handwritten note or tag
Gift Box Presentation
- Line a decorative box with tissue paper
- Place cupcakes in paper cupcake holders
- Arrange in the box with small gaps between each cupcake
- Add fresh flowers or greenery in the spaces (non-toxic varieties)
- Include a Mother’s Day card
Cupcake Bouquet
For a truly spectacular presentation:
- Get a small flower pot or decorative container
- Insert a styrofoam ball that fits the container
- Cover the styrofoam with green tissue paper
- Insert lollipop sticks into the bottom of each cupcake
- Arrange the cupcakes in the styrofoam ball to create a “bouquet”
Make-Ahead Tips and Storage
Preparing ahead can make your Mother’s Day celebration stress-free. Here’s how to manage your time:
Make-Ahead Timeline
- 3 days before: Prepare and freeze unfrosted cupcakes
- 2 days before: Make fondant decorations and let them dry
- 1 day before: Prepare buttercream and store in an airtight container in the refrigerator
- Day of: Thaw cupcakes, bring buttercream to room temperature, frost and decorate
Storage Guidelines
- Unfrosted cupcakes: Store at room temperature in an airtight container for up to 2 days, or freeze for up to 3 months
- Frosted cupcakes: Store in the refrigerator for up to 3 days
- Fondant decorations: Store in a cool, dry place in an airtight container for up to 2 weeks
Pro Tip: If refrigerating frosted cupcakes, bring them to room temperature for 30 minutes before serving for the best texture and flavor.
Serving Suggestions
Complete your Mother’s Day celebration with these complementary items:
- Serve with a pot of high-quality tea or freshly brewed coffee
- Create a cupcake bar with additional toppings like fresh berries, chocolate shavings, and edible flowers
- Pair with a small glass of sparkling water with a splash of fruit juice and fresh mint
- Present alongside a beautiful breakfast or brunch spread
- Serve on vintage china for an extra special touch
Troubleshooting Common Cupcake Problems
Even experienced bakers sometimes encounter issues. Here are solutions to common cupcake problems:
Sunken Centers
Problem: Cupcakes rose, then sank in the middle. Solutions:
- Ensure your baking powder is fresh (replace every 6 months)
- Avoid overmixing the batter
- Check your oven temperature with an oven thermometer
- Don’t open the oven door during the first 15 minutes of baking
Dry Cupcakes
Problem: Cupcakes are dry and crumbly. Solutions:
- Don’t overbake – check a minute or two before the recommended time
- Ensure all ingredients are at room temperature
- Add an extra egg yolk for moisture
- Brush cooled cupcakes with simple syrup before frosting
Buttercream Issues
Problem: Buttercream is too soft or runny. Solutions:
- Refrigerate for 15-20 minutes, then rewhip
- Add more powdered sugar, 1 tablespoon at a time
- Ensure butter is cool room temperature, not warm
Problem: Buttercream is too stiff. Solutions:
- Add more cream or milk, 1 teaspoon at a time
- Let it sit at room temperature longer
- Whip it longer to incorporate more air
Questions & Answers
Q: Can I make these cupcakes the day before Mother’s Day? Absolutely! Unfrosted cupcakes can be made 1-2 days in advance and stored in an airtight container at room temperature. You can also prepare the frosting ahead of time and store it in the refrigerator. Just bring it to room temperature and re-whip before using.
Q: I don’t have piping tips. How can I still make my cupcakes look special? No problem! You can create beautiful cupcakes without special equipment. Try these ideas:
- Use a zip-top bag with the corner snipped off for simple piping
- Spread frosting with an offset spatula or butter knife and top with sprinkles
- Dip the tops in ganache or glaze and add simple decorations
- Use store-bought edible decorations like sugar flowers
Q: How do I transport cupcakes without ruining the decorations? Invest in a cupcake carrier or make your own by inserting toothpicks between cupcakes in a covered container. For elaborate decorations, refrigerate the cupcakes first to firm up the frosting, then transport them in a cool vehicle.
Q: Can I use natural food coloring for these cupcakes? Yes! Natural food colorings made from vegetable powders work well for pastel colors. Beet powder creates pink, spirulina or matcha makes green, turmeric gives yellow, and blueberry or blackberry powder creates purple tones. Keep in mind that natural colors may be less vibrant than artificial ones.
Q: How do I make cupcakes with two-tone frosting swirls? Line a piping bag with two different colored frostings along opposite sides. When you pipe, both colors will come out together in a swirl pattern. For best results, use colors that complement each other, like pink and white or lavender and yellow.
Q: My cupcakes always stick to the liners. How can I prevent this? There are a few tricks to prevent sticking:
- Use high-quality cupcake liners (greaseproof or parchment ones work best)
- Spray the inside of the liners lightly with cooking spray
- Let cupcakes cool completely before unwrapping
- Store properly to prevent moisture buildup
Q: Can I freeze decorated cupcakes? While you can freeze unfrosted cupcakes with great success, fully decorated cupcakes don’t freeze as well. The texture of the frosting may change upon thawing. If you need to freeze them, place the frosted cupcakes in the freezer until solid, then wrap individually in plastic wrap and store in an airtight container for up to 1 month. Thaw overnight

