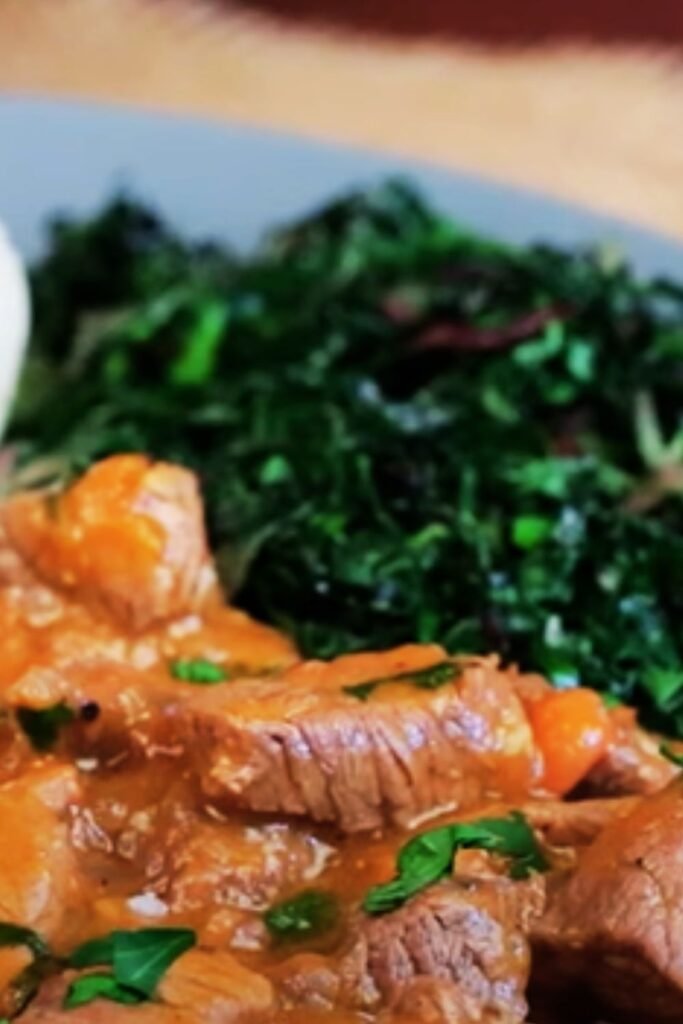
When I first discovered sukuma wiki during my culinary adventures, I never imagined that this humble Kenyan dish would become one of my most requested recipes. The name literally translates to “stretch the week” in Swahili, and trust me, this economical yet incredibly satisfying dish lives up to its promise. Today, I’m sharing my perfected version of Kenyan braised collard greens with ground beef that will have your family asking for seconds.
Sukuma wiki represents the heart of Kenyan home cooking – simple ingredients transformed into something extraordinary through time-tested techniques. What makes this dish particularly special is how the earthy collard greens marry beautifully with seasoned ground beef, creating a protein-rich meal that stretches your budget without compromising on flavor or nutrition.
Understanding Sukuma Wiki: More Than Just Greens
Sukuma Wiki : A traditional Kenyan dish featuring collard greens (kale) braised with onions, tomatoes, and various proteins, named for its ability to help families “stretch the week” economically.
Collard Greens (Kale) : Dark, leafy vegetables from the Brassica family, rich in vitamins A, C, and K, providing the nutritional foundation of this dish.
Braising Technique : A cooking method combining both wet and dry heat, where ingredients are first sautéed then simmered in liquid to develop deep flavors and tender textures.
The beauty of sukuma wiki lies in its versatility. While my version incorporates ground beef for added protein and richness, traditional preparations might include fish, chicken, or remain completely vegetarian. Each family has their own secret touches, and I encourage you to make this recipe your own once you master the basics.
Essential Ingredients for Perfect Sukuma Wiki
Creating authentic sukuma wiki requires understanding how each ingredient contributes to the final dish. Here’s my carefully curated ingredient list that ensures consistent, flavorful results every time.
Primary Ingredients
| Ingredient | Quantity | Purpose | Selection Tips |
|---|---|---|---|
| Fresh Collard Greens | 2 large bunches (about 2 lbs) | Main vegetable base | Choose vibrant green leaves without yellowing or wilting |
| Ground Beef | 1 lb (80/20 lean-to-fat ratio) | Protein component | Opt for fresh ground beef with some fat for flavor |
| Large Yellow Onions | 2 medium | Aromatic foundation | Select firm onions without soft spots |
| Fresh Tomatoes | 4 large or 6 medium | Acidity and body | Use ripe but firm tomatoes for best texture |
| Garlic Cloves | 6-8 cloves | Flavor enhancement | Fresh garlic provides superior taste over powdered |
| Fresh Ginger | 2-inch piece | Warmth and depth | Look for firm, unblemished ginger root |
Spices and Seasonings
| Spice/Seasoning | Quantity | Flavor Profile | Quality Indicators |
|---|---|---|---|
| Cumin Seeds | 2 teaspoons | Earthy, warm undertones | Whole seeds provide more flavor than ground |
| Coriander Seeds | 1 teaspoon | Citrusy, slightly sweet | Should be aromatic when crushed |
| Turmeric Powder | 1 teaspoon | Earthy, slightly bitter | Vibrant orange color indicates freshness |
| Paprika | 2 teaspoons | Mild heat, smoky sweetness | Choose Hungarian or Spanish varieties |
| Black Pepper | 1 teaspoon freshly ground | Sharp, pungent heat | Always grind fresh for maximum potency |
| Sea Salt | To taste | Flavor enhancement | Use fine sea salt for even distribution |
| Bay Leaves | 3 leaves | Subtle herbal notes | Whole leaves should be pliable, not brittle |
Step-by-Step Cooking Method
My approach to sukuma wiki emphasizes building layers of flavor while maintaining the integrity of each ingredient. This method has been refined through countless preparations and consistently delivers restaurant-quality results at home.
Preparation Phase (15 minutes)
Collard Green Preparation : Remove thick stems and ribs from collard greens. Stack leaves, roll tightly, and slice into 1-inch strips (chiffonade). Wash thoroughly in cold water, drain well.
Aromatics Preparation : Dice onions into uniform pieces. Mince garlic and ginger together to form a paste. Core and dice tomatoes, removing excess seeds.
Spice Preparation : Toast cumin and coriander seeds in a dry pan for 30 seconds until fragrant. Grind in a spice grinder or mortar and pestle.
Cooking Process
Phase 1: Building the Foundation (8-10 minutes)
Heat 2 tablespoons of vegetable oil in a large, heavy-bottomed pot over medium-high heat. The oil should shimmer but not smoke – this indicates the perfect temperature for developing flavors without burning.
Add the ground beef, breaking it apart with a wooden spoon. Cook until browned and slightly crispy edges form, about 5-6 minutes. This browning step, known as the Maillard reaction, creates deep, complex flavors that form the backbone of our dish.
Remove the beef with a slotted spoon, leaving the rendered fat in the pot. This fat carries concentrated beef flavor that will enhance our vegetables.
Phase 2: Aromatics Development (5-7 minutes)
Add diced onions to the same pot with the beef fat. Cook until translucent and lightly caramelized, stirring occasionally. The onions should release their natural sugars and develop a golden color.
Introduce the garlic-ginger paste, stirring constantly for 30 seconds until fragrant. Be careful not to burn these delicate aromatics, as they can turn bitter quickly.
Add the ground spice mixture (cumin, coriander, turmeric, paprika) and cook for another 30 seconds, allowing the spices to bloom and release their essential oils.
Phase 3: Tomato Integration (8-10 minutes)
Add diced tomatoes to the pot, along with bay leaves and a pinch of salt. The salt helps break down the tomatoes and release their juices more quickly.
Cook the tomatoes until they begin to break down and form a thick, sauce-like consistency. This process concentrates the flavors and creates the liquid base for braising our collard greens.
Return the browned ground beef to the pot, stirring to combine all ingredients evenly.
Phase 4: Greens Integration and Braising (20-25 minutes)
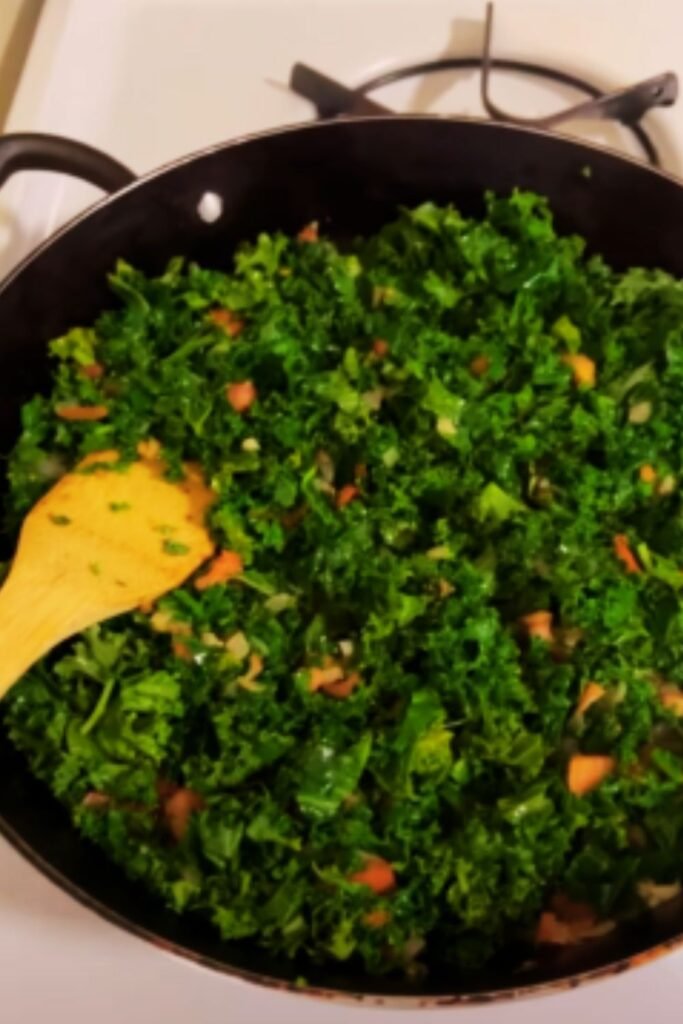
Add the prepared collard greens in batches, stirring each addition until wilted before adding more. Fresh greens will seem voluminous initially but will reduce significantly as they cook.
Once all greens are added and wilted, add 1 cup of warm water or beef stock. The liquid should partially cover the greens but not completely submerge them.
Bring to a gentle boil, then reduce heat to low, cover, and simmer for 20-25 minutes. Stir occasionally to prevent sticking and ensure even cooking.
The greens are perfectly done when they’re tender but still retain some texture – not mushy or overcooked.
Final Seasoning and Finishing
Taste and adjust seasoning with salt and freshly ground black pepper. Remove bay leaves before serving, as they’re not meant to be eaten.
Let the dish rest for 5 minutes off the heat to allow flavors to meld and settle.
Nutritional Benefits and Health Considerations
Sukuma wiki offers exceptional nutritional value, making it an ideal choice for health-conscious families. Understanding these benefits helps appreciate why this dish has sustained generations of Kenyan families.
Comprehensive Nutritional Analysis
| Nutrient Category | Key Components | Health Benefits | Daily Value Percentage* |
|---|---|---|---|
| Vitamins | Vitamin A (15,000 IU), Vitamin C (120mg), Vitamin K (1,000mcg) | Eye health, immune support, bone strength | 300%, 200%, 1,250% |
| Minerals | Iron (6mg), Calcium (180mg), Potassium (400mg) | Blood health, bone density, heart function | 33%, 18%, 11% |
| Protein | Complete protein from beef (25g per serving) | Muscle maintenance, satiety | 50% |
| Fiber | Dietary fiber (8g per serving) | Digestive health, blood sugar regulation | 32% |
| Antioxidants | Beta-carotene, lutein, zeaxanthin | Anti-inflammatory, cellular protection | Varies |
*Based on 2,000-calorie diet for average adult
Health Benefits Deep Dive
Cardiovascular Support : The high potassium content helps regulate blood pressure, while fiber aids in cholesterol management. The combination of lean protein and vegetables creates a heart-healthy meal profile.
Bone Health Enhancement : Exceptional vitamin K content supports bone mineralization, while calcium and magnesium work synergistically to maintain bone density.
Immune System Strengthening : High vitamin C levels, combined with antioxidants from both greens and spices, provide robust immune system support.
Digestive Health Promotion : The fiber content supports healthy gut bacteria while aiding in regular digestion and blood sugar stabilization.
Serving Suggestions and Meal Pairing
Sukuma wiki’s versatility shines through various serving options. My favorite presentations balance the rich, savory flavors with complementary textures and tastes.
Traditional Kenyan Accompaniments
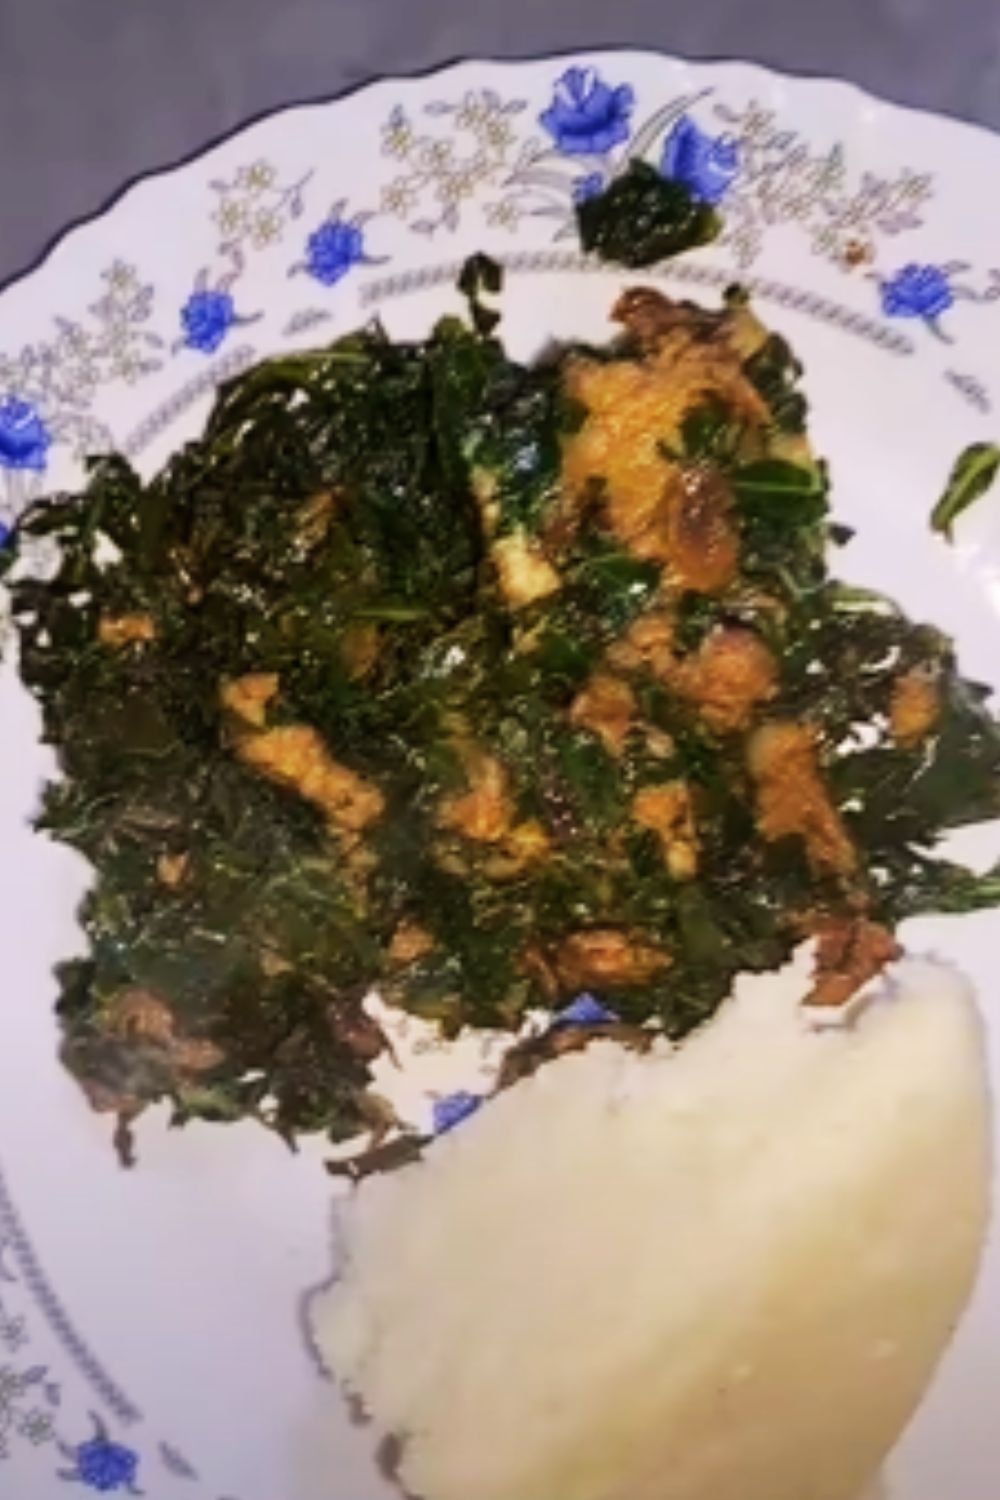
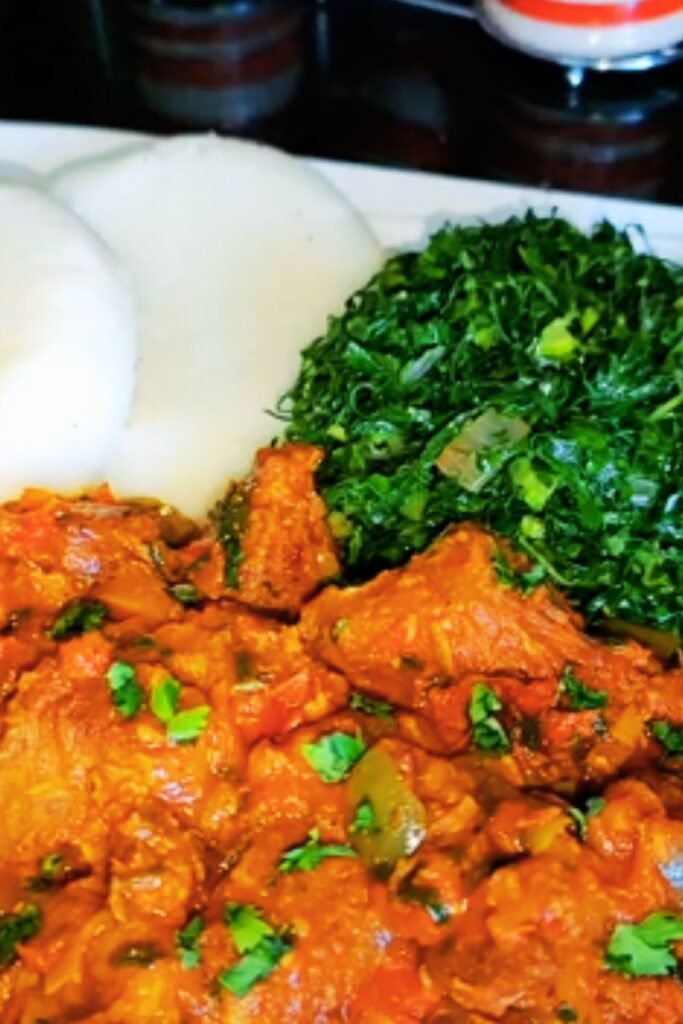
Ugali (Cornmeal Staple) : The classic pairing involves serving sukuma wiki alongside freshly prepared ugali. The neutral cornmeal provides a perfect canvas for the dish’s bold flavors while offering satisfying substance.
Steamed White Rice : Long-grain white rice absorbs the flavorful juices beautifully, creating a complete meal that’s both filling and economical.
Chapati or Flatbread : Warm, soft chapati allows diners to scoop up the greens and beef, creating an interactive eating experience that’s perfect for family meals.
Modern Serving Innovations
Quinoa Bowl Base : For a protein-rich, gluten-free option, serve sukuma wiki over cooked quinoa, adding avocado slices and a dollop of plain Greek yogurt.
Sweet Potato Mash : Creamy mashed sweet potatoes provide natural sweetness that balances the savory elements while adding additional beta-carotene.
Cauliflower Rice : For low-carb diets, cauliflower rice maintains the traditional feel while reducing overall carbohydrate content.
Portion and Presentation Guidelines
| Serving Style | Portion Size | Presentation Tips | Complementary Elements |
|---|---|---|---|
| Main Course | 1.5 cups sukuma wiki | Serve in deep bowls with garnish | Fresh cilantro, lemon wedges |
| Side Dish | 3/4 cup | Arrange alongside grilled proteins | Pickled vegetables, hot sauce |
| Family Style | Large serving bowl | Present with serving spoons | Multiple accompaniment options |
| Individual Plating | 1 cup with base | Layer over chosen grain/starch | Colorful vegetable medley |
Storage, Reheating, and Meal Prep Strategies
One of sukuma wiki’s greatest advantages is its exceptional storage capability and flavor improvement over time. Understanding proper storage techniques ensures you can enjoy this dish for days after preparation.
Refrigeration Guidelines
Optimal Storage Conditions : Transfer cooled sukuma wiki to airtight containers within 2 hours of cooking. Properly stored, it maintains quality for 4-5 days in the refrigerator at 40°F or below.
Container Selection : Use glass containers when possible, as they don’t absorb flavors and allow easy monitoring of food quality. Leave 1-inch headspace to accommodate expansion.
Flavor Development : Like many braised dishes, sukuma wiki actually tastes better the next day as flavors continue to meld and intensify during storage.
Freezing Techniques
Preparation for Freezing : Cool completely before freezing. Divide into meal-sized portions using freezer-safe containers or heavy-duty freezer bags.
Freezer Duration : Maintains optimal quality for up to 3 months when stored at 0°F. Label containers with contents and date for easy identification.
Thawing Process : Thaw overnight in refrigerator for best results. Avoid thawing at room temperature to prevent bacterial growth.
Reheating Methods
| Method | Time Required | Best For | Pro Tips |
|---|---|---|---|
| Stovetop | 8-10 minutes | Best flavor retention | Add splash of water, stir frequently |
| Microwave | 3-5 minutes | Quick individual portions | Cover, stir halfway through |
| Oven | 15-20 minutes | Large portions | Cover with foil, add moisture if needed |
| Slow Cooker | 1-2 hours on low | Hands-off reheating | Add minimal liquid, stir occasionally |
Recipe Variations and Customizations
The beauty of sukuma wiki lies in its adaptability. Over the years, I’ve developed numerous variations that cater to different dietary needs and flavor preferences while maintaining the dish’s essential character.
Protein Alternatives
Chicken Sukuma Wiki : Replace ground beef with diced chicken thighs for a leaner option with equally rich flavor. Cook chicken pieces until golden before adding vegetables.
Fish Variation (Traditional) : Use firm white fish like tilapia, cut into chunks and added during the last 10 minutes of cooking. This coastal variation offers lighter, more delicate flavors.
Vegetarian Version : Omit meat entirely and add extra vegetables like diced carrots, bell peppers, or mushrooms. Increase spices slightly to compensate for missing meat flavors.
Legume Enhancement : Add cooked black beans, kidney beans, or lentils for plant-based protein while maintaining heartiness.
Spice Level Modifications
Mild Version : Reduce or omit black pepper and paprika. Add extra tomatoes for natural sweetness that appeals to sensitive palates.
Spicy Enhancement : Incorporate fresh chilies (serrano or jalapeño) with the aromatics, or add cayenne pepper to taste. Scotch bonnet peppers provide authentic East African heat.
Aromatic Boost : Add whole spices like cardamom pods, cinnamon stick, or star anise during braising for complex, warming flavors.
Seasonal Adaptations
Summer Fresh Version : Use peak-season tomatoes and add fresh herbs like basil or oregano in the final minutes of cooking.
Winter Comfort Style : Increase liquid slightly and extend cooking time for extra tender, stew-like consistency perfect for cold weather.
Spring Green Variation : Mix collard greens with other spring greens like spinach, chard, or kale for varied textures and flavors.
Frequently Asked Questions
Q: Can I use frozen collard greens instead of fresh ones?
While fresh collard greens provide the best texture and flavor, frozen greens work in a pinch. Thaw completely and drain excess moisture before adding to the pot. Reduce cooking time by 5-7 minutes since frozen greens are partially cooked during the blanching process before freezing. The texture will be slightly softer than fresh, but the flavors remain delicious.
Q: What’s the best way to remove bitterness from collard greens?
Collard greens can sometimes have a slightly bitter taste, especially older leaves. Remove thick stems and ribs completely, as these contain most bitter compounds. If your greens still taste bitter, blanch them in boiling salted water for 2-3 minutes before adding to the recipe. The salt and tomatoes in the recipe also help neutralize any remaining bitterness naturally.
Q: Can I make this dish ahead for meal prep?
Absolutely! Sukuma wiki is perfect for meal prep and actually improves in flavor when made ahead. Prepare the full recipe, cool completely, and portion into containers. It keeps well for 4-5 days refrigerated. For best results when reheating, add a splash of water or broth to prevent sticking and maintain moisture.
Q: How do I know when the collard greens are properly cooked?
Properly cooked collard greens should be tender enough to cut easily with a fork but still retain some texture – not mushy or falling apart. They should be bright green in color, not olive or brown, which indicates overcooking. Taste-testing is your best guide; they should have no raw, harsh flavor but maintain a pleasant, slightly firm bite.
Q: What can I substitute for ground beef to make this dish more budget-friendly?
Several economical alternatives work well: ground turkey or chicken (often less expensive than beef), canned fish like mackerel or sardines (traditional in coastal Kenya), dried lentils or beans (soak and cook separately first), or simply increase the vegetables and omit meat entirely. Each option provides different nutritional benefits while keeping costs low.
Q: Why is my sukuma wiki watery, and how can I fix it?
Watery sukuma wiki usually results from not cooking off enough moisture from the tomatoes or adding too much liquid during braising. To fix: remove the lid and simmer uncovered for 10-15 minutes to evaporate excess liquid. For future batches, ensure tomatoes cook down to a thick paste before adding greens, and add liquid gradually as needed.
Q: Can I use other types of greens in this recipe?
Yes! While collard greens are traditional, kale, Swiss chard, spinach, or mustard greens work well. Adjust cooking times accordingly: delicate greens like spinach need only 5-10 minutes, while tough greens like mustard greens might need 30+ minutes. Mixing different greens creates interesting flavor and texture combinations.
Q: How do I store leftover sukuma wiki, and how long does it last?
Store cooled sukuma wiki in airtight containers in the refrigerator for up to 5 days. The flavors actually improve after a day or two. For longer storage, freeze in portion-sized containers for up to 3 months. Always reheat thoroughly before eating, and if it smells off or shows signs of mold, discard immediately.
The journey of mastering sukuma wiki has taught me that the best dishes often come from the simplest ingredients treated with respect and patience. This humble Kenyan classic proves that you don’t need expensive ingredients to create something truly satisfying and nourishing. Whether you’re feeding a large family on a budget or looking to incorporate more nutritious greens into your diet, this recipe delivers on all fronts.
What I love most about sharing this recipe is knowing that it connects us to generations of Kenyan cooks who understood the art of making the most with what they had. Every time I prepare sukuma wiki, I’m reminded that good food is about more than just ingredients – it’s about bringing people together around the table and nourishing both body and soul.
Try this recipe, make it your own, and discover why sukuma wiki has earned its place as a beloved staple across East Africa and beyond.