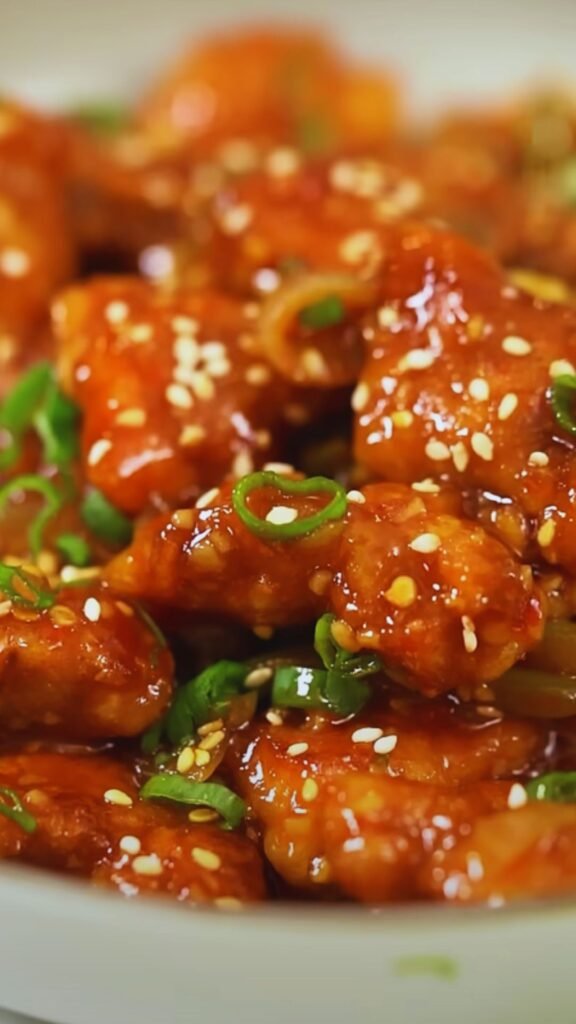
There’s something magical about the perfect balance of sweet and spicy that makes my taste buds dance with joy. That’s exactly what happens when I make my sweet chili chicken recipe—a dish that’s become a regular star at my dinner table. This Asian-inspired delight combines tender chicken pieces coated in a glossy, sticky sauce that delivers a gentle heat followed by a delightful sweetness that’s simply irresistible.
I’ve spent years perfecting this recipe, and today I’m thrilled to share all my secrets with you. Whether you’re cooking for picky eaters or adventurous food lovers, this sweet chili chicken hits all the right notes. The best part? It comes together in under 30 minutes, making it perfect for busy weeknights when you want something delicious without spending hours in the kitchen.
Why You’ll Love This Sweet Chili Chicken
Before we dive into the recipe, let me tell you why this dish has earned a permanent spot in my cooking repertoire:
- Quick and straightforward: Ready in under 30 minutes from start to finish
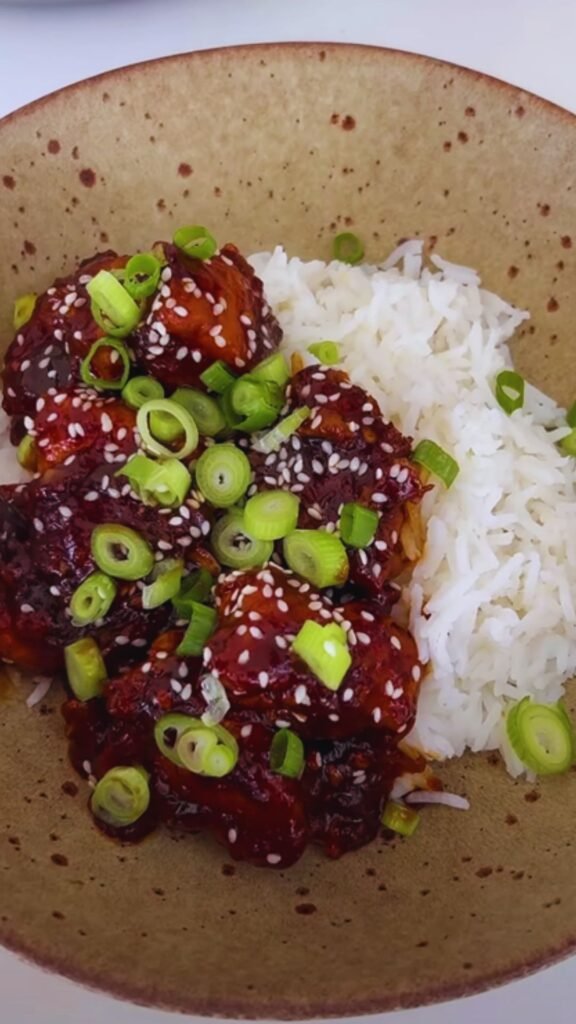
- Versatile: Works perfectly with rice, noodles, or even wrapped in lettuce leaves
- Customizable heat level: Easily adjusted to suit mild or spicy preferences
- Meal-prep friendly: Tastes even better the next day
- Crowd-pleaser: Appeals to both adults and children
- Balanced flavor profile: The perfect harmony of sweet, spicy, and savory
Ingredients You’ll Need
For the chicken:
- 1.5 pounds (680g) boneless, skinless chicken thighs (or breasts), cut into 1-inch pieces
- 2 tablespoons cornstarch
- 1/2 teaspoon salt
- 1/4 teaspoon black pepper
- 2 tablespoons vegetable oil for frying
For the sweet chili sauce:
- 1/3 cup sweet chili sauce (store-bought or homemade)
- 3 tablespoons soy sauce (low-sodium preferred)
- 2 tablespoons honey
- 1 tablespoon rice vinegar
- 1 tablespoon sriracha sauce (adjust to taste)
- 3 cloves garlic, minced
- 1 tablespoon fresh ginger, grated
- 1 tablespoon sesame oil
For garnish:
- 3 green onions, thinly sliced
- 1 tablespoon sesame seeds
- Fresh cilantro leaves (optional)
- Lime wedges for serving
Kitchen Equipment
Having the right tools ready will make the cooking process smooth and enjoyable:
- Large non-stick skillet or wok
- Mixing bowls (medium and small)
- Measuring spoons and cups
- Sharp knife and cutting board
- Whisk
- Tongs or spatula
- Microplane or grater for ginger
Step-by-Step Instructions
Preparing the Chicken
- Pat the chicken pieces dry with paper towels. This helps the cornstarch coating stick better and promotes better browning.
- In a medium bowl, combine the chicken pieces, cornstarch, salt, and pepper. Toss until each piece is evenly coated.
- Let the chicken sit for about 5 minutes to allow the cornstarch to adhere properly.
Making the Sweet Chili Sauce
- While the chicken is resting, prepare your sauce. In a small bowl, whisk together the sweet chili sauce, soy sauce, honey, rice vinegar, sriracha, minced garlic, grated ginger, and sesame oil until well combined.
- Taste and adjust the seasoning if needed. If you want it sweeter, add a bit more honey. For more heat, add additional sriracha.
Cooking the Chicken
- Heat a large non-stick skillet or wok over medium-high heat. Add the vegetable oil and let it get hot but not smoking.
- Add the coated chicken pieces to the pan in a single layer. Work in batches if necessary to avoid overcrowding, which would steam rather than crisp the chicken.
- Cook for 3-4 minutes without moving the chicken to allow it to develop a golden crust.
- Flip the pieces and cook for another 3-4 minutes until the chicken is cooked through (internal temperature of 165°F or 74°C) and golden brown on all sides.
- If cooking in batches, transfer the cooked chicken to a plate and continue with the remaining pieces.
Combining Chicken and Sauce
- Once all the chicken is cooked, return all pieces to the pan if you worked in batches.
- Reduce heat to medium-low and pour the sweet chili sauce mixture over the chicken.
- Toss to coat each piece thoroughly, and allow the sauce to simmer and thicken for 2-3 minutes, stirring occasionally.
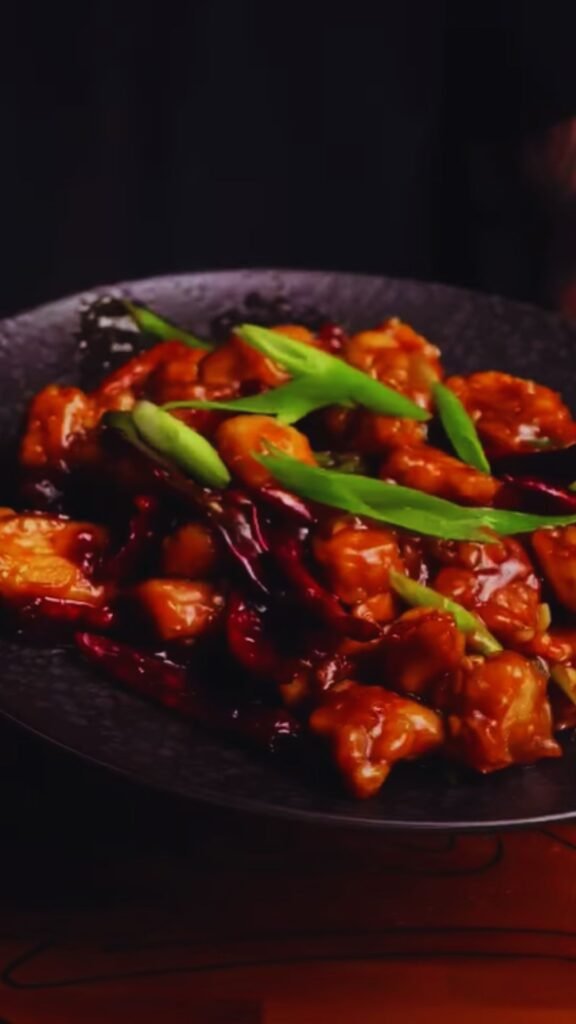
- The sauce should become glossy and coat the chicken pieces beautifully.
Finishing Touches
- Remove from heat and sprinkle with sliced green onions and sesame seeds.
- Add fresh cilantro leaves if using.
- Serve immediately with lime wedges on the side for squeezing over the dish.
Pro Tips for Perfect Sweet Chili Chicken
Throughout my years of making this recipe, I’ve discovered some tricks that elevate it from good to outstanding:
- Use chicken thighs for more flavor: While chicken breasts work fine, thighs have more fat and stay juicier.
- Don’t skip the cornstarch: It creates that wonderful crispy exterior that soaks up the sauce perfectly.
- Control the heat: The beauty of making your own sauce is adjusting the spice level exactly to your preference.
- Fresh aromatics make a difference: Fresh garlic and ginger create deeper, more complex flavors than their powdered counterparts.
- Let the sauce reduce: Don’t rush the final simmering step—this is when the sauce thickens and intensifies in flavor.
- Check for doneness: Use a meat thermometer to ensure chicken reaches 165°F (74°C) for food safety.
Nutritional Information
For those watching their intake, here’s the approximate nutritional breakdown per serving (recipe makes 4 servings):
| Nutrient | Amount per Serving |
|---|---|
| Calories | 385 kcal |
| Protein | 29g |
| Carbohydrates | 24g |
| Sugar | 18g |
| Fat | 19g |
| Saturated Fat | 4g |
| Fiber | 1g |
| Sodium | 890mg |
| Potassium | 412mg |
| Vitamin A | 135 IU |
| Vitamin C | 6mg |
| Calcium | 45mg |
| Iron | 2mg |
Serving Suggestions
This versatile dish pairs wonderfully with several sides. Here are my favorite ways to serve it:
Grain Accompaniments
- Steamed jasmine or basmati rice
- Brown rice for a healthier option
- Coconut rice for a tropical twist
- Fried rice (turn leftovers into an amazing fried rice the next day)
- Quinoa for a protein boost
- Vermicelli rice noodles
Vegetable Side Dishes
- Stir-fried bok choy or Chinese broccoli
- Steamed broccoli florets
- Simple cucumber salad with rice vinegar dressing
- Pickled vegetables for a tangy contrast
- Roasted sweet potatoes
- Fresh mango slices for a sweet complement to the spicy chicken
Presentation Ideas
- Serve in a lettuce cup for a low-carb option
- Create a rice bowl with the chicken on top and vegetables arranged around it
- Use as filling for summer rolls with rice paper wrappers
- Serve on a skewer for an impressive appetizer
- Create a colorful plate with purple cabbage slaw on the side
Make-Ahead and Storage Tips
One of the reasons I love this recipe is how well it works for meal prep:
Make-Ahead Options:
- Prepare the sauce up to 3 days ahead and store in an airtight container in the refrigerator.
- Cut the chicken and toss with the cornstarch mixture up to 1 day ahead, keeping covered in the refrigerator.
- Slice garnishes like green onions up to 1 day ahead and store in a damp paper towel in the refrigerator.
Storage Guidelines:
- Refrigerate leftovers in an airtight container for up to 3 days.
- Freeze cooked sweet chili chicken for up to 2 months. The texture may change slightly but the flavor remains delicious.
Reheating Methods:
- Microwave: Heat in 30-second intervals, stirring between each until warmed through.
- Stovetop: Reheat in a skillet over medium-low heat with a splash of water to prevent drying out.
- Oven: Place in an oven-safe dish, cover with foil, and warm at 325°F (165°C) for about 15 minutes or until heated through.
Variations to Try
The beauty of this recipe lies in its adaptability. Here are some delicious variations I’ve experimented with:
Protein Swaps
- Sweet Chili Shrimp: Replace chicken with peeled and deveined shrimp. Reduce cooking time to about 2 minutes per side.
- Sweet Chili Tofu: Use extra-firm tofu, pressed and cubed. Deep fry or air fry before tossing in the sauce for the best texture.
- Sweet Chili Salmon: Brush the sauce on salmon fillets and bake or grill for a healthier option.
Vegetable Add-Ins
- Add bell peppers, snap peas, and mushrooms to create a complete stir-fry.
- Include chunks of pineapple for a sweet and tangy twist.
- Mix in water chestnuts or bamboo shoots for added crunch.
Flavor Variations
- Add a tablespoon of peanut butter to the sauce for a Thai-inspired taste.
- Include a tablespoon of orange zest and juice for a citrusy note.
- Mix in a teaspoon of five-spice powder for complex Chinese flavors.
- Substitute part of the sweet chili sauce with hoisin sauce for a different sweet-savory balance.
Dietary Adaptations
I believe everyone should be able to enjoy this delicious dish, so here are some adaptations for common dietary needs:
Gluten-Free
- Use tamari or coconut aminos instead of soy sauce.
- Double-check that your sweet chili sauce is gluten-free (many commercial brands contain wheat).
- Ensure your sriracha sauce is gluten-free.
Low-Carb/Keto
- Replace honey with a sugar-free sweetener like monk fruit or erythritol.
- Use a sugar-free sweet chili sauce or make your own with sugar substitutes.
- Serve over cauliflower rice instead of regular rice.
- Reduce cornstarch to 1 tablespoon or replace with almond flour.
Paleo/Whole30
- Use coconut aminos instead of soy sauce.
- Replace the honey with date paste or omit.
- Make your own compliant sweet chili sauce using dates or approved sweeteners.
- Use arrowroot powder instead of cornstarch.
- Serve with cauliflower rice or roasted sweet potatoes.
Lower Sodium
- Use low-sodium soy sauce or coconut aminos.
- Reduce the amount of soy sauce by half.
- Balance with extra herbs like cilantro and mint for flavor without the salt.
Homemade Sweet Chili Sauce
If you prefer to make everything from scratch, here’s my recipe for homemade sweet chili sauce:
| Ingredient | Amount |
|---|---|
| Red chili peppers, finely chopped | 3-4 (adjust for heat preference) |
| Garlic, minced | 4 cloves |
| Rice vinegar | 1/2 cup |
| Sugar | 1/2 cup |
| Water | 1/4 cup |
| Salt | 1 teaspoon |
| Cornstarch slurry (1 tbsp cornstarch + 2 tbsp water) | 3 tablespoons |
Instructions:
- Combine all ingredients except the cornstarch slurry in a small saucepan.
- Bring to a simmer over medium heat and cook for 5 minutes.
- Add the cornstarch slurry and continue to cook, stirring constantly, until the sauce thickens (about 1-2 minutes).
- Let cool completely before storing in an airtight container in the refrigerator for up to 2 weeks.
Common Mistakes to Avoid
Even experienced cooks can sometimes run into issues. Here are some pitfalls to avoid when making sweet chili chicken:
- Overcrowding the pan: This leads to steamed rather than crispy chicken. Cook in batches if necessary.
- Not patting the chicken dry: Excess moisture prevents proper browning and crispiness.
- Adding the sauce too early: This prevents the chicken from developing that desirable crispy texture.
- Cooking over heat that’s too high: This can burn the garlic and ginger in the sauce, creating bitter flavors.
- Not adjusting seasonings to taste: Sweet chili sauces vary in sweetness and heat, so always taste and adjust.
- Rushing the sauce reduction: The sauce needs time to thicken and coat the chicken properly.
Food Safety Tips
Food safety is always a priority in my kitchen, especially when handling chicken:
- Always wash hands thoroughly before and after handling raw chicken.
- Use separate cutting boards for meat and vegetables to prevent cross-contamination.
- Store raw chicken on the bottom shelf of your refrigerator to prevent drips onto other foods.
- Ensure chicken reaches an internal temperature of 165°F (74°C) before consumption.
- Refrigerate leftovers within two hours of cooking.
- Never refreeze previously frozen and thawed raw chicken.
Frequently Asked Questions
Q: Can I use chicken breasts instead of thighs?
A: Absolutely! Chicken breasts work well in this recipe, though they tend to cook a bit faster and can dry out more easily. I recommend reducing the cooking time by about 1-2 minutes per side and watching carefully to ensure they remain juicy.
Q: How spicy is this dish?
A: As written, the recipe has a moderate heat level that builds gradually. The beauty is that you can easily adjust the spiciness by increasing or decreasing the amount of sriracha sauce and choosing a milder or spicier sweet chili sauce.
Q: Can I make this dish ahead for a party?
A: Yes! You can prepare it up to 24 hours in advance and reheat gently before serving. The flavors actually develop nicely overnight. For the best texture, I recommend slightly undercooking the chicken initially so it doesn’t become overcooked when reheated.
Q: Is there a way to make this recipe without cornstarch?
A: Yes, you can substitute arrowroot powder, potato starch, or rice flour for the cornstarch. Each will provide a slightly different texture, but all work well as alternatives. You could also skip the coating entirely for a lighter version, though the sauce won’t cling to the chicken quite as well.
Q: How can I tell when the chicken is done cooking?
A: The most reliable method is using a meat thermometer—chicken is safe to eat when it reaches an internal temperature of 165°F (74°C). Visually, the chicken pieces should be golden brown on the outside with no pink remaining in the center when cut open.
Q: Can I use this same sauce for other proteins?
A: Absolutely! This versatile sauce works beautifully with shrimp, firm white fish, tofu, tempeh, or even roasted vegetables. Just adjust the cooking time according to your chosen protein.
Q: My sauce didn’t thicken enough. What went wrong?
A: The sauce thickens as it simmers and continues to thicken as it cools. If yours didn’t reach the desired consistency, you can simmer it longer or make a small cornstarch slurry (1 teaspoon cornstarch mixed with 1 tablespoon cold water) and stir it into the sauce to help it thicken.
Q: Can I make this in an air fryer?
A: Yes! Air fry the coated chicken pieces at 380°F (193°C) for about 12-15 minutes, shaking the basket halfway through. Then toss the crispy chicken with the heated sauce in a separate bowl.
A Personal Note
I first discovered my love for sweet chili chicken during a trip to Thailand years ago. The street food vendors created magic with such simple ingredients, and I was determined to recreate that experience at home. Dozens of attempts later, this recipe emerged as my family’s favorite version.
What I cherish most about this dish is its ability to bring people together. Even my pickiest eaters clean their plates when sweet chili chicken is on the menu. I hope it brings the same joy to your table as it has to mine.
Remember that cooking is as much about the journey as the destination. Don’t be afraid to adjust this recipe to suit your personal taste preferences. That’s how good recipes become great ones, and how great ones become treasured family traditions.

