When I first discovered the magic of making breakfast hot pockets at home, my entire morning routine transformed. No more rushing out the door with nothing but coffee in my system, and definitely no more settling for those processed frozen versions that leave you feeling unsatisfied. These homemade breakfast hot pockets have become my secret weapon for busy mornings, weekend brunches, and even meal prep sessions.
The beauty of homemade breakfast hot pockets lies in their versatility and the control you have over every single ingredient. I’ve experimented with countless combinations over the years, and I’m excited to share everything I’ve learned about creating these portable breakfast perfections that will revolutionize your mornings.
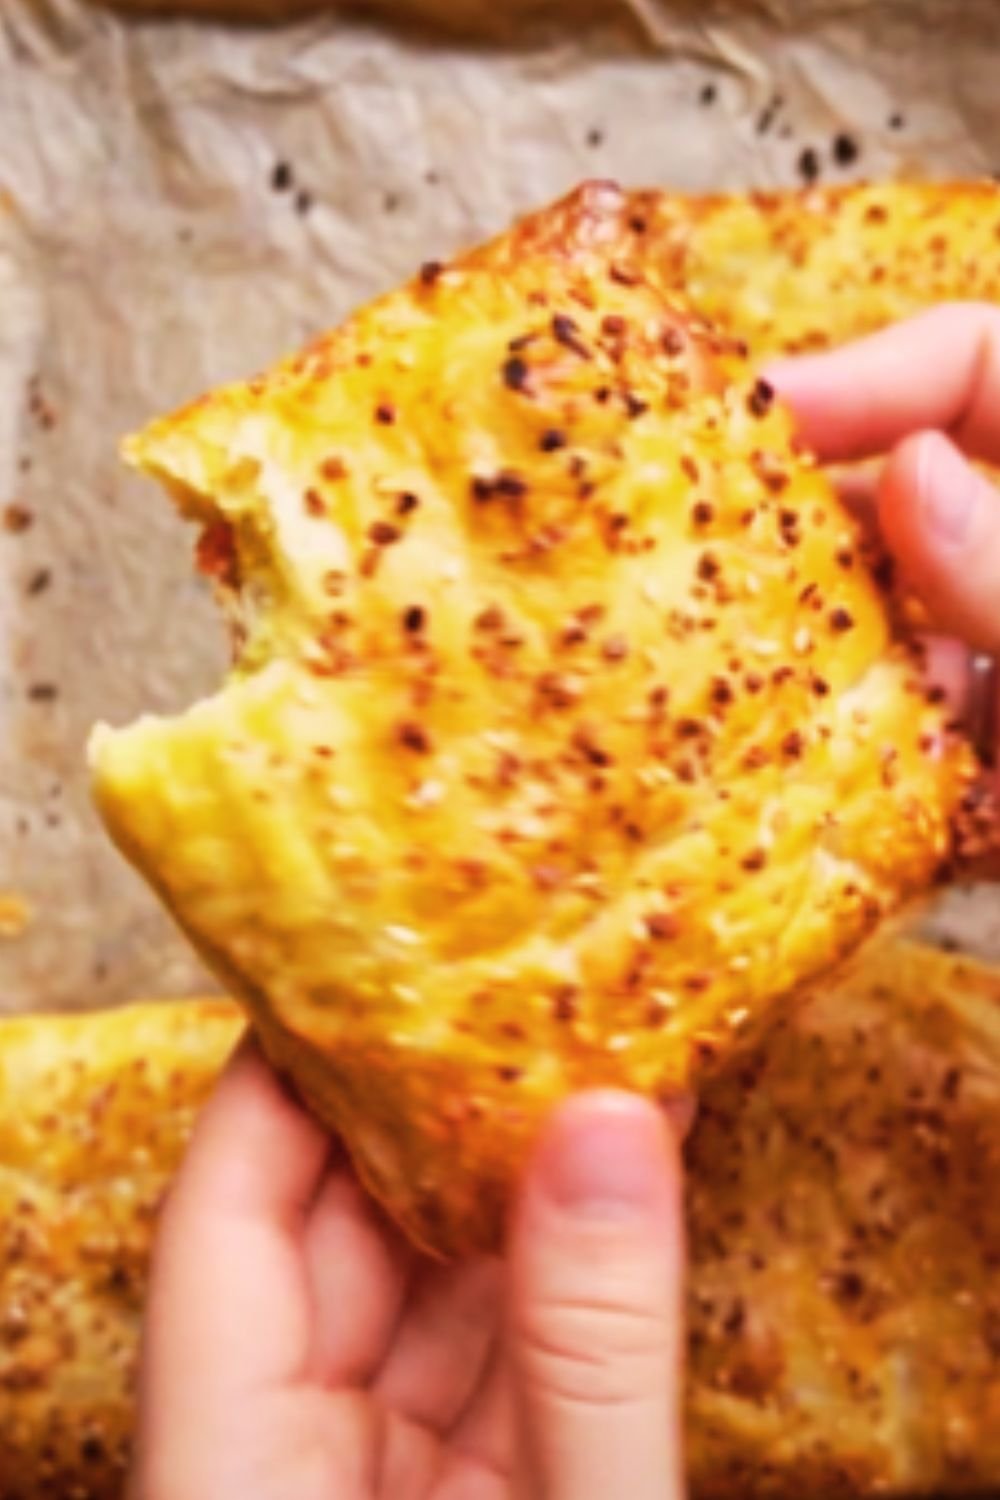
What Makes Breakfast Hot Pockets Special
Breakfast Hot Pocket: A handheld pastry pocket filled with breakfast ingredients like eggs, cheese, meat, and vegetables, encased in a golden, flaky dough that can be eaten on-the-go.
Meal Prep Champion: These beauties can be made ahead, frozen, and reheated whenever you need a quick, satisfying breakfast.
Customization King: Unlike store-bought versions, you control every ingredient, making them as healthy or indulgent as you prefer.
The concept might seem simple, but mastering the technique requires understanding the balance between dough consistency, filling moisture content, and cooking methods. I’ve made every mistake possible, from soggy bottoms to exploding pockets, so you don’t have to.
Essential Ingredients and Their Roles
Dough Components
Creating the perfect dough foundation requires precise ingredient selection. I’ve found that using a combination of all-purpose flour with a touch of bread flour creates the ideal texture – sturdy enough to hold generous fillings yet tender enough to bite through easily.
| Ingredient | Amount | Purpose | Substitution Options |
|---|---|---|---|
| All-purpose flour | 2½ cups | Structure and texture | Whole wheat flour (reduce by ¼ cup) |
| Bread flour | ½ cup | Extra strength | Additional all-purpose flour |
| Cold butter | 8 tablespoons | Flakiness and flavor | Vegetable shortening, cold margarine |
| Ice water | 6-8 tablespoons | Dough binding | Cold milk, cold buttermilk |
| Salt | 1 teaspoon | Flavor enhancement | Sea salt, kosher salt |
| Sugar | 1 tablespoon | Browning and tenderness | Honey, maple syrup (reduce liquid) |
Filling Essentials
The filling combination determines whether your hot pocket becomes a memorable breakfast or a disappointing mess. I’ve learned that managing moisture content is crucial – too wet and your dough becomes soggy, too dry and the filling lacks flavor impact.
| Protein Options | Preparation Method | Moisture Level | Flavor Profile |
|---|---|---|---|
| Scrambled eggs | Cook until just set | Medium | Creamy, mild |
| Breakfast sausage | Crumble and cook through | Low | Savory, spiced |
| Canadian bacon | Dice and lightly sauté | Low | Smoky, lean |
| Turkey bacon | Cook crisp, crumble | Very low | Light, crispy |
| Ham | Dice small | Low | Salty, traditional |

Step-by-Step Preparation Method
Creating the Perfect Dough
My dough-making process has evolved through countless trials. The key lies in temperature control and minimal handling to achieve that perfect flaky texture.
Start by combining your dry ingredients in a large mixing bowl. I always sift my flour to ensure even distribution of salt and sugar. Cut the cold butter into small cubes – and I mean really cold butter, straight from the refrigerator.
Using a pastry cutter or two knives, work the butter into the flour mixture until it resembles coarse crumbs with some pea-sized butter pieces remaining. These butter pieces create the flaky layers we’re after.
Gradually add ice water, one tablespoon at a time, mixing gently with a fork. The dough should just come together when pressed – resist the urge to overmix. I learned this lesson the hard way after producing countless tough, chewy disasters.
Divide the dough into two portions, wrap in plastic film, and refrigerate for at least 30 minutes. This resting period allows the gluten to relax and the butter to firm up again.
Preparing Your Fillings
While the dough chills, I prepare all my fillings and let them cool completely. Room temperature fillings are essential – hot fillings will melt your butter and create a mess.
For eggs, I scramble them until just barely set, as they’ll continue cooking during the baking process. Season generously with salt, pepper, and any herbs you enjoy. I particularly love adding fresh chives or dried oregano.
Cook your chosen protein until fully done, then drain on paper towels to remove excess grease. Crumble or dice into small, uniform pieces for even distribution.
Prepare vegetables by sautéing until tender and removing excess moisture. Bell peppers, onions, and mushrooms work beautifully, but make sure they’re not watery.

Assembly Techniques
Rolling out the dough requires patience and the right technique. I work with one portion at a time, keeping the other refrigerated. On a lightly floured surface, roll the dough into a rectangle about ⅛-inch thick.
Cut the dough into rectangles approximately 4×6 inches. I find this size perfect for a substantial breakfast that’s still manageable to eat.
Place about 2-3 tablespoons of filling on one half of each rectangle, leaving a ¾-inch border around the edges. Don’t overfill – I learned this lesson after several explosive failures during baking.
Brush the edges with beaten egg wash, then fold the dough over the filling. Press the edges firmly with a fork to seal, creating that classic crimped appearance.
Cooking Methods and Techniques
Oven Baking Method
Preheat your oven to 375°F (190°C). This temperature provides the perfect balance of cooking the filling through while achieving golden-brown pastry.
Place the assembled hot pockets on a parchment-lined baking sheet, spacing them about 2 inches apart. Brush the tops with egg wash for that beautiful golden finish.
Cut 2-3 small slits in the top of each pocket to allow steam to escape. This prevents the dreaded pocket explosion that ruins both your breakfast and your oven.
Bake for 25-30 minutes until golden brown and the internal temperature reaches 165°F (74°C). I always use a food thermometer to ensure food safety, especially with egg fillings.
Air fryer Alternative
For those who prefer the air fryer method, preheat to 360°F (182°C). Cook for 12-15 minutes, flipping halfway through. The air fryer creates an incredibly crispy exterior while keeping the inside perfectly moist.
Nutritional Benefits and Considerations
| Nutrient | Per Serving | Daily Value % | Health Benefits |
|---|---|---|---|
| Protein | 18-22g | 36-44% | Muscle maintenance, satiety |
| Carbohydrates | 35-40g | 12-13% | Energy source |
| Fat | 15-20g | 23-31% | Hormone production, vitamin absorption |
| Fiber | 2-4g | 8-16% | Digestive health |
| Calcium | 150-200mg | 15-20% | Bone health |
| Iron | 3-4mg | 17-22% | Oxygen transport |
The beauty of homemade breakfast hot pockets lies in their nutritional flexibility. By controlling ingredients, I can create versions that fit various dietary needs while maintaining incredible flavor.
Flavor Variations and Creative Combinations
Classic American Breakfast
My go-to combination features scrambled eggs, crispy bacon bits, sharp cheddar cheese, and a touch of black pepper. This combination never fails to satisfy and reminds me of weekend breakfast at my grandmother’s house.
Mediterranean Inspiration
For a lighter option, I combine scrambled eggs with feta cheese, sun-dried tomatoes, fresh spinach, and a hint of oregano. The flavors transport me to a Greek island every morning.
Mexican Fiesta
Scrambled eggs with chorizo, pepper jack cheese, diced jalapeños, and a sprinkle of cumin create a spicy start to any day. I often serve these with a small bowl of salsa on the side.
Vegetarian Delight
Sautéed mushrooms, bell peppers, spinach, and Swiss cheese with scrambled eggs make for a nutrient-packed, meat-free option that even carnivores appreciate.

Storage and Meal Prep Strategies
Freezing for Future Convenience
One of my favorite aspects of breakfast hot pockets is their freezer-friendly nature. After assembly but before baking, I place them on a tray and freeze until solid. Then I transfer them to freezer bags with labels indicating flavors and dates.
From frozen, these can go straight into a 350°F oven for 35-40 minutes, or into the air fryer for 18-20 minutes. No thawing required, making them perfect for those chaotic mornings when planning ahead seemed impossible.
Refrigerator Storage
Fully cooked hot pockets keep in the refrigerator for up to 4 days. I reheat them in a 325°F oven for 10-12 minutes, which maintains the crispy exterior better than microwave reheating.
Batch Cooking Strategies
I typically dedicate a Sunday afternoon to making multiple dozen hot pockets in various flavors. This investment of time pays dividends throughout the week when I can grab a homemade breakfast without any morning preparation.
Troubleshooting Common Issues
Preventing Soggy Bottoms
The most frustrating issue I encountered early on was soggy pastry bottoms. The solution involves pre-cooking wet ingredients thoroughly, allowing all components to cool completely, and ensuring your oven is fully preheated before baking.
Avoiding Filling Explosions
Overfilling causes more problems than underfilling. I learned to leave adequate sealing space and always cut steam vents in the top of each pocket.
Achieving Even Browning
Rotating the baking sheet halfway through cooking ensures even browning on all sides. Some ovens have hot spots that can cause uneven results without this simple step.
Serving Suggestions and Accompaniments
Fresh Accompaniments
I love serving breakfast hot pockets with fresh fruit salad, particularly berries or sliced melon. The refreshing sweetness balances the rich, savory flavors perfectly.
A simple green salad with light vinaigrette makes an excellent lunch pairing when serving hot pockets later in the day.
Sauce Pairings
Homemade hollandaise sauce elevates any breakfast hot pocket to restaurant quality. For easier mornings, good-quality hot sauce or sriracha mayo provides excellent flavor enhancement.
Fresh salsa works beautifully with Mexican-inspired varieties, while tzatziki complements Mediterranean flavors perfectly.
Beverage Combinations
Strong coffee remains my preferred breakfast beverage with hot pockets, but fresh orange juice or vegetable smoothies provide excellent nutritional balance.
Herbal teas like chamomile or peppermint offer a lighter alternative that won’t compete with the rich flavors of the pockets.
Advanced Tips for Perfect Results
Dough Enhancement Techniques
Adding a tablespoon of sour cream to the dough creates extra tenderness and tangy flavor that complements egg fillings beautifully. I discovered this technique accidentally and now use it regularly.
Filling Innovation
Pre-cooking hash browns until crispy and adding them to egg fillings creates additional texture and heartiness. Just ensure they’re completely cooled before assembly.
Professional Presentation
Brushing finished hot pockets with melted butter immediately after baking creates an attractive sheen and adds extra richness. Sprinkling with coarse sea salt or everything bagel seasoning provides restaurant-quality appearance.
Cost Analysis and Budget Benefits
| Component | Store-bought (4 pack) | Homemade (4 pieces) | Savings |
|---|---|---|---|
| Base cost | $4.99 | $2.50 | $2.49 |
| Cost per piece | $1.25 | $0.63 | $0.62 |
| Annual savings (5 per week) | – | – | $161.20 |
| Quality improvement | Standard | Premium | Priceless |
Making breakfast hot pockets at home saves significant money while providing superior ingredients and customization options. The initial time investment pays dividends in both financial savings and meal satisfaction.
Frequently Asked Questions
Q: Can I make the dough ahead of time and refrigerate it for several days?
Absolutely! The dough actually improves with time in the refrigerator, up to 3 days. The resting period allows flavors to develop and makes rolling easier. Just bring it to room temperature for about 15 minutes before rolling if it becomes too firm.
Q: What’s the best way to prevent my hot pockets from getting soggy when reheating?
The key is avoiding the microwave for reheating. Use your oven at 325°F for 10-12 minutes, or the air fryer at 320°F for 5-7 minutes. This method maintains the crispy exterior while heating the filling evenly.
Q: Can I use store-bought pastry dough instead of making my own?
Yes, puff pastry or pie crust dough work well as shortcuts. However, homemade dough provides better flavor and texture control. If using store-bought, choose all-butter varieties for the best results.
Q: How do I know when my hot pockets are fully cooked?
The exterior should be golden brown, and the internal temperature should reach 165°F (74°C) when measured with a food thermometer. The pastry should sound hollow when tapped gently.
Q: Can I make sweet breakfast hot pocket versions?
Definitely! Try combinations like cream cheese with berries, apple cinnamon with a touch of brown sugar, or ricotta with honey and lemon zest. Adjust the dough by adding an extra tablespoon of sugar for sweet versions.
Q: What vegetables work best in breakfast hot pockets?
Vegetables with lower moisture content work best. Sautéed bell peppers, onions, mushrooms, and spinach are excellent choices. Avoid raw tomatoes or zucchini, which release too much moisture during cooking.
Q: How long can I keep frozen unbaked hot pockets?
Properly wrapped unbaked hot pockets maintain quality for up to 3 months in the freezer. Label them with contents and date for best organization. They can be baked directly from frozen with adjusted cooking times.
Q: Is it possible to make gluten-free breakfast hot pockets?
Yes! Use a gluten-free flour blend designed for pastry making. The texture will be slightly different, but the results are still delicious. You may need to add a binding agent like xanthan gum if it’s not included in your flour blend.
Creating homemade breakfast hot pockets has transformed my relationship with morning meals. These portable packages of comfort provide endless customization possibilities while delivering consistent satisfaction. Whether you’re meal prepping for busy weekdays or creating special weekend brunches, mastering this technique opens up a world of convenient breakfast possibilities that never compromise on flavor or quality.
The journey from my first failed attempts to consistently perfect results taught me that cooking success comes from understanding techniques rather than just following recipes. Each batch I make reinforces why homemade versions surpass any commercial alternative – fresher ingredients, better nutrition, significant cost savings, and the satisfaction of creating something delicious with my own hands.
Start with the basic combinations I’ve shared, then let your creativity guide you toward flavor profiles that match your preferences. Soon you’ll have your own signature breakfast hot pocket combinations that friends and family will request by name.