Have you ever found yourself craving those irresistible, crispy chicken nuggets but didn’t want to hit the drive-thru? I’ve been there too! After years of trial and error (and many batches of not-quite-right nuggets), I’ve finally perfected my homemade chicken nugget recipe that rivals any fast-food chain. Today, I’m sharing all my secrets so you can make these crowd-pleasers in your own kitchen.
What makes these nuggets special isn’t just their incredible taste, but how much healthier they are than their fast-food counterparts. When you make chicken nuggets at home, you control exactly what goes into them—no mystery ingredients, preservatives, or excessive sodium. Plus, you can customize the flavors to suit your family’s preferences.
Why Make Chicken Nuggets at Home?
Before diving into the recipe, let me share why I believe homemade nuggets are worth the effort:
- Quality Control: You select the chicken, ensuring it’s fresh and high-quality
- Healthier Options: Bake instead of fry, or use an air fryer for less oil
- Cost-Effective: Make a large batch for less than store-bought versions
- Customizable: Adjust seasonings to match your family’s preferences
- Freezer-Friendly: Make once, enjoy multiple times
- Kid-Approved: Even picky eaters love these!
When I first started making nuggets at home, my kids were skeptical—how could mom’s version possibly compete with their drive-thru favorites? But after one bite of these crispy, juicy morsels, they were converted. Now they actually request the homemade version!
Essential Equipment
Before we start cooking, let’s make sure you have everything you need:
| Equipment | Purpose | Recommended Type |
|---|---|---|
| Sharp Knife | For cutting chicken into even pieces | Chef’s knife or boning knife |
| Cutting Board | Separate one for raw chicken | Plastic or composite (easier to sanitize) |
| Mixing Bowls | For breading stations | Set of 3 different sizes |
| Baking Sheet | For oven baking method | Heavy-duty with rim |
| Wire Rack | Allows air circulation for crispier nuggets | Oven-safe cooling rack |
| Meat Thermometer | Safety first! | Instant-read digital |
| Air Fryer (optional) | For extra crispy results | Any model with 3+ quart capacity |
| Parchment Paper | Prevents sticking | Oven-safe version |
| Food Processor | For ground chicken version | Mini processor works fine |
Don’t worry if you don’t have every item listed. The essential tools are a good knife, cutting board, and something to cook the nuggets on. The rest just makes the process easier or improves the results.
Ingredients for Perfect Chicken Nuggets
Let’s talk ingredients! The beauty of homemade nuggets is that the ingredient list is simple and recognizable:
For the Chicken Base:
| Ingredient | Amount | Notes |
|---|---|---|
| Boneless, skinless chicken breasts | 2 pounds | Organic if possible |
| Salt | 1 teaspoon | I prefer kosher salt |
| Black pepper | ½ teaspoon | Freshly ground |
| Garlic powder | 1 teaspoon | Not garlic salt |
| Onion powder | 1 teaspoon | Adds depth without visible pieces |
| Paprika | ½ teaspoon | Sweet or smoked, your choice |
| Dried herbs (optional) | ½ teaspoon | Thyme, oregano, or Italian blend |
For the Breading Station:
| Ingredient | Amount | Notes |
|---|---|---|
| All-purpose flour | 1 cup | For the first dredging |
| Eggs | 2 large | Well beaten |
| Milk | ¼ cup | Helps thin the egg mixture |
| Breadcrumbs | 2 cups | Panko gives the crispiest results |
| Parmesan cheese (optional) | ¼ cup | Finely grated |
| Oil spray | As needed | For crispier baked nuggets |
For the Flavor Variations (Optional Add-ins):
| Variation | Add to Breadcrumbs | Add to Chicken |
|---|---|---|
| Italian | 1 tsp Italian herbs, 2 tbsp parmesan | ¼ tsp extra garlic powder |
| Spicy | ½ tsp cayenne, ½ tsp chili powder | Few drops of hot sauce |
| Ranch | 1 packet ranch seasoning (divided) | Half the packet mixed in |
| Lemon Herb | 1 tbsp lemon zest, 1 tsp dried herbs | ½ tsp lemon pepper |
| Curry | 1 tbsp mild curry powder | ½ tsp turmeric |
Preparation Steps
Now for the fun part! Here’s my step-by-step process for creating these nuggets:
Step 1: Prepare the Chicken
- Pat chicken breasts dry with paper towels
- Cut into 1½-inch cubes or nugget shapes (try to keep them uniform for even cooking)
- Place chicken pieces in a bowl and season with salt, pepper, garlic powder, onion powder, and paprika
- Toss to coat evenly and let sit for 15-30 minutes (this step really improves flavor)
Step 2: Set Up Your Breading Station
- Arrange three shallow dishes in a row:
- First dish: Flour seasoned with a pinch of salt and pepper
- Second dish: Eggs beaten with milk
- Third dish: Breadcrumbs mixed with parmesan (if using) and any optional seasonings
- Place a parchment-lined baking sheet at the end to hold the breaded nuggets
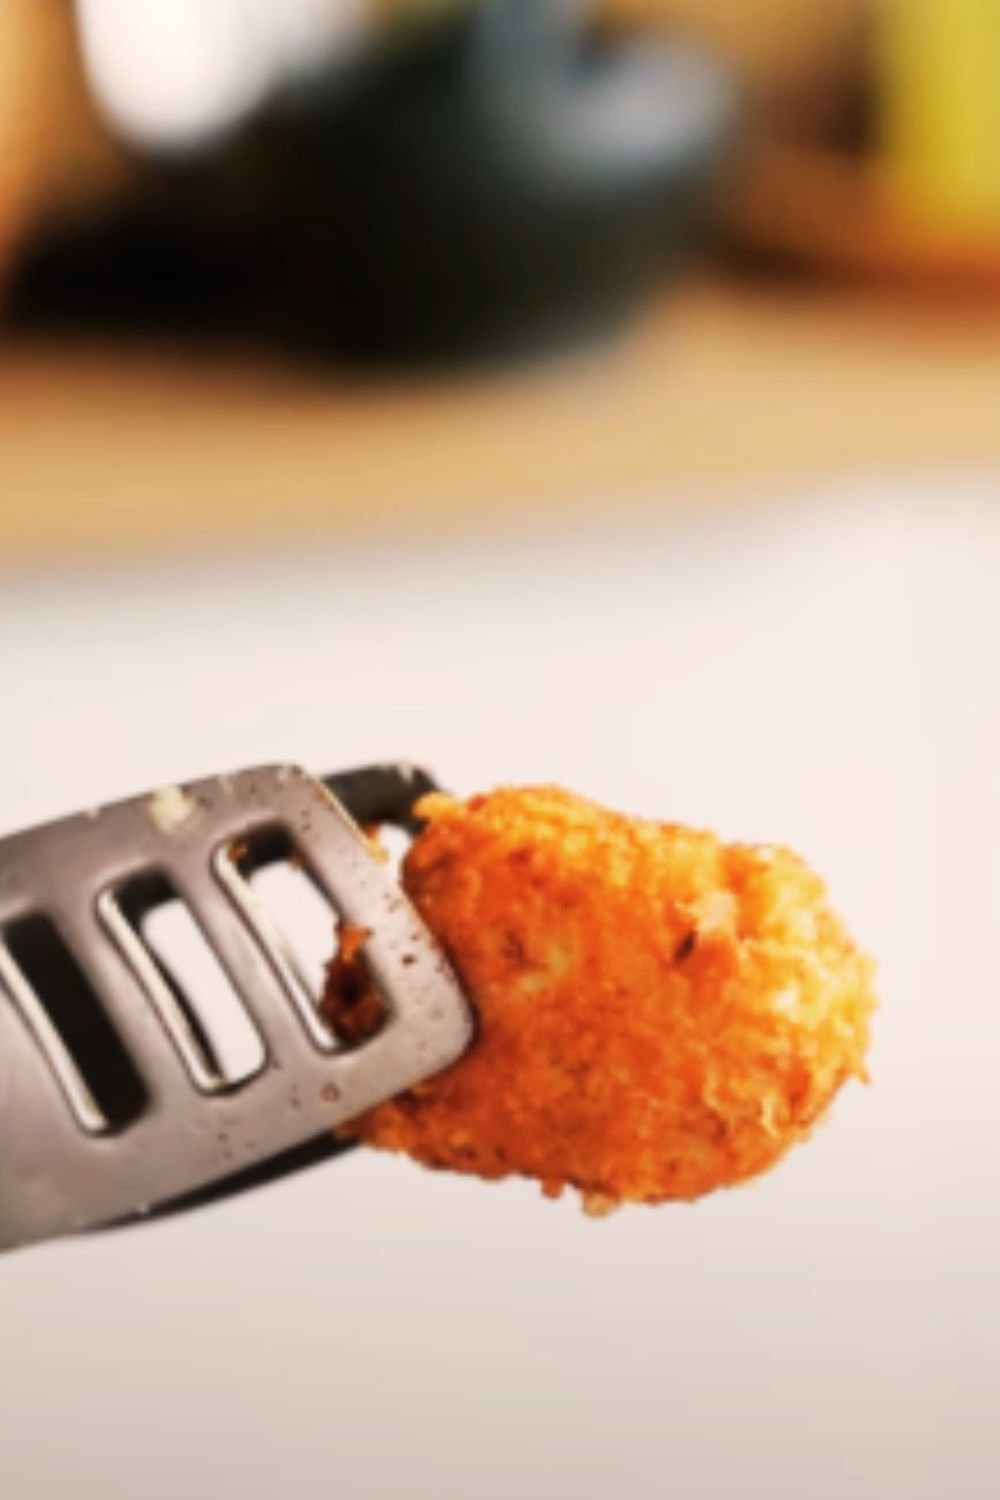
Step 3: Bread the Nuggets
- Working with a few pieces at a time, dredge chicken in flour and shake off excess
- Dip into egg mixture, allowing excess to drip off
- Roll in breadcrumb mixture, pressing gently to adhere
- Place on prepared baking sheet
- Once all pieces are breaded, refrigerate for 15-30 minutes (this helps the coating stick)
Cooking Methods
One of the best things about this recipe is its versatility. Here are different ways to cook your nuggets:
Oven-Baked Method
This is my go-to method for feeding a crowd:
- Preheat oven to 425°F (220°C)
- Place nuggets on a wire rack set over a baking sheet
- Spray lightly with oil for extra crispiness
- Bake for 15-20 minutes, flipping halfway through
- Nuggets are done when golden brown and internal temperature reaches 165°F (74°C)
| Advantages | Considerations |
|---|---|
| Cook many at once | Takes a bit longer than frying |
| Less hands-on time | Not quite as crispy as fried |
| Healthier option | Need to flip for even browning |
| Easy cleanup | Requires higher oven temperature |
Air Fryer Method
For the absolute crispiest results:
- Preheat air fryer to 400°F (200°C)
- Arrange nuggets in a single layer (work in batches if needed)
- Spray lightly with oil
- Cook for 8-10 minutes, flipping halfway through
- Check temperature reaches 165°F (74°C)
| Advantages | Considerations |
|---|---|
| Super crispy exterior | Limited batch size |
| Quick cooking time | Need to work in batches |
| Uses minimal oil | Requires an air fryer |
| No preheating required | Need to check frequently initially |
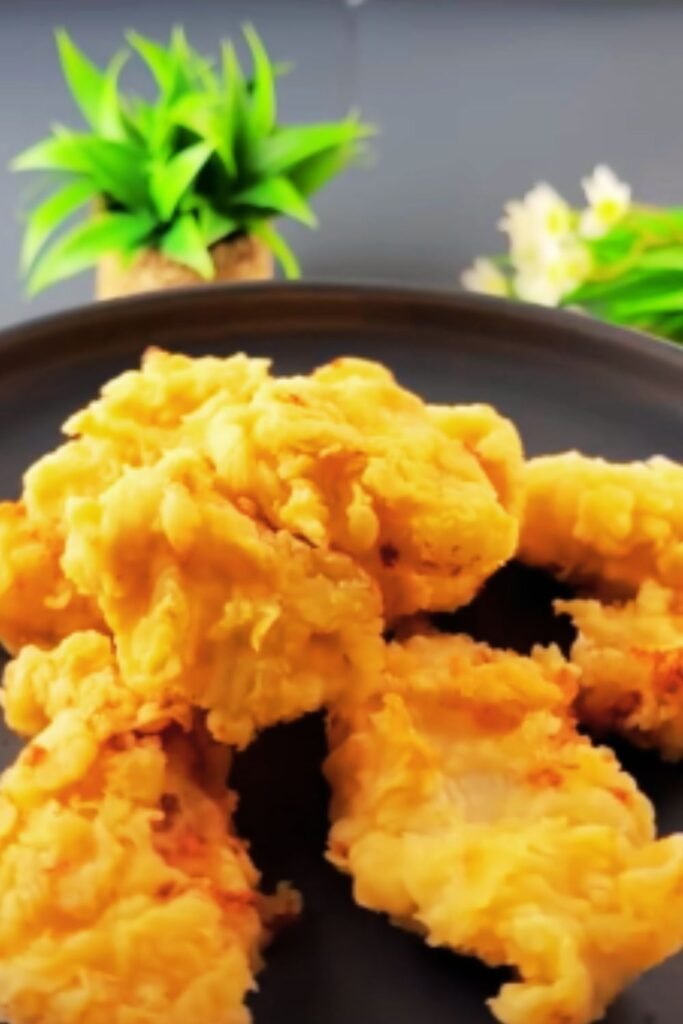
Pan-Fried Method
The traditional approach:
- Heat ½ inch of oil in a heavy skillet to 350°F (175°C)
- Carefully add nuggets in batches, don’t overcrowd
- Fry for 3-4 minutes per side until golden
- Drain on paper towels
- Check temperature reaches 165°F (74°C)
| Advantages | Considerations |
|---|---|
| Most authentic texture | Uses more oil |
| Golden, crispy crust | More active cooking time |
| Quick cooking time | More cleanup |
| Classic flavor | Requires careful temperature monitoring |
Special Variations
Over the years, I’ve developed some variations that my family loves:
Ground Chicken Nuggets
For a texture closer to fast-food nuggets:
- Use 2 pounds ground chicken instead of chicken breast
- Mix in seasonings directly
- Add 2 tablespoons mayonnaise and ¼ cup breadcrumbs to the chicken mixture
- Form into nugget shapes by hand
- Proceed with breading and cooking as directed
Gluten-Free Nuggets
My niece has celiac disease, so I developed this variation for her:
- Replace all-purpose flour with gluten-free flour blend
- Use gluten-free certified breadcrumbs or crushed rice Chex cereal
- Double-check all seasonings for gluten-free certification
- Follow the same cooking instructions
Extra-Crunchy Coating
For nugget purists who demand maximum crunch:
- After the standard breading, dip nuggets back into egg mixture
- Roll in a mixture of half breadcrumbs, half crushed cornflakes
- Refrigerate for 30 minutes before cooking
- Cook as directed, adding 1-2 minutes to cooking time
Dipping Sauce Ideas
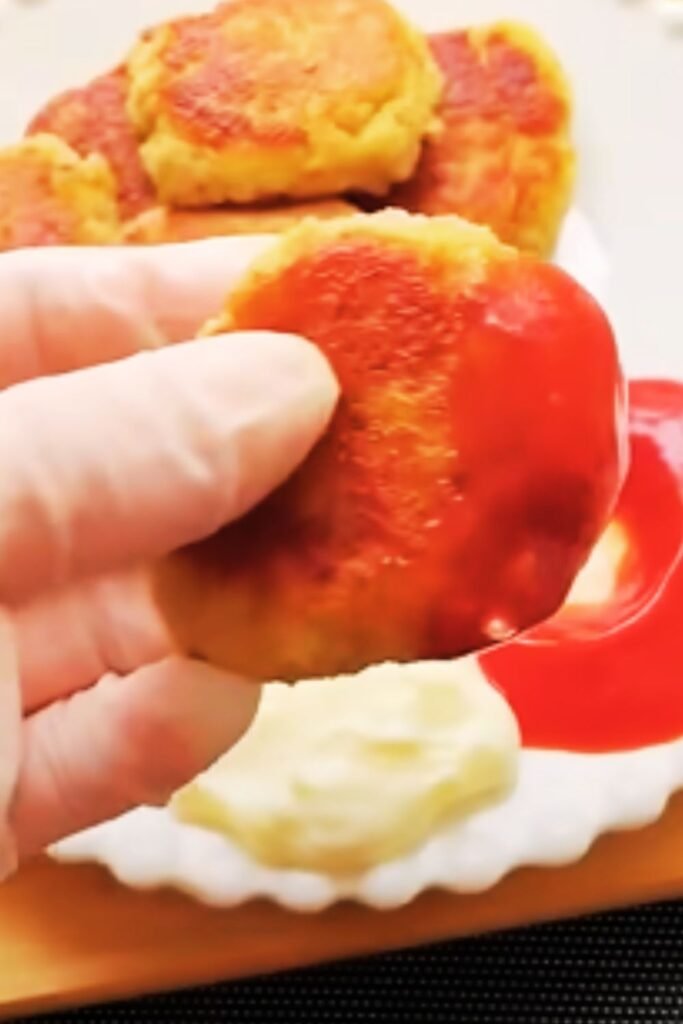
What’s a chicken nugget without sauce? Here are some of my family’s favorites:
| Sauce | Base Ingredients | Flavor Add-ins |
|---|---|---|
| Classic Honey Mustard | Equal parts honey and Dijon mustard | Splash of lemon juice, pinch of cayenne |
| Spicy Sriracha Mayo | Mayonnaise + sriracha | Lime juice, garlic powder |
| Sweet BBQ | Store-bought BBQ sauce | Brown sugar, apple cider vinegar |
| Ranch | Buttermilk + mayo + sour cream | Dill, parsley, garlic, onion powder |
| Buffalo | Melted butter + hot sauce | Garlic powder, splash of vinegar |
| Curry Yogurt | Greek yogurt | Curry powder, honey, lime juice |
I like to prepare 2-3 sauces and serve them in small ramekins alongside the nuggets. This always impresses guests and gives everyone options!
Make-Ahead and Storage Tips
One of the biggest advantages of homemade nuggets is preparing them in advance:
Freezing Uncooked Nuggets
- Follow the recipe through the breading step
- Place breaded nuggets on a parchment-lined baking sheet
- Freeze until solid (about 2 hours)
- Transfer to freezer bags or containers
- Label with date and cooking instructions
- Store for up to 3 months
Cooking From Frozen
- Preheat oven to 425°F (220°C)
- Place frozen nuggets on a wire rack over a baking sheet
- Spray lightly with oil
- Bake for 20-25 minutes, flipping halfway
- Check temperature reaches 165°F (74°C)
Storing Leftovers
- Cool completely
- Refrigerate in airtight container up to 3 days
- Reheat in 350°F (175°C) oven for 10 minutes or air fryer at 375°F (190°C) for 3-4 minutes
Serving Suggestions
Turn your nuggets into a complete meal with these accompaniments:
- For Kids: Serve with carrot and celery sticks, apple slices, and a small portion of mac and cheese
- Weeknight Dinner: Pair with roasted sweet potato fries and a crisp green salad
- Game Day Spread: Offer with loaded potato skins, vegetable platters, and dipping sauces
- Picnic Option: Pack with pasta salad, fresh fruit, and homemade lemonade
Nutritional Information
While exact values will depend on your specific ingredients and cooking method, here’s an approximate nutritional breakdown per serving (5-6 nuggets):
| Nutrient | Amount | % Daily Value |
|---|---|---|
| Calories | 320-350 | – |
| Protein | 28g | 56% |
| Carbohydrates | 24g | 8% |
| Fat | 14g | 18% |
| Fiber | 1g | 4% |
| Sodium | 480mg | 20% |
| Iron | 2mg | 11% |
| Calcium | 80mg | 6% |
These values are significantly better than fast-food nuggets, which typically contain more sodium, fat, and preservatives.
Troubleshooting Common Problems
Even experienced cooks sometimes run into issues. Here are solutions to common nugget problems:
Breading Falls Off
- Problem: The coating separates from the chicken during cooking
- Solution: Make sure to:
- Dry chicken thoroughly before seasoning
- Refrigerate breaded nuggets for 30 minutes before cooking
- Don’t flip too early during cooking
- Ensure oil is hot enough before adding nuggets (if frying)
Nuggets Too Dry
- Problem: Finished nuggets are overcooked and dry
- Solution:
- Use a meat thermometer to avoid overcooking
- Consider brining chicken first (30 minutes in salt water)
- Reduce cooking time slightly
- Try the ground chicken variation which tends to stay moister
Not Crispy Enough
- Problem: Nuggets are cooked through but lack crunch
- Solution:
- Make sure oven is fully preheated
- Use the wire rack method for better air circulation
- Spray with oil before baking
- Try the double-breading method
- Consider finishing under the broiler for 1-2 minutes
Questions & Answers
Q: Can I use chicken thighs instead of breast meat?
Absolutely! Chicken thighs work wonderfully in this recipe and naturally stay more juicy and flavorful. Just trim away any excess fat before cutting into nugget-sized pieces. The cooking time remains about the same.
Q: My kids don’t like visible herbs or spices. How can I adapt this?
I understand completely! You can either omit the herbs entirely or use powdered versions that blend invisibly into the breading. Another option is to focus the flavor in the dipping sauces instead, keeping the nuggets more plain.
Q: Are these healthy enough for regular meals?
When baked or air-fried, these nuggets are absolutely suitable for regular meals, especially when paired with vegetables and whole grains. They contain real chicken, minimal oil, and no artificial ingredients or preservatives—making them significantly healthier than processed alternatives.
Q: How do I keep the nuggets warm if cooking in batches?
Great question! Keep your oven at 200°F (95°C) and place finished batches on a wire rack over a baking sheet. This low temperature keeps them warm without continuing to cook them significantly. Just don’t hold them this way for more than 30 minutes or they might dry out.
Q: Can I make these without eggs due to allergies?
Yes! Replace the egg mixture with either buttermilk or a mixture of 2 tablespoons ground flaxseed mixed with 6 tablespoons warm water (let it sit for 5 minutes to thicken). The breading won’t be quite as thick but will still be delicious.
Q: Why refrigerate the breaded nuggets before cooking?
This 15-30 minute rest in the refrigerator helps the coating adhere better to the chicken. The flour paste created by the egg mixture has time to set, resulting in less breading falling off during cooking. If you’re in a hurry, you can skip this step, but it does improve the final result.
Final Thoughts
Making chicken nuggets from scratch might seem like a lot of work compared to grabbing a frozen bag, but the difference in taste and nutrition is remarkable. Plus, there’s something deeply satisfying about serving food you’ve made completely from scratch.
I recommend making a double batch and freezing half—you’ll thank yourself on those busy weeknights when dinner needs to be on the table quickly. And don’t be afraid to experiment with different seasonings and dipping sauces. The basic technique stays the same, but the flavor possibilities are endless!
Once you master this recipe, you might find your family requesting “your” nuggets instead of drive-thru versions. That moment when my kids first said they preferred my homemade nuggets over their fast-food favorites? Pure kitchen victory!