There’s something magical about the moment when autumn arrives and my kitchen becomes a haven of warm spices, bubbling caramel, and the sweet aroma of baked apples. I’ve spent countless hours perfecting dessert recipes that capture this essence, and I’m thrilled to share my crown jewel: the Caramel Apple Blondie Cheesecake. This isn’t just another dessert – it’s a symphony of textures and flavors that combines the best of three beloved treats into one show-stopping creation.
When I first conceived this recipe, I wanted to create something that would make people pause mid-conversation, fork halfway to their mouth, eyes widening in pure delight. The result is a dessert that layers a chewy blondie base with silky cheesecake filling, crowned with tender cinnamon apples and finished with a glossy caramel drizzle that cascades down the sides like liquid gold.
Understanding the Components: Building Your Masterpiece
Blondie Base: The foundation of our dessert, blondies are the vanilla cousin of brownies. Unlike their chocolate counterparts, blondies rely on brown sugar for their characteristic deep, butterscotch flavor and chewy texture.
Cheesecake Layer: A smooth, tangy cream cheese filling that provides the perfect contrast to the sweet blondie base. The addition of vanilla extract and a touch of lemon zest brightens the overall flavor profile.
Apple Topping: Fresh apples are sautéed with cinnamon and sugar until they’re tender but still retain a slight bite, creating textural interest and seasonal appeal.
Caramel Sauce: Whether homemade or high-quality store-bought, the caramel sauce ties all elements together and adds that final touch of indulgence.
Essential Ingredients and Their Roles
Understanding why each ingredient matters has transformed my baking from good to exceptional. Here’s what you’ll need and why each component is crucial:
For the Blondie Base:
- All-purpose flour (2 cups): Provides structure without making the base too dense
- Brown sugar (1½ cups, packed): Creates the signature butterscotch flavor and chewy texture
- Unsalted butter (½ cup, melted): Adds richness and helps bind ingredients
- Large eggs (2): Essential for structure and moisture
- Vanilla extract (2 teaspoons): Enhances the overall flavor profile
- Salt (½ teaspoon): Balances sweetness and enhances other flavors
- Baking powder (½ teaspoon): Provides slight lift without making it cakey
For the Cheesecake Layer:
- Cream cheese (24 oz, room temperature): The star ingredient; must be softened for smooth mixing
- Granulated sugar (¾ cup): Sweetens without competing with brown sugar flavors
- Large eggs (3): Provides structure and richness
- Sour cream (½ cup): Adds tanginess and prevents cracking
- Vanilla extract (1 tablespoon): Complements the cream cheese
- Lemon zest (1 teaspoon): Brightens the flavor without making it citrusy
For the Apple Topping:
- Granny Smith apples (4 large): Their tartness balances the sweet elements
- Unsalted butter (3 tablespoons): For sautéing the apples
- Brown sugar (⅓ cup): Complements the blondie base
- Ground cinnamon (1 teaspoon): Essential fall spice
- Nutmeg (¼ teaspoon): Adds warmth and complexity
- Cornstarch (1 tablespoon): Thickens the apple juices
For Assembly:
- Caramel sauce (1 cup): Choose high-quality for best results
- Heavy cream (2 tablespoons): To thin caramel if needed
Step-by-Step Preparation: My Foolproof Method
Preparing Your Kitchen and Equipment
Before I begin any complex dessert, I set myself up for success. Preheat your oven to 350°F (175°C) and line a 9-inch springform pan with parchment paper, leaving overhang for easy removal. I always butter the sides of the pan, even with parchment, because it helps the layers adhere better.
Creating the Perfect Blondie Base
I start with the blondie layer because it needs time to cool before adding the cheesecake mixture. In a large mixing bowl, I whisk together the melted butter and brown sugar until they’re completely combined. The mixture should look glossy and uniform.
Next, I add the eggs one at a time, beating well after each addition. This ensures proper emulsification and prevents the mixture from curdling. The vanilla extract goes in next, followed by the dry ingredients. I always sift my flour with the baking powder and salt to prevent lumps and ensure even distribution.
When mixing the dry ingredients into the wet, I use a gentle folding motion rather than aggressive stirring. Overmixing develops gluten, which would make our blondie tough instead of tender. The finished batter should be thick and slightly glossy.
Press this mixture evenly into your prepared springform pan. I use an offset spatula or the back of a measuring cup to ensure uniform thickness. Bake for 15-17 minutes, until the edges are set but the center still looks slightly underdone. It will continue cooking with residual heat.
Crafting the Cheesecake Layer
While the blondie base cools, I prepare the cheesecake filling. Room temperature ingredients are crucial here – cold cream cheese will create lumps no matter how much you beat it. I learned this the hard way during my early baking days!
Using an electric mixer on medium speed, I beat the cream cheese until it’s completely smooth and fluffy, about 3-4 minutes. Scraping down the bowl frequently prevents lumps from hiding at the bottom. Gradually add the granulated sugar, beating until fully incorporated.
The eggs are added one at a time, beating just until combined after each addition. Overbeating at this stage incorporates too much air, which can cause cracking during baking. Finally, I fold in the sour cream, vanilla, and lemon zest until just combined.
Pour this mixture over the cooled blondie base, spreading it evenly with an offset spatula. The key is to pour slowly and from a low height to prevent air bubbles.
Baking the Combined Layers
Reduce your oven temperature to 325°F (163°C). This lower temperature prevents the cheesecake from cooking too quickly, which would cause cracks. I place a pan of hot water on the bottom rack of the oven to create steam, which also helps prevent cracking.
Bake for 45-50 minutes, until the center is almost set but still slightly jiggly when you gently shake the pan. The edges should be firm and slightly puffed. Turn off the oven and crack the door open, allowing the cheesecake to cool gradually for 1 hour. This gradual cooling is essential for preventing cracks.
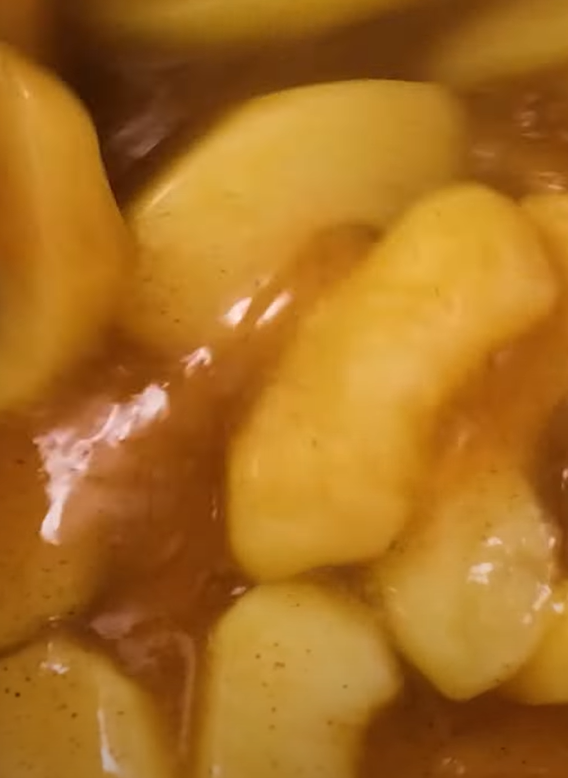
Preparing the Apple Topping
While the cheesecake cools, I prepare the apple topping. I peel and core the Granny Smith apples, then cut them into ¼-inch thick slices. Consistency in size ensures even cooking.
In a large skillet over medium heat, I melt the butter and add the apple slices. Cook for 5-6 minutes, stirring occasionally, until they begin to soften. Add the brown sugar, cinnamon, and nutmeg, stirring to coat the apples evenly.
In a small bowl, I mix the cornstarch with 2 tablespoons of water to create a slurry. This prevents lumps when thickening the apple juices. Add this to the skillet and cook for another 2-3 minutes until the liquid thickens slightly. The apples should be tender but still hold their shape.
Assembly and Final Touches
Once the cheesecake has cooled to room temperature, I carefully arrange the warm apple topping over the surface. The contrast between the warm apples and cool cheesecake is delightful, but you can also let the apples cool completely if you prefer.
For the caramel drizzle, I warm the caramel sauce slightly to make it more pourable. If it’s too thick, I add heavy cream one tablespoon at a time until it reaches the perfect consistency. The caramel should flow smoothly but not be so thin that it disappears into the dessert.
I drizzle the caramel in a decorative pattern over the apples, allowing some to cascade down the sides. This not only looks beautiful but also ensures every bite has that perfect caramel flavor.
Nutritional Information and Serving Guidelines
| Nutrient | Per Slice (12 servings) | Daily Value % |
|---|---|---|
| Calories | 485 | 24% |
| Total Fat | 26g | 33% |
| Saturated Fat | 16g | 80% |
| Cholesterol | 145mg | 48% |
| Sodium | 320mg | 14% |
| Total Carbohydrates | 58g | 21% |
| Dietary Fiber | 2g | 7% |
| Sugars | 48g | – |
| Protein | 8g | 16% |
| Vitamin A | 890 IU | 18% |
| Vitamin C | 4mg | 4% |
| Calcium | 145mg | 11% |
| Iron | 1.8mg | 10% |
Storage and Make-Ahead Tips
| Storage Method | Duration | Notes |
|---|---|---|
| Refrigerated (covered) | 5-7 days | Best quality in first 3 days |
| Frozen (whole) | 2-3 months | Wrap tightly in plastic wrap |
| Frozen (slices) | 1-2 months | Individual wrapping recommended |
| Room Temperature | 2 hours maximum | Food safety consideration |
I always store this dessert covered in the refrigerator. The flavors actually improve after 24 hours as they meld together. For the best texture, I remove it from the refrigerator 15-20 minutes before serving to take the chill off.
Troubleshooting Common Issues
Through years of making this recipe, I’ve encountered and solved nearly every possible problem. Here are the most common issues and my solutions:
Cracked Cheesecake Surface: Usually caused by rapid temperature changes or overbaking. Ensure your ingredients are at room temperature, don’t overbeat the filling, and use the gradual cooling method I described.
Soggy Blondie Base: This happens when the base isn’t baked enough initially or when the cheesecake mixture is too thin. Make sure the blondie edges are set before adding the cheesecake layer.
Runny Apple Topping: The cornstarch slurry is essential for thickening. If your topping is still too liquid, cook it a few minutes longer to evaporate excess moisture.
Caramel Won’t Stick: If your caramel sauce slides off, it might be too warm or thin. Let it cool slightly and thicken before drizzling.
Seasonal Variations and Adaptations
| Variation | Key Changes | Best Season |
|---|---|---|
| Pumpkin Spice Version | Add pumpkin puree to cheesecake, use pumpkin pie spice | Fall |
| Berry Blondie Cheesecake | Replace apples with mixed berries, use berry sauce | Summer |
| Chocolate Apple Version | Add cocoa powder to blondie base | Year-round |
| Mini Individual Portions | Use muffin tins, adjust baking times | Parties/Events |
Advanced Techniques for Perfect Results
After making this dessert hundreds of times, I’ve developed some advanced techniques that elevate the final result:
Temperature Control: I use an instant-read thermometer to check the cheesecake’s doneness. The center should reach 150°F (66°C) for the perfect texture.
Apple Selection: While I recommend Granny Smith, mixing varieties creates complexity. I sometimes use 2 Granny Smith and 2 Honeycrisp for added sweetness and texture variation.
Caramel Technique: For homemade caramel, I add a pinch of sea salt and a tablespoon of bourbon for depth. The alcohol cooks off, leaving only flavor.
Presentation Enhancement: I sometimes add a light dusting of cinnamon or edible gold leaf for special occasions. Fresh thyme sprigs also make beautiful garnishes.
Serving Suggestions and Pairings
This dessert is substantial enough to stand alone, but I love pairing it with complementary elements that enhance rather than compete with its flavors. A dollop of freshly whipped cream adds lightness, while a scoop of vanilla bean ice cream creates temperature contrast.
For beverages, I recommend freshly brewed coffee or espresso to cut through the richness. Hot apple cider or spiced tea also complement the fall flavors beautifully. For non-alcoholic options, sparkling apple cider or ginger ale provide effervescence that cleanses the palate.
Special Occasion Adaptations
I’ve served this dessert at countless gatherings, and I’ve learned to adapt it for different occasions:
Thanksgiving: I add a touch of orange zest to the cheesecake layer and use maple syrup in the apple topping for seasonal flair.
Holiday Parties: A sprinkle of chopped pecans or walnuts over the caramel adds festive crunch and visual appeal.
Birthday Celebrations: Individual mini versions in ramekins make elegant personal desserts that are easy to serve.
Potluck Events: This dessert travels well and always disappears first, making it my go-to contribution.
The Science Behind the Perfect Texture
Understanding the science behind this dessert has helped me achieve consistent results. The blondie base relies on brown sugar’s molasses content for its characteristic chew and flavor. The slight underbaking creates a fudgy texture that contrasts beautifully with the smooth cheesecake.
The cheesecake layer’s success depends on protein coagulation. The eggs and cream cheese proteins set at different temperatures, which is why gradual heating and cooling are crucial. The sour cream adds acidity that helps prevent curdling and creates that perfect tangy flavor.
The apple topping showcases how pectin and acid work together. The natural pectin in apples, combined with the cornstarch and the acid from the apples themselves, creates a glossy, thick topping that won’t make the dessert soggy.
Questions and Answers
Q: Can I make this dessert ahead of time for a party? A: Absolutely! I actually recommend making it 1-2 days ahead. The flavors develop and improve over time, and it’s much easier to slice when it’s been properly chilled. Just add the caramel drizzle right before serving to maintain its glossy appearance.
Q: What’s the best way to get clean slices? A: I use a sharp knife dipped in warm water and wiped clean between each cut. For the cleanest slices, I sometimes run the knife under hot water and dry it with a towel before each cut. Dental floss also works surprisingly well for cutting through the layers.
Q: Can I substitute the cream cheese with a lighter alternative? A: While you can use reduced-fat cream cheese, I don’t recommend going below the one-third-less-fat variety. The texture and flavor will be noticeably different. For best results, stick with full-fat cream cheese – this is a special occasion dessert, after all!
Q: My caramel sauce is too thick to drizzle. How can I fix it? A: Gently warm the caramel in the microwave in 15-second intervals, stirring between each interval. If it’s still too thick, add heavy cream one tablespoon at a time until you reach the desired consistency. You can also thin it with a touch of vanilla extract.
Q: Can I freeze individual slices? A: Yes! I wrap individual slices tightly in plastic wrap, then place them in freezer bags. They keep for up to 2 months. Thaw them in the refrigerator overnight before serving. The texture remains remarkably good after freezing.
Q: What type of apples work best besides Granny Smith? A: I love Granny Smith for their tartness and ability to hold their shape, but Honeycrisp, Braeburn, or Jonagold also work well. Avoid Red Delicious or Gala as they become mushy when cooked. For extra complexity, try mixing two varieties.
Q: Is there a way to make this gluten-free? A: Yes! I substitute the all-purpose flour with a 1:1 gluten-free baking flour blend. Bob’s Red Mill and King Arthur both make excellent options. The texture is nearly identical to the original version.
Q: How do I know when the cheesecake layer is properly baked? A: The center should be almost set but still slightly jiggly when you gently shake the pan. It should not be liquid or completely firm. An instant-read thermometer inserted in the center should read 150°F. Remember, it will continue cooking as it cools.
Q: Can I make homemade caramel sauce for this recipe? A: Absolutely! Homemade caramel adds an extra special touch. I make a simple caramel by heating 1 cup of sugar until it melts and turns amber, then carefully whisking in ½ cup of heavy cream and 4 tablespoons of butter. Add a pinch of salt for salted caramel.
Q: What’s the secret to preventing cracks in the cheesecake? A: Several factors prevent cracking: room temperature ingredients, not overbeating the mixture, baking at a lower temperature, using the water bath method for humidity, and most importantly, gradual cooling. Never put a hot cheesecake directly in the refrigerator.
This Caramel Apple Blondie Cheesecake represents everything I love about fall baking: the warmth of spices, the comfort of familiar flavors, and the joy of creating something that brings people together. Every time I make it, I’m reminded why I fell in love with baking in the first place. The combination of textures and flavors never fails to impress, and the smiles it creates are worth every minute spent in the kitchen.
I hope this recipe becomes as beloved in your kitchen as it has in mine. There’s something truly magical about creating a dessert that captures the essence of the season while bringing together the best elements of multiple beloved treats. Whether you’re making it for a special occasion or simply because you deserve something wonderful, this dessert will not disappoint.