Have you ever bitten into a chicken breast that’s so tender it practically dissolves on your tongue? That’s exactly what this melt-in-your-mouth chicken recipe delivers. I’ve been perfecting this dish for years, and it never fails to impress my family and dinner guests alike. The secret lies in the incredibly creamy topping that bakes into the chicken, keeping it moist and adding a burst of flavor with every bite.
Why This Recipe Works
There’s a reason this recipe has become my go-to for weeknight dinners and special occasions alike. Chicken breasts can easily become dry and tough when baked, but this recipe solves that problem beautifully. The creamy topping acts as both a flavor enhancer and a moisture barrier, resulting in chicken that’s:
- Incredibly tender and juicy
- Packed with savory, rich flavor
- Simple to prepare with minimal hands-on time
- Made with pantry staples you likely already have
- Perfect for meal prep and family dinners
- Naturally gluten-free (when using GF mayo)
This recipe transforms ordinary chicken breasts into something extraordinary without complicated techniques or hard-to-find ingredients. It’s truly a game-changer for anyone who wants to enjoy perfectly cooked chicken with minimal effort.
Ingredients You’ll Need
For the Chicken:
- 4 boneless, skinless chicken breasts (about 2 pounds)
- 1 teaspoon garlic powder
- 1/2 teaspoon salt
- 1/4 teaspoon black pepper
- 1/2 teaspoon paprika (regular or smoked)
For the Creamy Topping:
- 1/2 cup mayonnaise
- 1/2 cup freshly grated parmesan cheese
- 1 teaspoon garlic powder
- 1/2 teaspoon Italian seasoning
- 1/4 teaspoon onion powder
- 1/4 teaspoon dried parsley
- 1/8 teaspoon crushed red pepper flakes (optional)
Optional Garnishes:
- Fresh chopped parsley
- Additional grated parmesan
- Lemon wedges for serving
Kitchen Tools Required
Before diving into the preparation, gather these simple kitchen tools that will make your cooking process smooth and efficient:
- 9×13 inch baking dish
- Mixing bowl
- Measuring cups and spoons
- Meat thermometer
- Aluminum foil
- Silicone spatula or spoon for spreading the topping
- Sharp knife and cutting board
- Paper towels
Nothing fancy required here—just the basic tools most home cooks already have on hand.
Step-by-Step Instructions
Preparing the Chicken
- Preheat your oven to 375°F (190°C). This temperature is perfect for baking chicken breasts—hot enough to cook them through without drying them out.
- Pat the chicken breasts dry with paper towels. This step is crucial as it helps the seasoning stick better and promotes better browning.
- If your chicken breasts are particularly thick or uneven, consider pounding them to an even thickness of about 3/4 inch. This ensures they cook evenly throughout.
- Season both sides of the chicken breasts with garlic powder, salt, pepper, and paprika. Make sure to rub the seasonings in for maximum flavor penetration.
- Place the seasoned chicken breasts in a baking dish, leaving a little space between each piece.
Creating the Creamy Topping
- In a medium mixing bowl, combine mayonnaise, grated parmesan cheese, garlic powder, Italian seasoning, onion powder, dried parsley, and red pepper flakes (if using).
- Stir the mixture until all ingredients are thoroughly combined. The consistency should be thick and spreadable, similar to a creamy dip.
- Using a silicone spatula or the back of a spoon, spread the topping evenly over each chicken breast. Make sure to cover the entire surface of each piece, creating a protective layer that will keep the moisture locked in during baking.

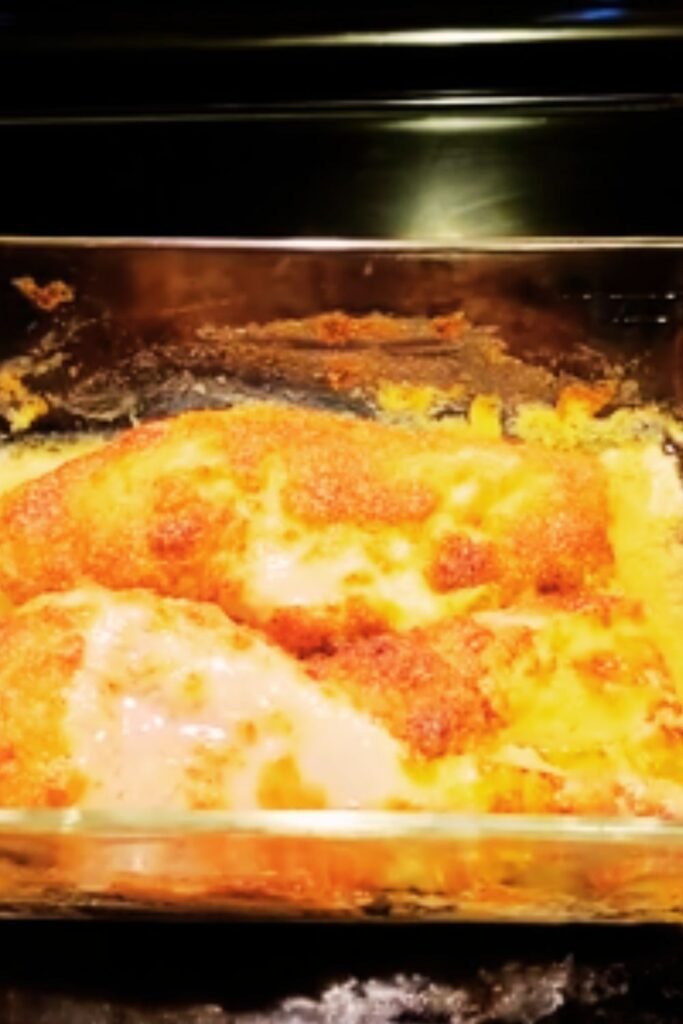
Baking to Perfection
- Place the baking dish in the preheated oven and bake for 25-30 minutes. The exact cooking time will depend on the thickness of your chicken breasts.
- To ensure perfect doneness, use a meat thermometer to check that the internal temperature has reached 165°F (74°C). This is the safe temperature for chicken consumption and guarantees that your chicken will be fully cooked yet still juicy.
- Once the chicken reaches the proper temperature, you can optionally broil it for 2-3 minutes to get a beautiful golden-brown color on the topping. Watch carefully during this step to prevent burning.
- Remove from the oven and let the chicken rest for 5 minutes before serving. This resting period allows the juices to redistribute throughout the meat, resulting in moister chicken.
Tips for Perfect Results Every Time
After making this recipe countless times, I’ve discovered some tricks that elevate it from good to absolutely amazing:
- Use room temperature mayonnaise: Taking the mayo out of the refrigerator 30 minutes before cooking makes it easier to spread and helps it meld better with the other ingredients.
- Don’t skimp on the parmesan: Use freshly grated parmesan cheese rather than the pre-grated variety. The flavor difference is noticeable, and fresh parmesan melts much better during baking.
- Watch for doneness carefully: Overcooked chicken breast can become dry no matter how good your topping is. Start checking for doneness at the 20-minute mark if your chicken pieces are on the thinner side.
- Consider brining: For even juicier results, brine your chicken breasts before cooking. A simple solution of 1/4 cup salt dissolved in 4 cups water works wonderfully. Soak the chicken for 15-30 minutes, then pat dry before proceeding with the recipe.
- Add a crunchy topping: For textural contrast, you can mix 1/4 cup of panko breadcrumbs with 1 tablespoon of melted butter and sprinkle over the creamy mixture before baking.
Nutrition Information
Understanding the nutritional content of what you’re eating is important for many home cooks. Here’s a detailed breakdown of what you can expect from this dish per serving (one chicken breast with topping):
| Nutrient | Amount per Serving |
|---|---|
| Calories | 385 |
| Protein | 39g |
| Total Fat | 23g |
| Saturated Fat | 5g |
| Cholesterol | 125mg |
| Carbohydrates | 2g |
| Fiber | 0g |
| Sugars | 0g |
| Sodium | 650mg |
| Calcium | 150mg |
| Iron | 1mg |
| Potassium | 450mg |
| Vitamin A | 300IU |
| Vitamin C | 2mg |
This dish is high in protein and moderate in healthy fats, making it a satisfying main course that fits well into many eating plans. The sodium content can be reduced by decreasing the amount of salt in the seasoning if you’re watching your intake.
Dietary Adaptations
One of the reasons I love this recipe is how easily it can be adapted to suit various dietary needs:
Keto and Low-Carb
This recipe is naturally low in carbohydrates and high in fat and protein, making it perfect for those following ketogenic or low-carb diets without any modifications needed.
Dairy-Free
Replace the parmesan cheese with nutritional yeast for a similar cheesy flavor without the dairy. Use a dairy-free mayonnaise as your base.
Gluten-Free
The recipe is naturally gluten-free as written, just double-check that your mayonnaise and seasonings don’t contain hidden gluten ingredients.
Lower Calorie
Use light mayonnaise and reduce the amount of parmesan cheese by half to lower the calorie count while still maintaining good flavor.
Serving Suggestions
This versatile chicken dish pairs beautifully with a variety of sides. Here are some of my favorite combinations:
For a Light Meal
- Roasted asparagus or green beans
- Simple garden salad with lemon vinaigrette
- Steamed broccoli with a squeeze of lemon
- Sautéed zucchini and yellow squash
For a Heartier Dinner
- Creamy mashed potatoes or cauliflower mash
- Roasted garlic parmesan potatoes
- Wild rice or brown rice pilaf
- Buttered egg noodles with herbs
Sauce Options
While this chicken is wonderfully moist on its own, you can serve it with these complementary sauces:
- Light lemon butter sauce
- Herb-infused olive oil drizzle
- Reduced balsamic glaze
- Warm marinara for an Italian twist
Storage and Reheating Instructions
One of the best features of this recipe is how well it works for meal prep and leftovers. Here’s how to store and reheat your melt-in-your-mouth chicken:
Refrigerator Storage
- Store cooled chicken breasts in an airtight container.
- Properly stored, the chicken will keep for 3-4 days in the refrigerator.
- For best results, store the chicken with any accumulated cooking juices to maintain moisture.
Freezer Storage
- This chicken freezes surprisingly well! Wrap individual portions tightly in plastic wrap, then place in a freezer bag.
- Label with the date and use within 2-3 months for best quality.
- Thaw overnight in the refrigerator before reheating.
Reheating Methods
Oven Method (Best for Maintaining Texture):
- Preheat oven to 325°F (165°C).
- Place chicken in an oven-safe dish and add 1-2 tablespoons of water or chicken broth to the bottom.
- Cover with foil and heat for 15-20 minutes until warmed through.
Microwave Method (Quickest Option):
- Place chicken on a microwave-safe plate.
- Cover with a damp paper towel to retain moisture.
- Heat on 70% power for 2 minutes, then check and continue in 30-second intervals if needed.
Variations to Try
The basic recipe is fantastic as is, but here are some delicious variations I’ve developed over time:
Italian-Style
- Add 1/2 teaspoon of dried basil and oregano to the topping mixture
- Mix in 2 tablespoons of sun-dried tomatoes (chopped)
- Sprinkle with fresh basil after baking
Greek-Inspired
- Replace the parmesan with crumbled feta cheese
- Add 1 teaspoon of dried oregano to the topping
- Mix in 1 tablespoon of chopped Kalamata olives
- Garnish with fresh dill before serving
Spicy Southwest
- Add 1 teaspoon of taco seasoning to the chicken rub
- Mix 1/2 teaspoon of chipotle powder into the topping
- Sprinkle with pepper jack cheese instead of parmesan
- Garnish with chopped cilantro and lime wedges
Herb Garden
- Mix 1 tablespoon each of fresh chopped herbs (parsley, dill, chives) into the topping
- Add 1 teaspoon of lemon zest for brightness
- Finish with a squeeze of fresh lemon juice before serving

Common Problems and Solutions
Even experienced cooks occasionally encounter issues. Here are solutions to the most common problems with baked chicken recipes:
| Problem | Possible Cause | Solution |
|---|---|---|
| Dry chicken | Overcooked or uneven thickness | Use a meat thermometer and remove chicken at exactly 165°F; pound chicken to even thickness before cooking |
| Topping slides off | Chicken surface too wet | Pat chicken completely dry before adding seasonings and topping |
| Runny topping | Ingredients too cold or not mixed well | Ensure mayo is room temperature; mix topping ingredients thoroughly |
| Bland flavor | Insufficient seasoning | Season chicken itself, not just the topping; let seasoned chicken rest 10 minutes before adding topping |
| Topping too browned | Oven temperature too high | Cover loosely with foil if topping browns too quickly; place rack in middle position of oven |
| Chicken takes too long to cook | Chicken too cold or too thick | Allow chicken to come to room temperature for 20 minutes before baking; pound thicker pieces |
Frequently Asked Questions
After sharing this recipe with countless friends and family members, these are the questions I’m most commonly asked:
Can I use chicken thighs instead of breasts? Absolutely! Boneless, skinless chicken thighs work beautifully with this recipe and are naturally more moist. Reduce cooking time by about 5 minutes as thighs cook faster than breasts.
Is there a substitute for mayonnaise? Yes, Greek yogurt makes a great substitute for a lighter version, though the flavor will be tangier. You can also use sour cream or a mixture of the two. For a dairy-free option, try a vegan mayonnaise.
Can I prepare this dish ahead of time? You can prepare everything up to 8 hours ahead. Season the chicken and make the topping, but store them separately in the refrigerator. Apply the topping just before baking for best results.
Why is my chicken releasing so much liquid during baking? This often happens with chicken that has been previously frozen. Make sure to thoroughly pat your chicken dry before seasoning, and if using frozen chicken, thaw it completely and drain any excess liquid.
How can I tell when the chicken is done without a meat thermometer? While a thermometer is most reliable, you can also cut into the thickest part of the breast—the meat should be completely white with no pink, and the juices should run clear. However, this method may release some of the precious juices.
Can I make this recipe dairy-free? Yes, use a dairy-free mayonnaise and substitute nutritional yeast for the parmesan cheese. The flavor profile will be slightly different but still delicious.
Is this recipe keto-friendly? Yes! With minimal carbs and a good balance of protein and fat, this recipe is perfect for those following a ketogenic diet.
My family doesn’t like spicy food. Should I omit the red pepper flakes? The small amount of red pepper flakes adds flavor without significant heat, but you can certainly omit them for heat-sensitive palates.
Why This Recipe Has Become a Family Favorite
I first discovered this recipe during a particularly busy season of life when I needed reliable, delicious meals that didn’t require hours in the kitchen. What started as a convenient weeknight dinner quickly became requested for birthdays, dinner parties, and even holiday gatherings.
What makes this chicken recipe stand out is its remarkable ability to please everyone—from picky children to gourmet food enthusiasts. The creamy, savory topping creates chicken that’s so tender it truly does melt in your mouth, while the simple ingredient list means I can whip it up even when I haven’t planned a special grocery trip.
Over time, I’ve tweaked the seasonings and proportions to create what I believe is the perfect balance of flavors. The parmesan adds umami depth, the mayo provides richness without making the dish heavy, and the carefully selected herbs and spices create a profile that’s familiar yet interesting.
Whether you’re cooking for a family dinner, meal prepping for a busy week ahead, or entertaining guests, this melt-in-your-mouth chicken breast recipe deserves a prominent place in your cooking repertoire. It’s proof that extraordinary meals don’t require extraordinary effort—sometimes the simplest recipes create the most memorable dining experiences.
Give it a try, and I’m confident it will become a staple in your home just as it has in mine. Happy cooking!