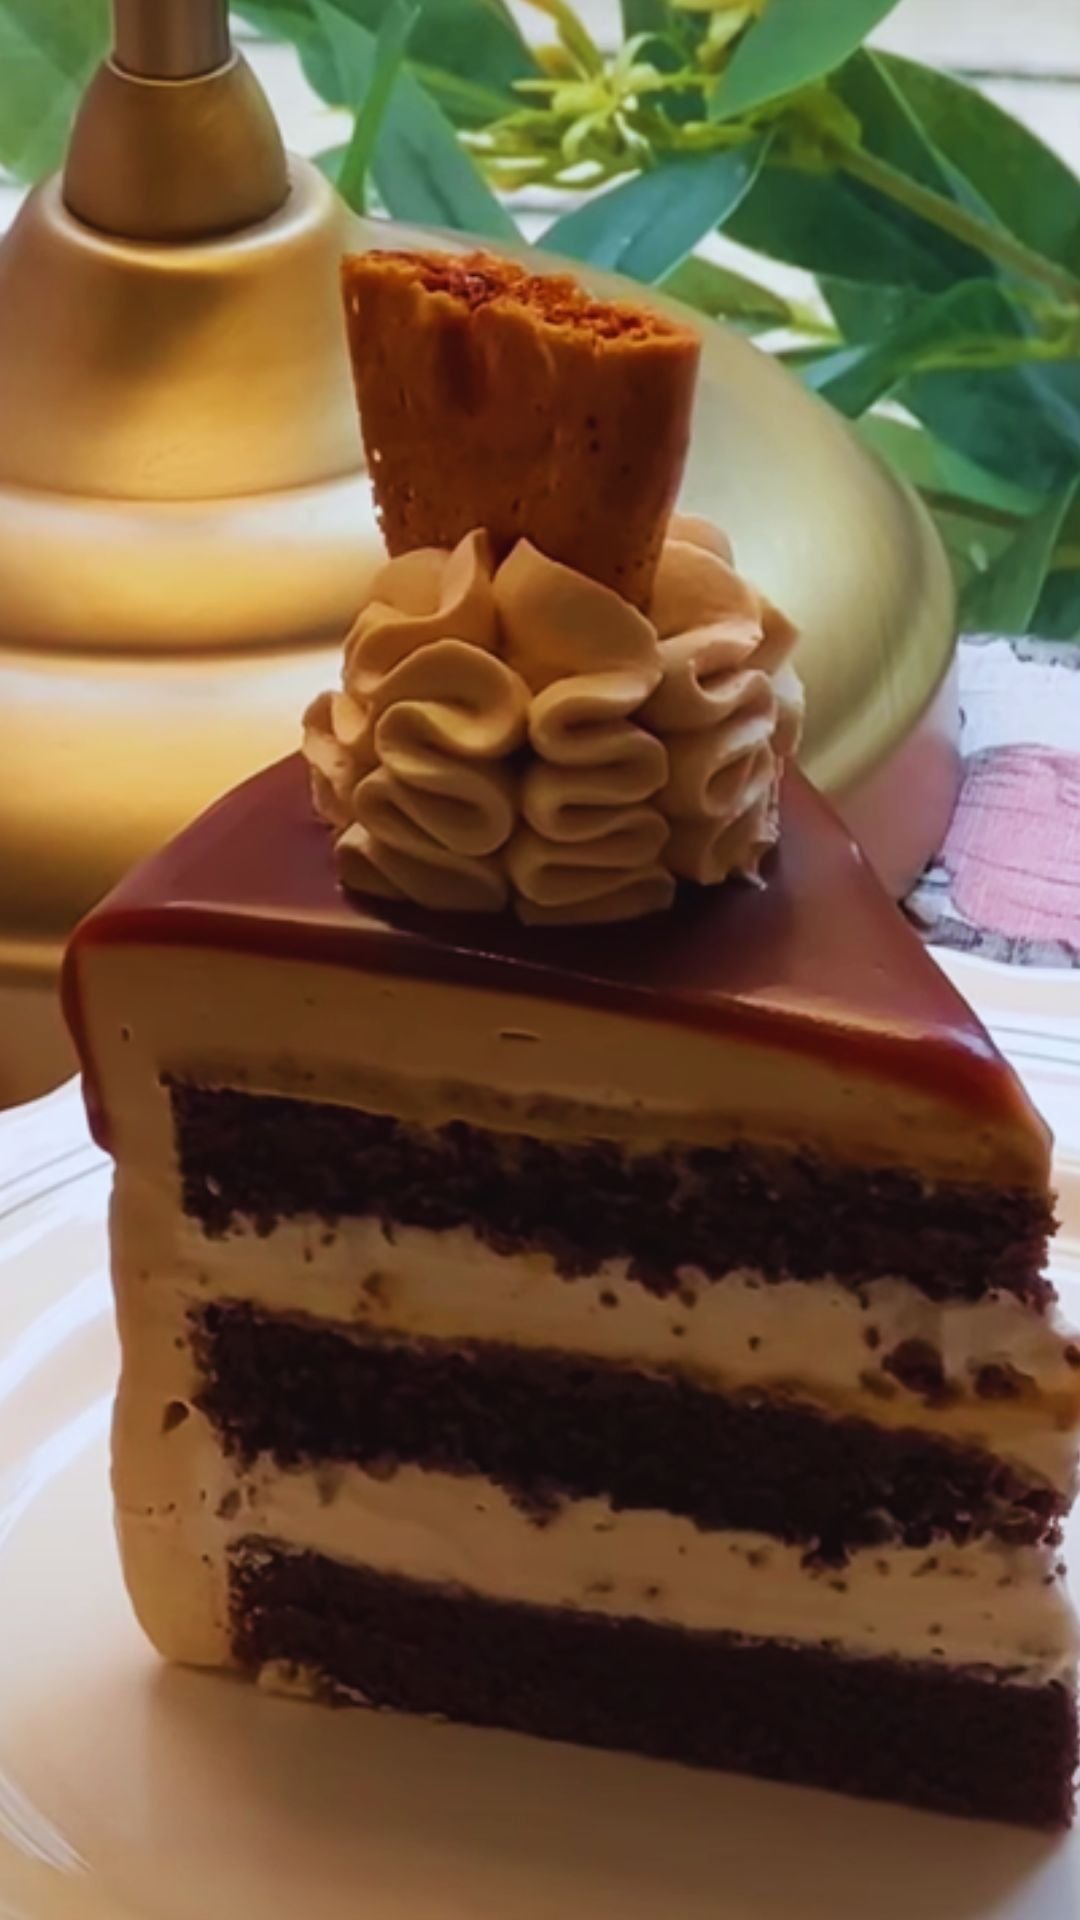
Have you ever bitten into a dessert so incredible that time seems to stand still? That’s exactly what happens with this Salted Caramel Chocolate Cake. I’ve been perfecting this recipe for years, and I’m thrilled to finally share my secret weapon for dinner parties and special celebrations.
This indulgent layer cake combines rich, moist chocolate cake with the perfect balance of sweet and salty caramel. The combination creates a flavor explosion that will have your guests begging for the recipe. Trust me, I’ve had friends offer to pay me to make this for their events!
What Makes This Salted Caramel Chocolate Cake Special?
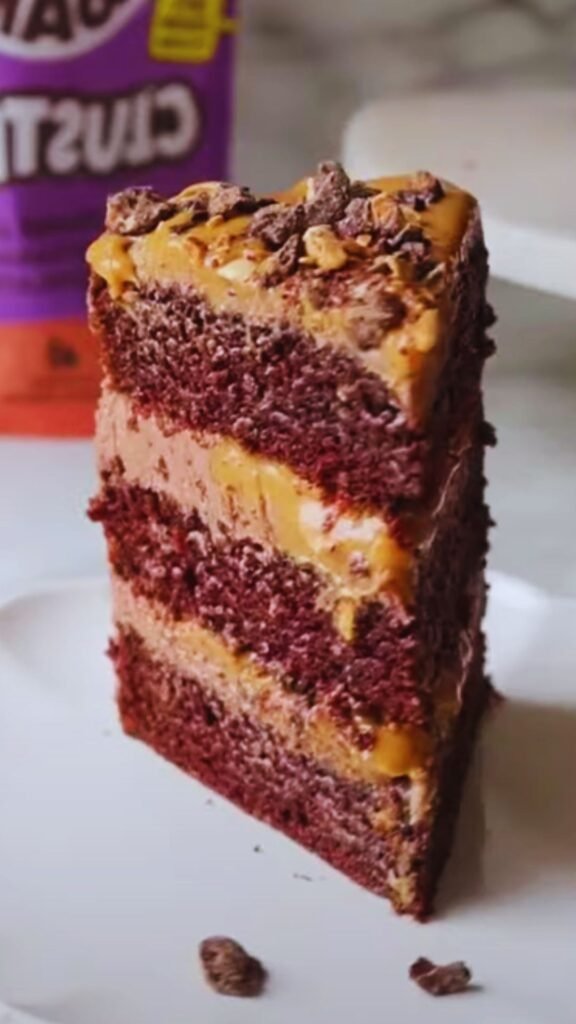
This isn’t just any chocolate cake. The deep chocolate layers are incredibly moist with a tender crumb that practically melts in your mouth. But what truly sets this dessert apart is the homemade salted caramel that’s incorporated in three different ways:
- Infused in the cake layers – The cake batter itself contains caramel for depth of flavor
- Whipped into the frosting – The silky buttercream is enhanced with caramel
- Drizzled on top – That gorgeous caramel cascade down the sides
The result is a multi-dimensional dessert experience that hits all the right notes. Let me walk you through exactly how to create this showstopper in your own kitchen.
Essential Ingredients
The magic of this cake comes from quality ingredients. Here’s what you’ll need:
For the Chocolate Cake Layers:
- 2 cups all-purpose flour
- 2 cups granulated sugar
- 3/4 cup unsweetened cocoa powder (Dutch-processed preferred)
- 2 teaspoons baking soda
- 1 teaspoon baking powder
- 1 teaspoon salt
- 2 large eggs, room temperature
- 1 cup buttermilk, room temperature
- 1/2 cup vegetable oil
- 2 teaspoons pure vanilla extract
- 1 cup hot coffee (or hot water)
For the Salted Caramel Sauce:
- 2 cups granulated sugar
- 12 tablespoons unsalted butter, room temperature, cut into pieces
- 1 cup heavy cream, room temperature
- 1 tablespoon flaky sea salt
For the Salted Caramel Buttercream:
- 1 1/2 cups unsalted butter, softened
- 4 cups confectioners’ sugar, sifted
- 1/2 cup salted caramel sauce (from recipe above)
- 2 teaspoons vanilla extract
- 3-4 tablespoons heavy cream (if needed)
For Assembly and Decoration:
- Remaining salted caramel sauce
- 1/2 cup chocolate chips or chunks (optional)
- Flaky sea salt, for sprinkling
Equipment You’ll Need
Before diving in, make sure you have these tools on hand:
- Three 8-inch round cake pans
- Parchment paper
- Stand mixer or hand mixer
- Rubber spatula
- Cooling racks
- Cake turntable (helpful but not required)
- Offset spatula
- Heavy-bottomed saucepan (for caramel)
- Candy thermometer (recommended for caramel)
- Serrated knife (for leveling cakes)
Step-by-Step Instructions
I’ve broken this recipe down into manageable stages. The cake and caramel sauce can be made a day ahead if you want to split up the work.
Stage 1: Make the Chocolate Cake Layers
- Prepare your pans: Preheat your oven to 350°F (175°C). Grease three 8-inch round cake pans and line the bottoms with parchment paper. I recommend also flouring the sides lightly.
- Mix dry ingredients: In a large bowl, whisk together the flour, sugar, cocoa powder, baking soda, baking powder, and salt.
- Combine wet ingredients: In a separate bowl, beat together the eggs, buttermilk, oil, and vanilla extract until well combined.
- Create the batter: Gradually add the wet ingredients to the dry ingredients, mixing on low speed until just combined. Be careful not to overmix. With the mixer still on low, slowly add the hot coffee (the batter will be quite thin – this is normal and creates an ultra-moist cake).
- Bake: Divide the batter evenly among the prepared pans. Bake for 23-28 minutes, or until a toothpick inserted in the center comes out with just a few moist crumbs. The cakes should spring back slightly when touched.
- Cool: Let the cakes cool in the pans for 10 minutes, then remove from pans and transfer to wire racks to cool completely.
Stage 2: Make the Salted Caramel Sauce
This homemade caramel sauce is what elevates this cake from good to extraordinary. Don’t be intimidated – I’ll walk you through it step by step:
- Prepare ingredients: Have all your ingredients measured and ready to go. Caramel waits for no one once it starts to color!
- Melt the sugar: In a heavy-bottomed medium saucepan, spread the sugar in an even layer. Heat over medium heat, watching carefully. The sugar will begin to melt around the edges first.
- Caramelize: Once the sugar starts melting, gently stir occasionally with a heat-resistant spatula or wooden spoon. The sugar will form clumps before completely melting into a amber-colored liquid. Be patient and keep the heat medium to avoid burning.
- Add butter: Once the sugar is completely melted and has turned a deep amber color (around 350°F on a candy thermometer), carefully add the butter pieces. The mixture will bubble vigorously – this is normal! Whisk until the butter is completely melted.
- Add cream: Remove the pan from heat and slowly pour in the heavy cream while whisking constantly. Again, the mixture will bubble intensely. Keep whisking until you have a smooth sauce.
- Add salt: Stir in the sea salt.
- Cool: Allow the caramel to cool in the pan for about 10 minutes, then transfer to a heat-safe jar or container. It will thicken as it cools.
Stage 3: Make the Salted Caramel Buttercream
- Beat the butter: In a stand mixer fitted with the paddle attachment, beat the softened butter on medium speed until creamy and light, about 3-4 minutes.
- Add sugar: Reduce speed to low and gradually add the sifted confectioners’ sugar, about 1 cup at a time, beating well after each addition.
- Incorporate caramel: Add 1/2 cup of the cooled salted caramel sauce and the vanilla extract. Beat on medium speed until smooth and fluffy, about 2 minutes.
- Adjust consistency: If the frosting is too thick, add heavy cream one tablespoon at a time until you reach your desired consistency. If it’s too thin, add more confectioners’ sugar.
Stage 4: Assemble the Cake
- Level the cakes: If your cake layers have domed tops, use a serrated knife to level them flat. This ensures your cake will be stable and professional-looking.
- Build the base: Place one cake layer on your serving plate or cake stand. Spread a thin layer of buttercream on top using an offset spatula.
- Add caramel: Drizzle about 2 tablespoons of the salted caramel sauce over the buttercream, staying about 1/2 inch from the edge (it will spread as you add the next layer).
- Add next layer: Place the second cake layer on top and repeat with buttercream and caramel.
- Complete the stack: Add the final cake layer, placing it bottom-side up for a flat top.
- Crumb coat: Apply a thin layer of buttercream all over the cake (top and sides) to seal in any crumbs. Chill the cake for 15-20 minutes to set this layer.
- Final frosting: After chilling, apply a thicker, even layer of buttercream to the top and sides of the cake. You can make it as smooth or textured as you like.
Stage 5: Decorate
- Caramel drip: Slightly warm the remaining caramel sauce if it has thickened too much. Using a spoon, carefully drizzle the caramel around the top edge of the cake, allowing it to drip down the sides naturally. Fill in the top with more caramel.
- Final touches: If desired, sprinkle a small amount of flaky sea salt on top and add chocolate chunks around the base or on top of the cake.
- Chill: Refrigerate the cake for at least 30 minutes before serving to help the caramel set.
Tips for Success
I’ve made this cake dozens of times, and these insider tips will help you achieve perfection:
Caramel Making Success:
- Use a light-colored pan if possible so you can clearly see the color changes in the caramel
- Stay focused – caramel can go from perfect to burnt in seconds
- Have ice water nearby in case of caramel burns (they’re nasty!)
- Don’t stir initially – just let the sugar melt around the edges before gently stirring
- Make extra caramel – you can store leftovers in the refrigerator for up to 2 weeks and use it on ice cream
Cake Baking Success:
- Room temperature ingredients are crucial for a smooth batter
- Measure flour correctly by spooning it into measuring cups and leveling off (don’t scoop directly)
- Don’t overmix the batter once the flour is added to avoid a tough cake
- The hot coffee doesn’t make the cake taste like coffee – it enhances the chocolate flavor and creates moisture
Frosting and Assembly Success:
- Chill layers before assembling if they seem fragile
- A rotating cake stand makes frosting much easier
- Bench scraper or long offset spatula helps create smooth sides
- Slightly warm caramel in the microwave in 5-second bursts if it’s too thick for dripping
Make-Ahead Options and Storage
This cake is perfect for making components ahead of time:
| Component | Make-Ahead | Storage Method | Maximum Storage Time |
|---|---|---|---|
| Cake Layers | Up to 2 days | Wrap tightly in plastic wrap at room temperature | 2 days room temp, 1 month frozen |
| Caramel Sauce | Up to 2 weeks | Airtight container in refrigerator | 2 weeks |
| Buttercream | Up to 3 days | Airtight container in refrigerator | 3 days fridge, 1 month frozen |
| Completed Cake | Up to 2 days | Covered in refrigerator | 3-4 days |
To freeze cake layers: Wrap completely cooled layers individually in plastic wrap, then aluminum foil. Thaw overnight in the refrigerator before using.
To store completed cake: Cover and refrigerate for up to 4 days. Let sit at room temperature for 30 minutes before serving for best flavor and texture.
Variations to Try
Once you’ve mastered the classic version, here are some delicious variations I’ve experimented with:
Mocha Variation:
- Add 1 tablespoon of espresso powder to the cake batter
- Sprinkle chocolate-covered espresso beans on top
Spiced Variation:
- Add 1 teaspoon of cinnamon and 1/4 teaspoon cayenne to the chocolate batter
- Add 1/2 teaspoon cinnamon to the caramel sauce
Nutty Variation:
- Add 1 cup toasted, chopped pecans between the layers
- Decorate the outside with chopped pecans
Bourbon Infused:
- Add 2 tablespoons bourbon to the caramel sauce
- Replace 2 tablespoons of the hot water/coffee with bourbon in the cake batter

Serving Suggestions
This cake deserves to be showcased! Here’s how I recommend serving it:
- Allow the cake to sit at room temperature for 20-30 minutes before serving for optimal flavor and texture
- Serve small slices (it’s rich!) on chilled plates
- Pair with a scoop of vanilla ice cream for a hot/cold contrast
- Offer extra caramel sauce on the side for true caramel lovers
- A small glass of cold milk is the perfect complement
- Hot coffee balances the sweetness beautifully
- For special occasions, dust the plate with cocoa powder or gold edible shimmer
- Fresh raspberries or strawberries on the side add a refreshing contrast
Troubleshooting Common Issues
Even experienced bakers encounter challenges. Here are solutions to potential problems:
| Issue | Potential Cause | Solution |
|---|---|---|
| Cake layers sink in middle | Opening oven door too early or underbaking | Ensure proper oven temperature and don’t open door until at least 20 minutes into baking |
| Caramel crystallizes | Sugar crystals on sides of pan or stirring too early | Brush sides of pan with water before starting and avoid early stirring |
| Buttercream separates | Ingredients at different temperatures | Ensure butter and caramel are similar temperatures before combining |
| Caramel too thin for dripping | Not cooked long enough | Return to heat briefly or refrigerate to thicken |
| Caramel too thick | Overcooked or too cold | Gently warm in microwave in 5-second intervals |
| Dry cake | Overbaked or improper measuring | Follow exact baking times and measure ingredients carefully |
Nutritional Information
For those watching their macros, here’s an approximate breakdown per slice (assuming 12 slices per cake):
| Nutrient | Amount per Slice |
|---|---|
| Calories | 675 |
| Total Fat | 34g |
| Saturated Fat | 20g |
| Cholesterol | 105mg |
| Sodium | 430mg |
| Total Carbohydrates | 89g |
| Dietary Fiber | 3g |
| Sugars | 72g |
| Protein | 5g |
Note: This is a special occasion dessert – it’s meant to be indulgent!
Your Questions Answered
Q: Can I make this cake without a stand mixer? Yes! You can use a hand mixer for both the cake batter and frosting. For the cake batter, you can even mix by hand with a whisk, though it requires a bit more effort.
Q: Is it possible to make this cake dairy-free? This particular recipe relies heavily on dairy products for the proper texture and flavor. Unfortunately, dairy-free substitutes wouldn’t yield the same results, especially for the caramel sauce and buttercream.
Q: Can I use cake flour instead of all-purpose flour? Absolutely! Cake flour will give you an even more tender crumb. Use 2 1/4 cups of cake flour to replace the 2 cups of all-purpose flour.
Q: Why do you add hot coffee to the batter? The hot liquid helps bloom the cocoa powder, intensifying the chocolate flavor. The heat also helps create a smoother batter. Don’t worry – the cake won’t taste like coffee at all!
Q: How do I prevent my cake layers from sticking to the pans? Be sure to thoroughly grease your pans, line the bottoms with parchment paper, and lightly flour the sides. Allow the cakes to cool for 10 minutes before removing from pans.
Q: Can I make this as cupcakes instead? Yes! This recipe will yield about 24-30 cupcakes. Bake at the same temperature for 18-22 minutes. Fill the liners only 2/3 full as the batter rises significantly.
Q: What if my caramel sauce hardens before I can use it all? Simply warm it gently in the microwave in 5-10 second intervals, stirring between each, until it reaches your desired consistency.
Q: Can I make this cake in advance for a party? Definitely! You can make the components up to several days in advance and assemble the day before. The flavors actually develop beautifully as it sits in the refrigerator overnight.
The Final Slice
There’s something magical about the combination of rich chocolate and salted caramel. This cake has become my signature dessert for good reason – it consistently wows everyone who tries it. While it does require some time and attention to detail, I promise the results are absolutely worth the effort.
The key to success is preparing properly, following the directions carefully (especially for the caramel), and enjoying the process. Baking should be a joy, not a stress. Take your time with each step, and you’ll create a dessert that will have everyone convinced you should open your own bakery.
I hope this salted caramel chocolate cake becomes a treasured recipe in your collection as it has in mine. When you make it, I’d love to hear how it turned out and see your beautiful creations! Happy baking!