There’s something almost magical about biting into a perfectly baked brownie – that crackly top giving way to a fudgy, rich interior. But when you take that classic brownie and infuse it with not one, not two, but three distinct types of chocolate? Well, that’s when a simple dessert transforms into something truly extraordinary.
I’ve spent years perfecting my brownie recipes, testing countless variations and chocolate combinations. Today, I’m thrilled to share what I consider the holy grail of chocolate indulgence: my Triple Chocolate Brownies. These aren’t just brownies; they’re an experience – one that takes you on a journey through different chocolate dimensions with every bite.
Whether you’re baking for a special occasion, bringing a dessert to a potluck, or simply treating yourself after a long week, these brownies never disappoint. The combination of dark, milk, and white chocolate creates a complex flavor profile that satisfies every chocolate craving imaginable.
So preheat your oven, gather your ingredients, and get ready to create brownie perfection. Your chocolate-loving heart will thank you.
The Science Behind Perfect Brownies
Before diving into the recipe, let’s talk about what makes a truly exceptional brownie. Understanding these fundamental principles will help you create brownies that are consistently amazing:
The Fudgy vs. Cakey Debate
I’ve found that brownie preferences are deeply personal. Some swear by fudgy, dense brownies while others prefer a lighter, cake-like texture. This recipe leans toward the fudgy side, but I’ll share modifications for those who prefer a cakier result.
What creates these different textures? Fudgy brownies : Higher fat-to-flour ratio, fewer eggs, and less leavening agent
Cakey brownies : More flour, more eggs, and often include baking powder
My triple chocolate recipe strikes a beautiful balance – fudgy enough to satisfy that rich chocolate craving but with just enough structure to hold together perfectly when sliced.
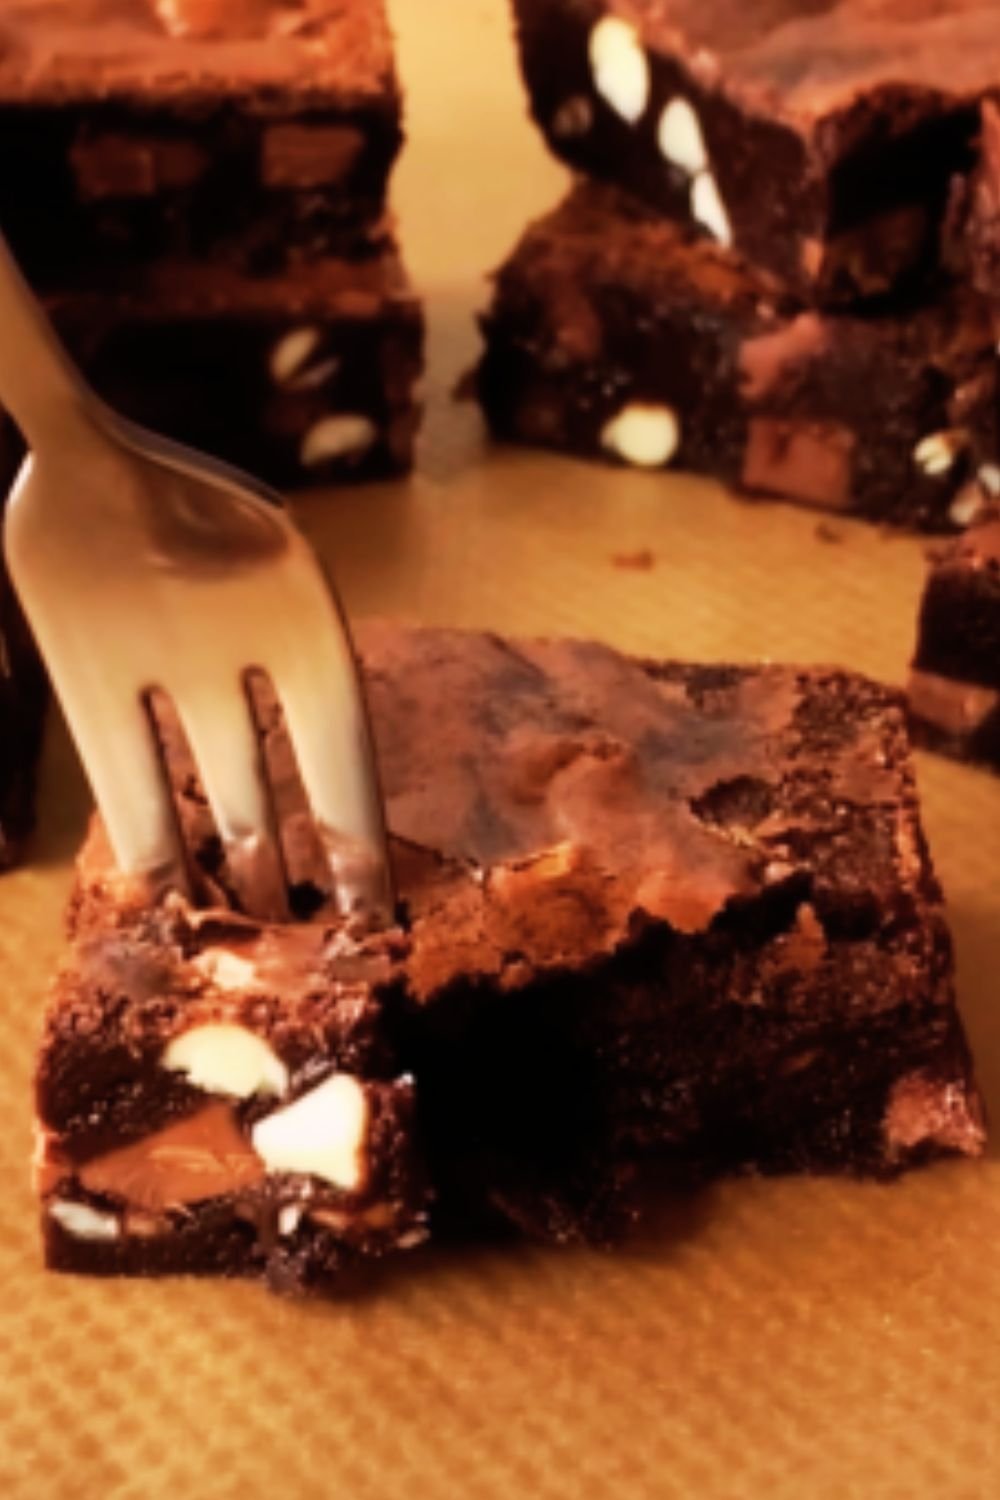
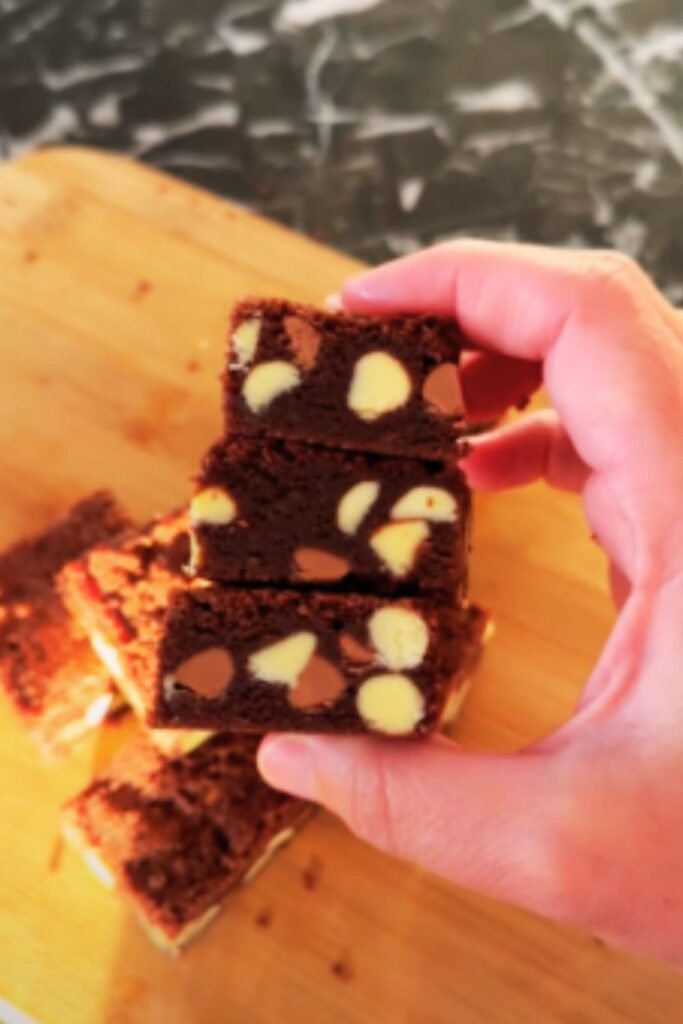
The Chocolate Trinity
The magic of these brownies comes from using three distinct types of chocolate, each playing a crucial role:
Dark chocolate : Provides depth, complexity and a slightly bitter note that prevents the brownies from becoming too sweet
Milk chocolate : Adds creaminess and that classic, nostalgic chocolate flavor we all love
White chocolate : Contributes sweetness, vanilla notes, and stunning visual contrast
Using high-quality chocolate makes a significant difference. While it might be tempting to use chocolate chips for convenience, I strongly recommend using baking chocolate bars when possible, especially for the melted chocolate component.
The Ultimate Triple Chocolate Brownie Recipe
Ingredients
- 200g high-quality dark chocolate (70% cocoa solids), chopped
- 175g unsalted butter, cubed
- 300g granulated sugar
- 3 large eggs, room temperature
- 1 teaspoon vanilla extract
- 130g all-purpose flour
- 30g unsweetened cocoa powder
- ½ teaspoon salt
- 100g milk chocolate, roughly chopped
- 75g white chocolate, roughly chopped
Equipment Needed
- 9×9-inch (23×23 cm) baking pan
- Parchment paper
- Medium saucepan
- Heat-resistant bowl for double boiler
- Mixing bowls
- Whisk
- Rubber spatula
- Cooling rack
- Sharp knife for cutting
Step-by-Step Instructions
- Prepare your pan: Preheat your oven to 350°F (175°C). Line your baking pan with parchment paper, leaving some overhang on the sides to easily lift the brownies out later.
- Melt the base chocolate: Set up a double boiler by placing a heat-resistant bowl over a pot of simmering water (make sure the bowl doesn’t touch the water). Add the dark chocolate and butter to the bowl. Stir occasionally until completely melted and smooth. Remove from heat and let cool slightly.
- Mix the wet ingredients: In a large bowl, whisk the sugar into the melted chocolate mixture until well combined. Add the eggs one at a time, whisking well after each addition. Stir in the vanilla extract.
- Combine the dry ingredients: In a separate bowl, sift together the flour, cocoa powder, and salt.
- Create the batter: Gently fold the dry ingredients into the chocolate mixture until just combined. Be careful not to overmix – this is crucial for fudgy brownies!
- Add the chocolate chunks: Reserve a small handful of both the milk and white chocolate pieces for topping. Fold the remaining milk and white chocolate chunks into the batter.
- Bake to perfection: Pour the batter into your prepared pan, spreading it evenly. Sprinkle the reserved chocolate pieces on top. Bake for 25-30 minutes, or until a toothpick inserted in the center comes out with a few moist crumbs attached. Remember: it’s better to slightly underbake than overbake!
- Cool completely: Allow the brownies to cool in the pan on a wire rack for at least 1 hour. This waiting period is crucial – it allows the flavors to develop and the texture to set properly.
- Slice and serve: Once cooled, lift the brownies out using the parchment paper overhang. Use a sharp knife to cut into squares. For the cleanest cuts, wipe your knife with a warm, damp cloth between slices.
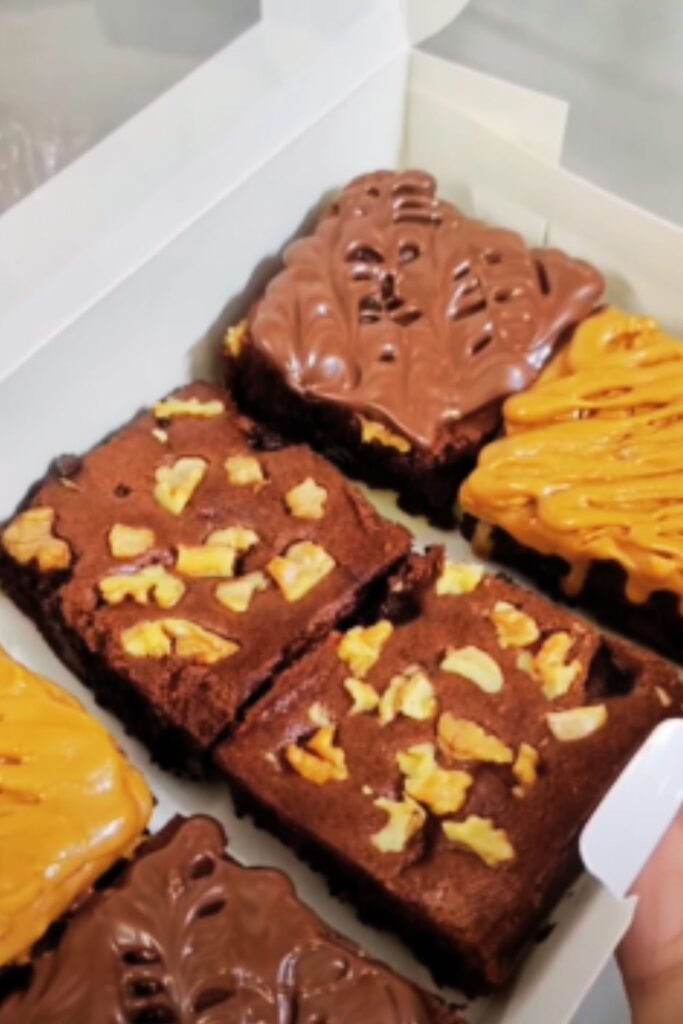
The Art of Brownie Variations
One of the things I love most about this recipe is how versatile it is. Here are some of my favorite variations that build on the triple chocolate foundation:
Flavor Infusions
- Mint Chocolate: Add ½ teaspoon of peppermint extract to the batter and substitute the milk chocolate chunks with mint chocolate pieces.
- Orange Chocolate: Mix in the zest of one orange and add 1 tablespoon of orange liqueur (optional) to the batter.
- Espresso Chocolate: Dissolve 2 teaspoons of espresso powder in the vanilla extract before adding to the mixture – this intensifies the chocolate flavor without making the brownies taste like coffee.
- Salted Caramel: Drizzle homemade or store-bought caramel sauce into the batter before baking and sprinkle with flaky sea salt.
Textural Additions
- Triple Chocolate Nutty Brownies: Add ½ cup of toasted walnuts, pecans, or hazelnuts to the batter.
- Coconut Chocolate Paradise: Mix in ⅓ cup of toasted coconut flakes and sprinkle more on top before baking.
- Rocky Road Brownies: Top the brownies with mini marshmallows during the last 5 minutes of baking, then drizzle with melted chocolate after cooling.
Troubleshooting Common Brownie Problems
Even experienced bakers encounter challenges sometimes. Here are solutions to common brownie issues I’ve faced over the years:
| Problem | Possible Cause | Solution |
|---|---|---|
| Brownies too dry | Overbaking | Check brownies 5 minutes before the recipe states; look for moist crumbs, not a clean toothpick |
| Brownies too gooey | Underbaking | Give them a few more minutes, but if already removed from oven, refrigerate to firm up |
| Brownies didn’t rise | Old leavening agents or overmixing | Check expiration dates on baking powder/soda; mix just until ingredients are incorporated |
| Brownies stuck to the pan | Inadequate preparation | Always use parchment paper with overhang for easy removal |
| Uneven chocolate distribution | Not enough mixing or too large chunks | Ensure chocolate pieces are evenly dispersed; consider using smaller chunks |
| Crumbly when cutting | Cutting while warm or too dry | Allow to cool completely; slightly underbake for fudgier texture |
| Sinking chocolate pieces | Heavy add-ins | Toss chocolate chunks in a little flour before adding to batter |
Advanced Techniques for Brownie Perfection

After making hundreds of batches, I’ve discovered some professional techniques that elevate brownies from good to extraordinary:
The Banging Method
About 15 minutes into baking, carefully remove the pan and gently drop it on a flat surface from about 2 inches height. This releases air bubbles and creates that coveted crackly top. Return to the oven immediately to finish baking.
Two-Stage Cooling
For the perfect fudgy texture, cool brownies at room temperature for 30 minutes, then refrigerate for another 30 minutes before cutting. This controlled cooling process creates the ideal consistency.
The Water Bath Technique
For supremely moist brownies, place your brownie pan inside a larger pan filled with about 1 inch of hot water before putting in the oven. This gentle, even heat prevents the edges from overcooking before the center is done.
Pre-Freezing Add-Ins
Freeze your chocolate chunks for at least 30 minutes before folding into the batter. This prevents them from completely melting during baking, ensuring distinct pockets of chocolate throughout.
Serving Suggestions and Presentation Ideas
Brownies are delightful on their own, but here are my favorite ways to transform them into show-stopping desserts:
Elegant Dessert Plates
- Warm brownie squares topped with vanilla bean ice cream and a drizzle of warm ganache
- Brownie triangles with raspberry coulis, fresh berries, and a light dusting of powdered sugar
- Brownie cubes stacked with layers of whipped mascarpone cream and chocolate shavings
Casual Gathering Ideas
- Brownie sundae bar with various ice cream flavors and toppings
- Brownie milkshakes: blend a brownie piece with vanilla ice cream and milk
- Brownie trifle with layers of whipped cream and fresh berries in a clear glass bowl
Accompaniments That Complement
- Fresh berries (raspberries and strawberries work exceptionally well)
- Homemade whipped cream with a touch of vanilla
- Caramel or chocolate sauce for drizzling
- Coffee ice cream
- Mint chocolate chip ice cream (especially with the mint variation)
- Hot beverages like coffee, hot chocolate, or chai tea
Storage and Make-Ahead Tips
These brownies actually improve with time as the flavors meld together. Here’s how to store them properly:
Short-Term Storage
Store in an airtight container at room temperature for up to 3 days. Place a slice of bread in the container to maintain moisture – it works like magic!
Long-Term Storage
Refrigerate in an airtight container for up to a week. Let come to room temperature before serving, or warm briefly in the microwave (15 seconds) for that just-baked experience.
Freezing Instructions
These brownies freeze beautifully for up to 3 months:
- Cut into individual squares
- Wrap each piece tightly in plastic wrap
- Place wrapped brownies in a freezer-safe container or bag
- Thaw overnight in the refrigerator or for 2 hours at room temperature
Make-Ahead Options for Events
- Prepare the batter up to 24 hours in advance and refrigerate in an airtight container
- Bake brownies up to 2 days before your event and store properly
- Create a brownie dessert table by making multiple variations a week ahead and freezing until needed
Nutritional Considerations
While these brownies are definitely an indulgence, here are some modifications I’ve tested for different dietary needs:
Reduced Sugar Options
- Reduce sugar to 250g without significantly affecting texture
- Replace up to half the sugar with a natural sugar substitute like Stevia
- Use dark chocolate with 85% cocoa content to reduce overall sweetness
Gluten-Free Adaptation
- Substitute the all-purpose flour with an equal amount of gluten-free flour blend (ones with xanthan gum work best)
- Add 1/4 teaspoon of xanthan gum if your blend doesn’t include it
- Ensure all other ingredients (chocolate, vanilla) are certified gluten-free
Healthier Substitutions
| Original Ingredient | Healthier Alternative | Effect on Brownies |
|---|---|---|
| Butter (175g) | 125g butter + 50g unsweetened applesauce | Slightly less rich, more moisture |
| All-purpose flour (130g) | 65g all-purpose + 65g almond flour | Nuttier flavor, more protein |
| Granulated sugar (300g) | 200g coconut sugar + 50g granulated sugar | Deeper caramel notes, less sweet |
| Dark chocolate (200g) | 100g dark chocolate + 100g unsweetened chocolate + 2 Tbsp maple syrup | Less sugar, more intense |
Q&A: Triple Chocolate Brownie Expertise
Over the years, I’ve received countless questions about brownie baking. Here are answers to the most common ones:
Q: Why do my brownies always turn out cakey instead of fudgy? This usually happens when there’s too much flour or leavening agent. For fudgier brownies, reduce the flour by 2-3 tablespoons, use one fewer egg, and make sure you’re not overmixing the batter after adding the dry ingredients.
Q: Can I use chocolate chips instead of chopped chocolate bars? You can, but the results won’t be quite the same. Chocolate chips contain stabilizers to help them keep their shape during baking, which means they don’t melt as smoothly. If using chips, I recommend high-quality ones without many additives.
Q: My brownies always sink in the middle. What am I doing wrong? A slight sink in the middle is actually desirable for fudgy brownies! But if they’re collapsing dramatically, you might be underbaking them or opening the oven door too frequently during baking, causing temperature fluctuations.
Q: How can I tell when brownies are done without overbaking them? This is the eternal question! The toothpick test works differently for brownies than for cake. Insert a toothpick into the center – it should come out with a few moist crumbs attached, but not covered in wet batter. Remember that brownies continue to cook slightly after removing from the oven.
Q: My brownies never get that shiny, crackly top. What’s the secret? The crackly top comes from properly incorporating the sugar into the eggs, creating a meringue-like effect. Make sure you’re whisking the eggs and sugar thoroughly until the mixture becomes slightly pale. Some bakers swear by an additional step of beating just the eggs and sugar first until light and fluffy.
Q: Can I make these brownies without eggs? Yes! For each egg, substitute either: 1/4 cup of unsweetened applesauce plus 1/2 teaspoon of baking powder; 1/4 cup of mashed banana; or a commercial egg replacer following package directions. The texture will be slightly different but still delicious.
Q: What’s the best way to get clean-cut brownie squares? Patience is key! Let the brownies cool completely, then refrigerate for at least 30 minutes. Use a sharp knife dipped in hot water and wiped clean between cuts. For perfectly straight edges, trim about 1/4 inch from the perimeter of the entire slab before cutting into squares.
Q: Why do you recommend using parchment paper instead of just greasing the pan? Parchment paper serves two purposes: it prevents sticking much more effectively than greasing alone, and the overhang acts as handles to easily lift the entire brownie slab from the pan for clean cutting.
Final Thoughts: Brownie Philosophy
As I’ve perfected this recipe over the years, I’ve developed something of a brownie philosophy. The perfect brownie isn’t just about ingredients or technique – it’s about intention and understanding the small details that make a big difference.
I believe that truly exceptional brownies require balance: balance between sweetness and depth, between structure and tenderness, between classic comfort and surprising delight. These triple chocolate brownies embody that balance, offering layers of flavor that unfold with each bite.
Remember that baking is both science and art. Follow the measurements precisely, but also trust your instincts. Look for visual cues, embrace the sensory experience, and don’t be afraid to make this recipe your own.
Most importantly, share these brownies. In my experience, there are few better ways to bring joy to a gathering than with a plate of homemade triple chocolate brownies. They have a way of creating moments – pauses in conversation as people close their eyes to savor that first bite, smiles of recognition from fellow chocolate lovers, and the warm satisfaction that comes from creating something truly special with your own hands.
So go ahead – preheat that oven, gather your three types of chocolate, and create a little magic in your kitchen. Your brownie journey begins now.